Overview:
- Set up a new payment reconciliation journal
- Import bank statements
- Match transactions with open customer and vendor entries
- Post and reconcile the payment reconciliation journal
Why Use Payment Reconciliation Journal?
Payment reconciliation journals streamline your process by importing bank transactions and matching them to unpaid invoices, open entries and credit notes. This process lets you review unmatched entries before posting. This ensures your bank balances and open entries are accurate and up to date.
Before you begin
- A bank account is set up in Wiise.
- On the Bank Account Card, assign a Data Exchange Definition to the Bank Statement Import Format before importing bank statements.
- In Wiise Australia, if you’re using ACSISS or direct bank feeds, the feed connection must be set up and active.
- In Wiise New Zealand, if you’re using Yodlee bank feeds, the Yodlee connection must be set up and active.
- Customer and Vendor records are set up with correct bank account details.
How to use a payment reconciliation journal?
You’ll first need to set up a new payment reconciliation journal. Here are the steps:
- Search for payment reconciliation journals on the top right-hand corner of the page. Select the relevant link and the page displays.
Note: You can also select Cash Management on your navigation menu. From the drop-down menu, select Payment Recon. Journals.
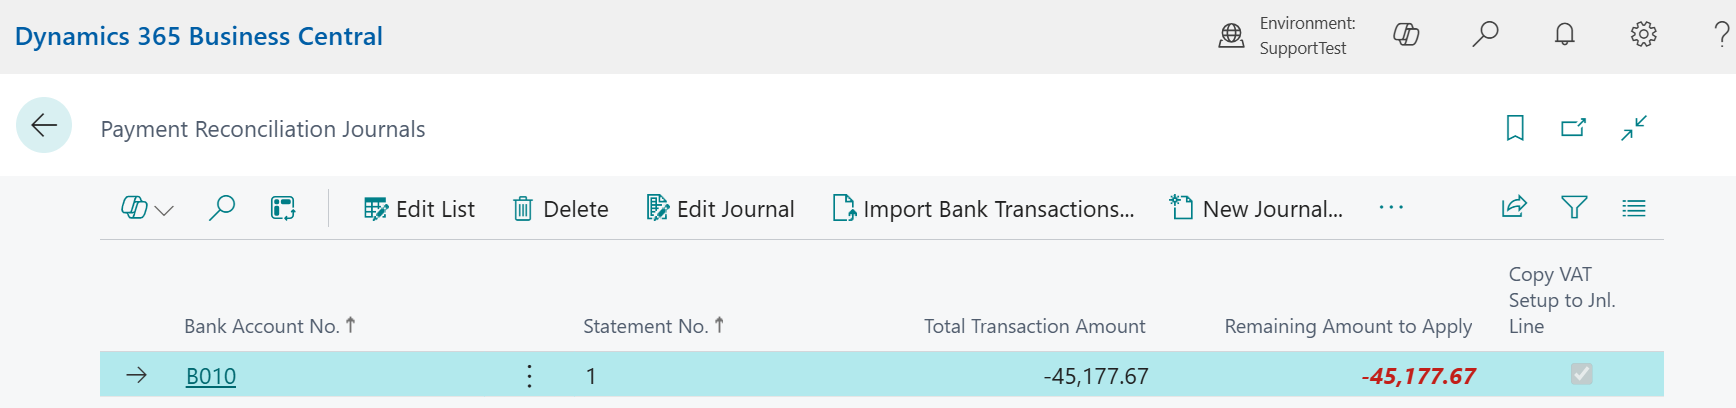
Note: On the Payment Reconciliations Journals page, you can set up a New Journal for a bank account, import bank statement files or bank feeds and register payments. - Select New Journal.
- The Payment Bank Account List page displays.

- Select the required bank account from the list.
- Then, select OK to continue.
- The new journal displays.

- You’ve set up a new payment reconciliation journal.
Note: You can import bank feeds automatically through a live connection in Wiise or manually by downloading a bank statement file from your bank and uploading it to populate the Payment Reconciliation Journal.
Tip: To import bank feeds automatically with ACSISS Bank Feeds, select Actions. Then, select Get ACSISS Bank Statement. Enter the date range for the transactions you want to add to the reconciliation, or choose to link all unlinked transactions at once.
Tip: With NZ bank feeds, the payment reconciliation journals are automatically generated.
Note: If you don’t have a payment reconciliation journal set up for the bank account, you can select Import Bank Transactions from the Payment Reconciliation Journals list. If you already have a journal set up, open it and import the bank transactions from there. - Select Import Bank Transactions.
- Select a file to import from your desktop.
Note: You can drag and drop the file to upload or browse for the file to upload.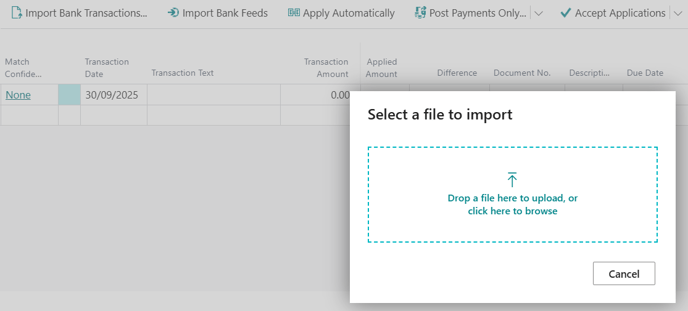
- A message displays confirming that X number of payment lines out of X are applied.
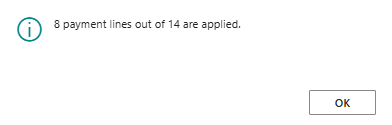
- Select OK to close the process.
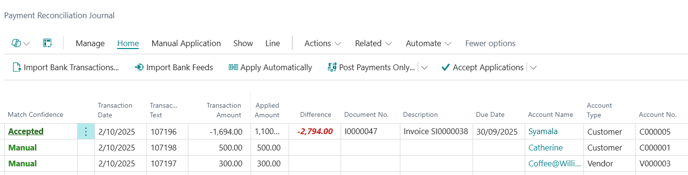
- The imported bank feed transactions populate in the payment reconciliation journal with the Transaction Date, Transaction Text and Transaction Amount filled in.
- You’ve successfully imported bank transactions.
Note: The Import bank transactions function automatically matches bank transactions to open Customer or Vendor entries. If no match is found, you can manually assign the line. Use Customer for incoming payments such as direct credits against customer invoices, and Vendor for outgoing payments such as EFT or direct debit against vendor bills. If the transaction isn’t linked to a customer or vendor, use a G/L account to post it directly to the general ledger, for example, for bank fees, interest, or adjustments. - Select Home. Then, select Apply Automatically to apply payment lines to your most suitable sales invoices and purchase invoices that you’ve already created in Wiise.
Note: When a match is found, the Applied Amount, Document No., Description, Due Date, Account Name, Account Type and Account No. Fields are updated.
Note: The Match Confidence field on the left corner of the row gives you an indication of how good a match Wiise thinks it’s made. Find out how to use match confidence fields to apply payments. - Select Home. Then, select Post Payments Only...
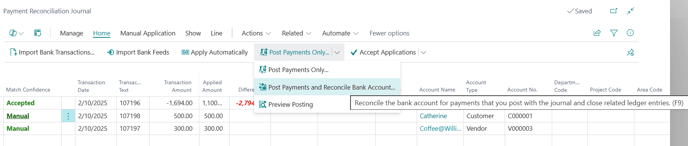
- From the drop-down menu, select Post Payments and Reconcile Bank Account.
- A message displays to confirm if you want to post the payments and reconcile the bank account?
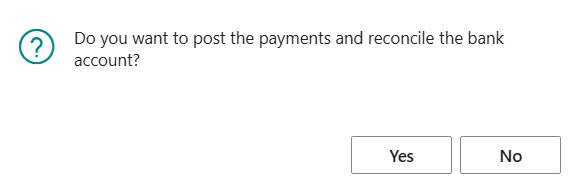
- Select Yes to continue or No to cancel the process.
- You’ve posted and reconciled the payment reconciliation journal.


Note: Once posted, payments are recorded with the relevant customer or vendor, and the bank account is reconciled up to the statement date. You can review posted reconciliations in Posted Payment Reconciliations.
If you need to correct an error, review the applied entries and post a manual correction journal to reverse or adjust the transaction as the Payment Reconciliation Journal itself cannot be reversed once posted.
What’s next?
Find out how to do a bank reconciliation.
Need more help?
No problem, that's what we're here for. Reach out to support@wiise.com anytime you can't find what you're looking for.