Overview:
Before You Begin
- You’ll need the appropriate authorisation and online bank access. These are usually managed by your bank account administrator, such as your CFO or Financial Controller.
- Check that your bank accounts are ready to share using CDR Ready.
- Note: The data sharing collection consent is 1 day.
- Ensure that you've installed ACSISS Connect from Microsoft Appsource before you set up ACSISS bank feeds in Wiise Australia.
- You'll need to set up the bank accounts in Wiise before you can enable bank feeds.
- As a new customer to ACSISS Bank Feeds, you'll need to create your ACSISS My Data account and give consent to start your bank feeds
- Note: This will feel similar to when you're checking CDR Ready. The data sharing collection consent is 1 year.
- In Step 2 below, when you Enable Bank Feeds in Wiise, you'll need to register ACSISS Bank Feeds, You'll need to select this unique Wiise–ACSISS link to register your account and enable bank feeds.
- The link mentioned above is this: https://register.acsiss.com.au/Billing/Manage/CreateCompany?integrationid=56dd207c-d6d3-4891-8ae1-5e6b4c59b09d
- Tip: When you connect to the above link, all fees and charges will be covered by Wiise as part of your Wiise subscription.
- Note: If you select New Registration, you’ll be directed to the ACSISS login to register and set up a payment method directly with ACSISS. This bypasses Wiise functionality. Please do not select New Registration. Instead, use the unique Wiise–ACSISS link provided above.
You can now proceed with setting up ACSISS Bank Feeds in Wiise.
Reach out to support@wiise.com if you have any questions.
1. Ensure you have the right permissions
Log into Wiise and follow the steps below:
Step 1: Allocate one of the following roles in the relevant company in Wiise:
-
- Business Manager
- Business Manager Evaluation
- Accountant
Step 2: Give users access to the Wiise Bank Feeds panel
You will need the Banking Officer permission to view the banking related information on the Wiise landing page or the role centre. Not all users may require this enabled.
- Search for User Setup on the top right-hand corner of the page. Then, select the related link.

- The User Setup page displays. Update the following fields:

- User ID: Add the relevant user
- Banking Officer: Select to enable checkbox.
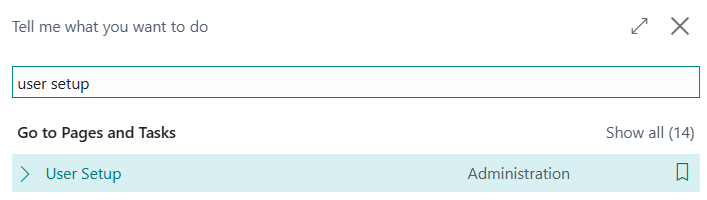

Note: Selecting the Banking Officer checkbox gives the user access to the Wiise Bank Feeds panel on their Wiise landing page.
2. Enable bank feeds
- You’ll see the Enable bank feeds button on the Wiise Bank Feeds widget on your Wiise landing page Insights panel.

- Select the Enable bank feeds action button on the Wiise Bank Feeds panel widget on your Wiise landing page.
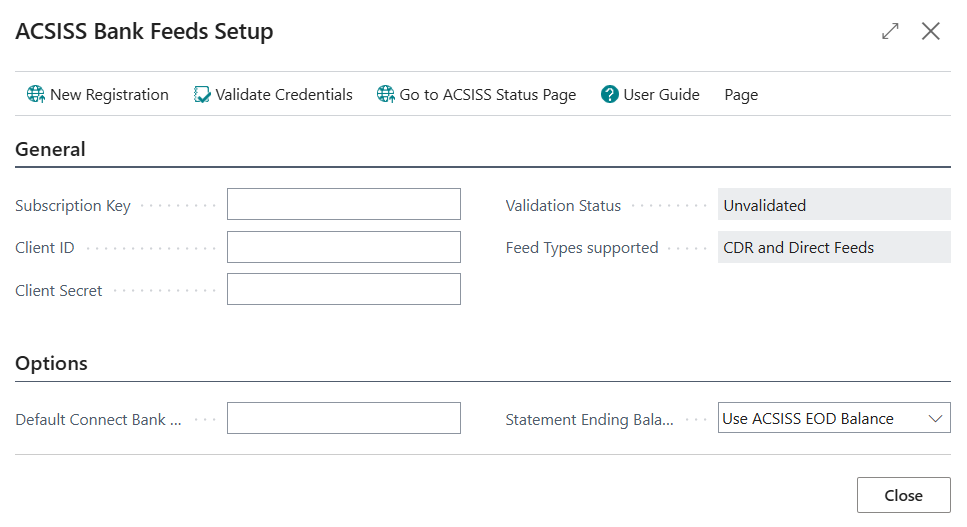
- This action, displays the ACSISS Bank Feeds Setups page.

Note: You’ll need to fill in the Subscription Key, Client ID and Client Secret fields in the General section. - The action menus are:
-
- New Registration: Select the unique Wiise–ACSISS link to register your account and enable bank feeds.
- The link mentioned above is this: https://register.acsiss.com.au/Billing/Manage/CreateCompany?integrationid=56dd207c-d6d3-4891-8ae1-5e6b4c59b09d
- Tip: When you connect this to the above link, all fees and charges will be covered by Wiise as part of your Wiise subscription.
- Note: If you select New Registration, you’ll be directed to the ACSISS login to register and set up a payment method directly with ACSISS. This bypasses Wiise functionality. Please do not select New Registration. Instead, use the unique Wiise–ACSISS link provided above.
- Validate Credentials: Select this action, to valide your credentials, when you’ve filled in the Subscription Key, Client ID and Client Secret fields in the General section. See further instructions in the steps on how to register your details below.
- Go to ACSISS Status Page: This page is your central hub for updates on incidents, scheduled maintenance, and any disruptions affecting data availability. While services such as CDR Open Banking and Direct Feeds are managed by external banks, ACSISS monitor and report on them to keep you informed and minimise any impact on your data.
- Note: You can subscribe to the ACSISS status page to be notified of any updates.
- User Guide: This action takes you to ACSISS guides and troubleshooting support materials.
- New Registration: Select the unique Wiise–ACSISS link to register your account and enable bank feeds.
Note: If it’s your first time logging into this portal, you’ll need to Register as a new user. -

Tip: When you connect to this unique Wiise–ACSISS link to register, all fees and charges will be covered by Wiise as part of your Wiise subscription.
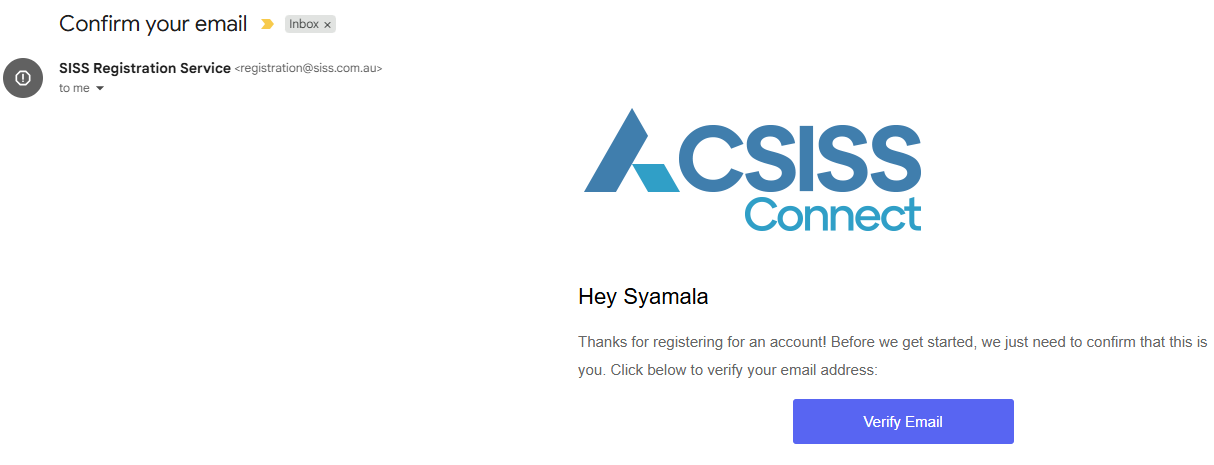
Note: Complete the registration process to obtain the Subscription Key, Client ID, and Client Secret, which enable bank feeds in Wiise.- Login with your credentials. You will be requested to check your email to confirm your account.
- Select the email from SISS Registration Service in your email inbox. Then, select Verify Email.

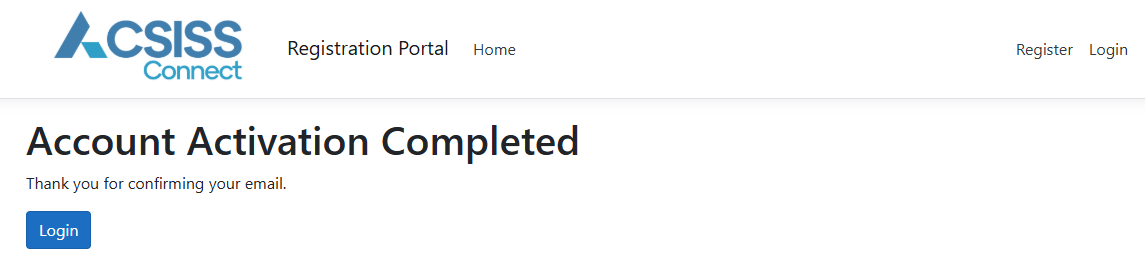
- Once your email is verified, the Account Activation Completed message displays.

- Select Login to be redirected back to the ACSISS Connect Registration Portal.
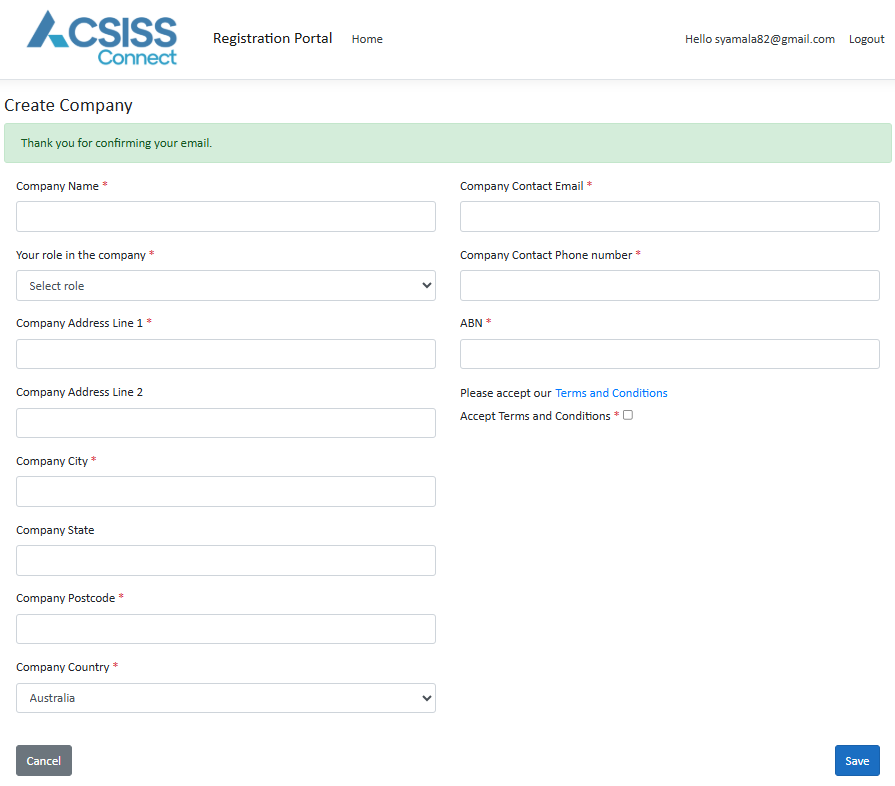
- As a first-time registered user, once you login, you’ll be redirected to the Create Company page.

- Complete all the fields in the Create Company form:
- Company Name: The name of your Wiise company.
- Company Contact Email: The contact must be the person responsible for the business who’s signing up for the bank feed.
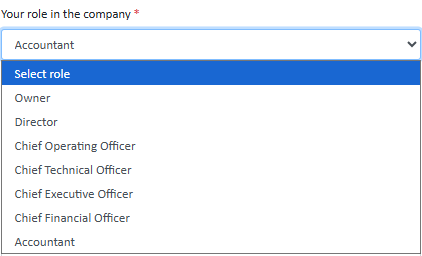
- Your role in the company: Select one of the following options in the drop-down menu:

- Company Address and Country.
- ABN: Australian Business registration Number.
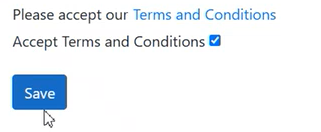
- Review and Accept the Terms and Conditions checkbox.

- Select Save.
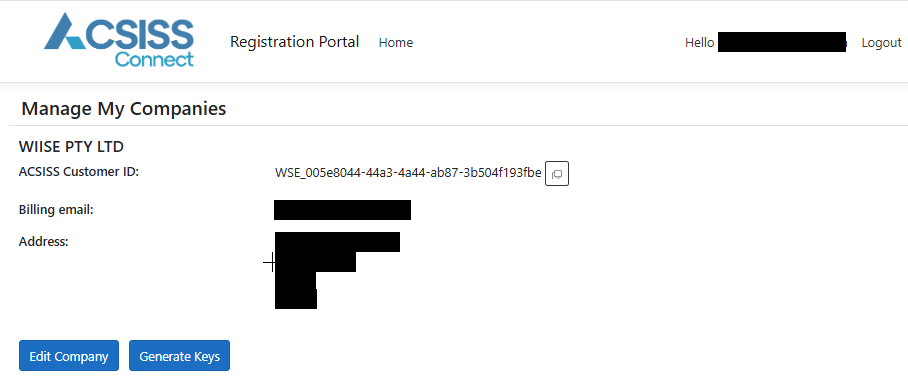
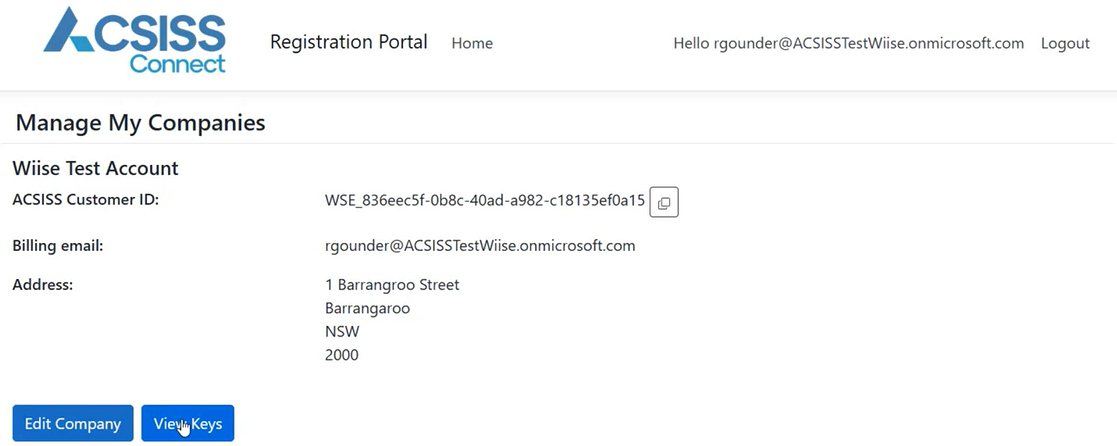
- The Manage My Companies page displays. Your company profile is now set up.

Note: An ACSISS Customer ID populates. This is your unique identifier within ACSISS. When you set up bank feeds in Wiise, the Customer ID connects your Wiise environment to your ACSISS account to ensure the correct bank feed data flows into the correct company.- Select Generate Keys.
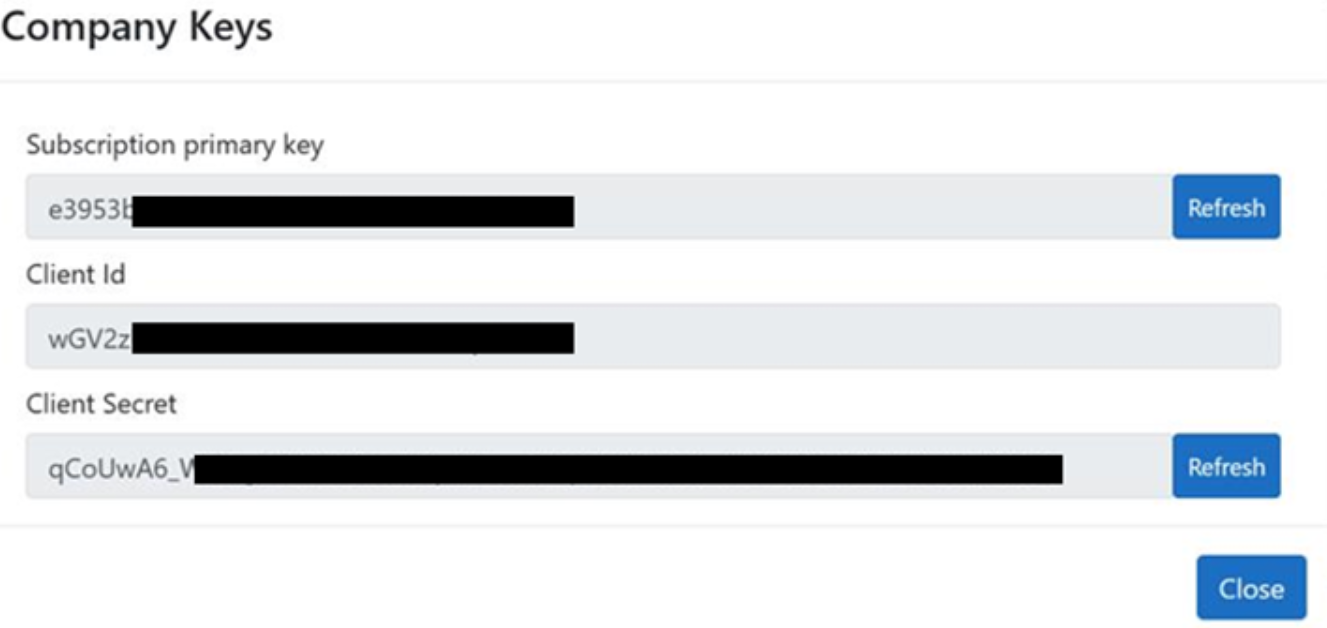
- This generates your Company Keys consisting of:
- Subscription primary key: A unique code that confirms your subscription and validates requests from your account.
- Client Id: A username to show which app is connecting to ACSISS.
- Client Secret: A password used with the Client ID to securely verify the app.
Note: The Refresh buttons next to the Subscription Primary Key and Client Secret allow you to generate new credentials if the existing ones have been exposed, expired, or need rotating for security. When you refresh these keys, you must also update them in Wiise.
- Copy these three keys and update them in Wiise. This is required to enable your bank feeds.

Note: If you’ve already previously setup your company profile, you can manage your company and select View Keys on the ACSISS Connect Registration Portal. Copy the three keys.
- You can now go back to Wiise.
- Search for ACSISS Bank Feeds Setup on the top right-hand corner of the page. Select the related link and the page displays.
Note: You can select Enable Bank Feeds button on your Wiise Bank Feeds panel widget on your Wiise landing page. This action displays the ACSISS Bank Feeds Setup page.
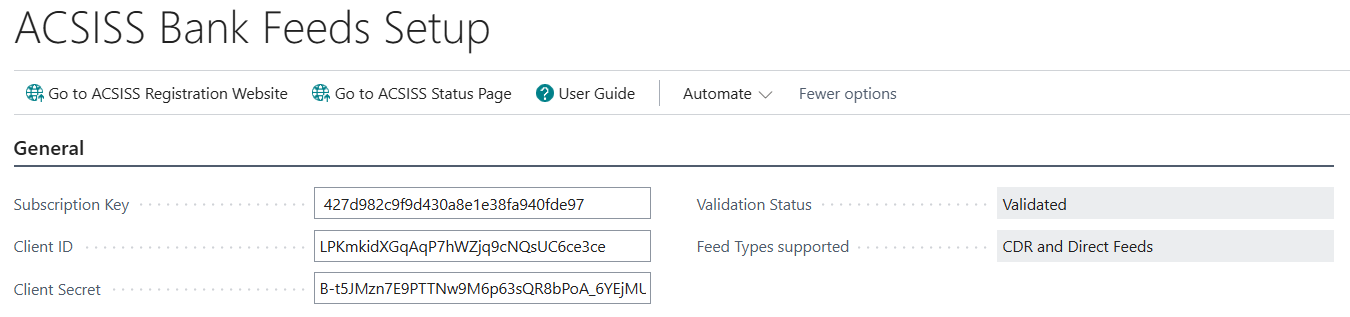
- In the General section, enter or paste the copied Subscription Key, Client ID, and Client Secret keys on the relevant fields.
- Then, select Validate Credentials.
- A message displays Authentication: OK. Select OK to close the process.
- The Validation Status field changes from Unvalidated to Validated.

Note: The action menu is updated. New Registration and Validate Credentials action disappears and is replaced with Go to ACSISS Registration Website. This action directs you to the login page where you can manage your ACSISS Connect Registration Portal. - You can now add bank accounts from the Wiise Bank Feeds panel on your Wiise landing page.

- You’ve completed the ACSISS Bank Feeds setup, enabled your bank feeds and can now connect your bank accounts.


Note: If the Validation Status on your ACSISS Bank Feed setup displays as Unvalidated, you'll be unable to connect your bank account to ACSISS.
Step 1: Assign the correct permission sets.
Note: Once you’ve enabled bank feeds, go to the User Card and assign the SISS Bank Feeds permission set to the user.
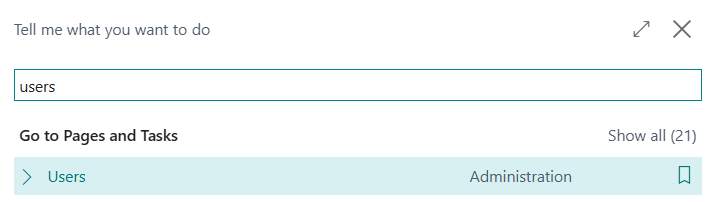
- Search for Users on the top right-hand corner of the page. Select the related link and the Users List page displays.

- Select the relevant User Name to display the user card.
- Select New Line in the User Permission Sets section.
- Then, select the horizontal three dots in the Permission Set field to access the Permission Set Lookup.

- Search for SISS Bank Feeds. Assign this permission set for the user.
- Select OK to continue.
- You've set up banking permissions. Now you can enable bank feeds.

Note: Your system administrator or a user with SUPER access can allocate these permissions for you. The Banking Officer permission can be updated in User Setup.
3. Connect your new bank account
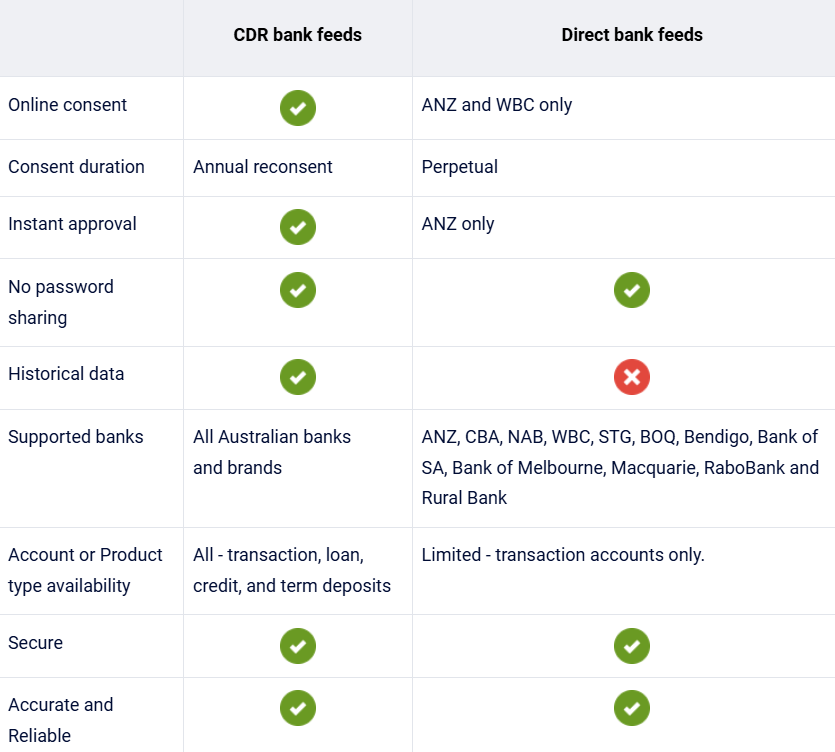
This section covers connecting to your new bank account and giving consent to either an Open Banking (CDR) or Direct bank feeds. Refer to the table below for comparisons between CDR bank feeds and Direct bank feeds.
In this section, you’ll need provide consent for your bank feeds via Open Banking (CDR) or Direct Bank Feeds.
- Select Bank Accounts on your Wiise landing page.
- The Bank Accounts list displays.

- Highlight the bank account row you want to connect to by selecting it.
Note: Set up a bank account in Wiise before you connect and map your new bank account to bank feeds. - Then, select More Options. Select Actions. From the drop-down menu, select Connect Bank.
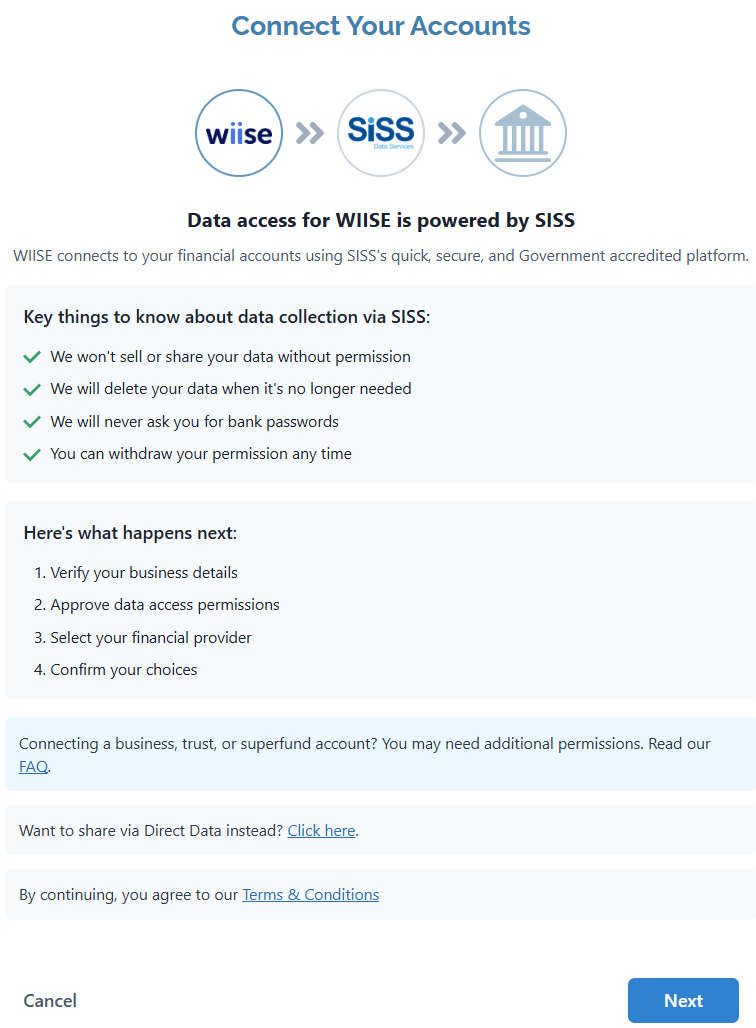
- You’ll be directed to the Connect Your Accounts page.

- Select Next to continue with Connect Your Accounts via CDR.
- Note: Go to the ACSISS Connect Help section for instructions and step by step process to Connect Your Accounts via CDR.

Note: Connect your bank account using Direct Bank Feeds
You have the option to share the bank feeds via Direct Data instead. On the Connect Your Accounts page, scroll down to the bottom of the page until you see ‘Want to share via Direct Data instead? Click here. The hyperlink directs you to the ACSISS My Data page where you can select your bank accounts and provide consent.
You’ll be required to print and sign your consent form and email it directly to SISS. Refer to further instructions here.
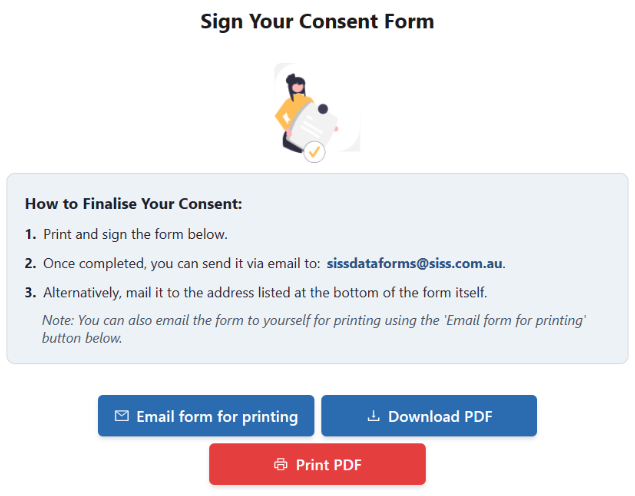
Direct Bank Feeds can take up to 10 days to be approved. Historical data is not available, and only transaction accounts are supported. For historical data, credit cards, loans, and term deposits, connect to a bank account using CDR.
Note: You’ve provided consent to share your data with ACSISS Bank Feeds and you’ve connected your new bank account to ACSISS Bank Feeds.
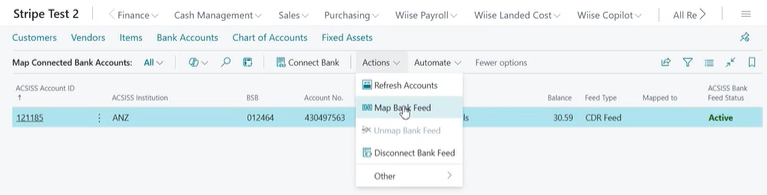
4. Map your connected Bank Accounts
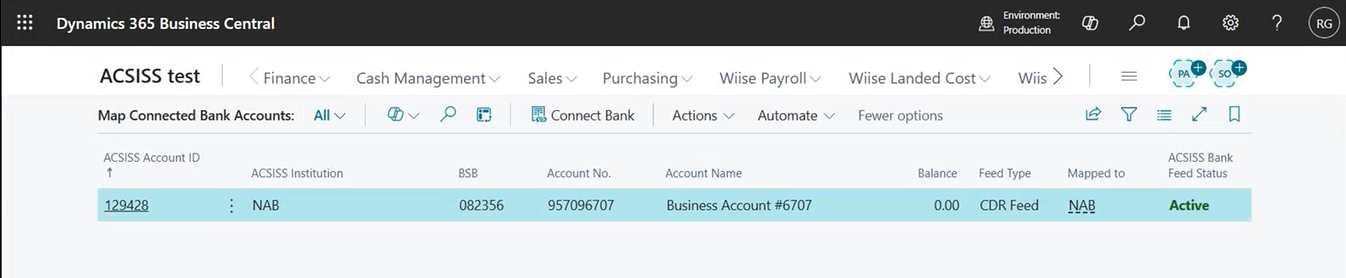
- By completing the above steps, you’ll be directed to the Map Connected Bank Accounts page, where all connections made via ACSISS My Data appear with an Active status.

- Alternatively, from your Wiise landing page, select Bank Accounts.
- Select the bank account row you want to link the feed to.
- Select Actions. Then, select Map Bank Feed.
Note: If you do not see Actions, select More Options. Then, you can see the Actions menu.
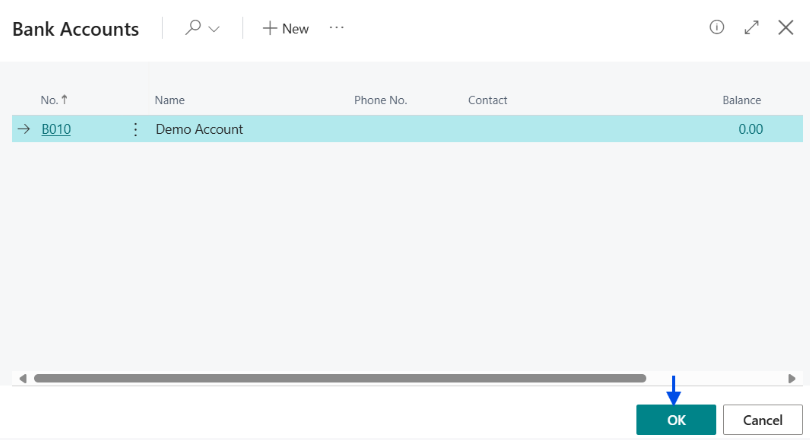
Note: This action directs you to the Bank Accounts page. You’ll need to map a set up bank account.
- Select the appropriate bank account. Then, select OK.
- You’ll be directed back to the Map Connected Bank Accounts page. The Mapped to column has the bank account number as the value on your connected account.

Note: The fifth section only appears after you’ve connected to a bank feed. Here, you can view your bank's feed details and check ACSISS Feed Status to confirm the connection is active.
Note: Once your bank account is active, you’ll need to set up Job Queue Entries. - You’ve mapped your connected bank accounts.

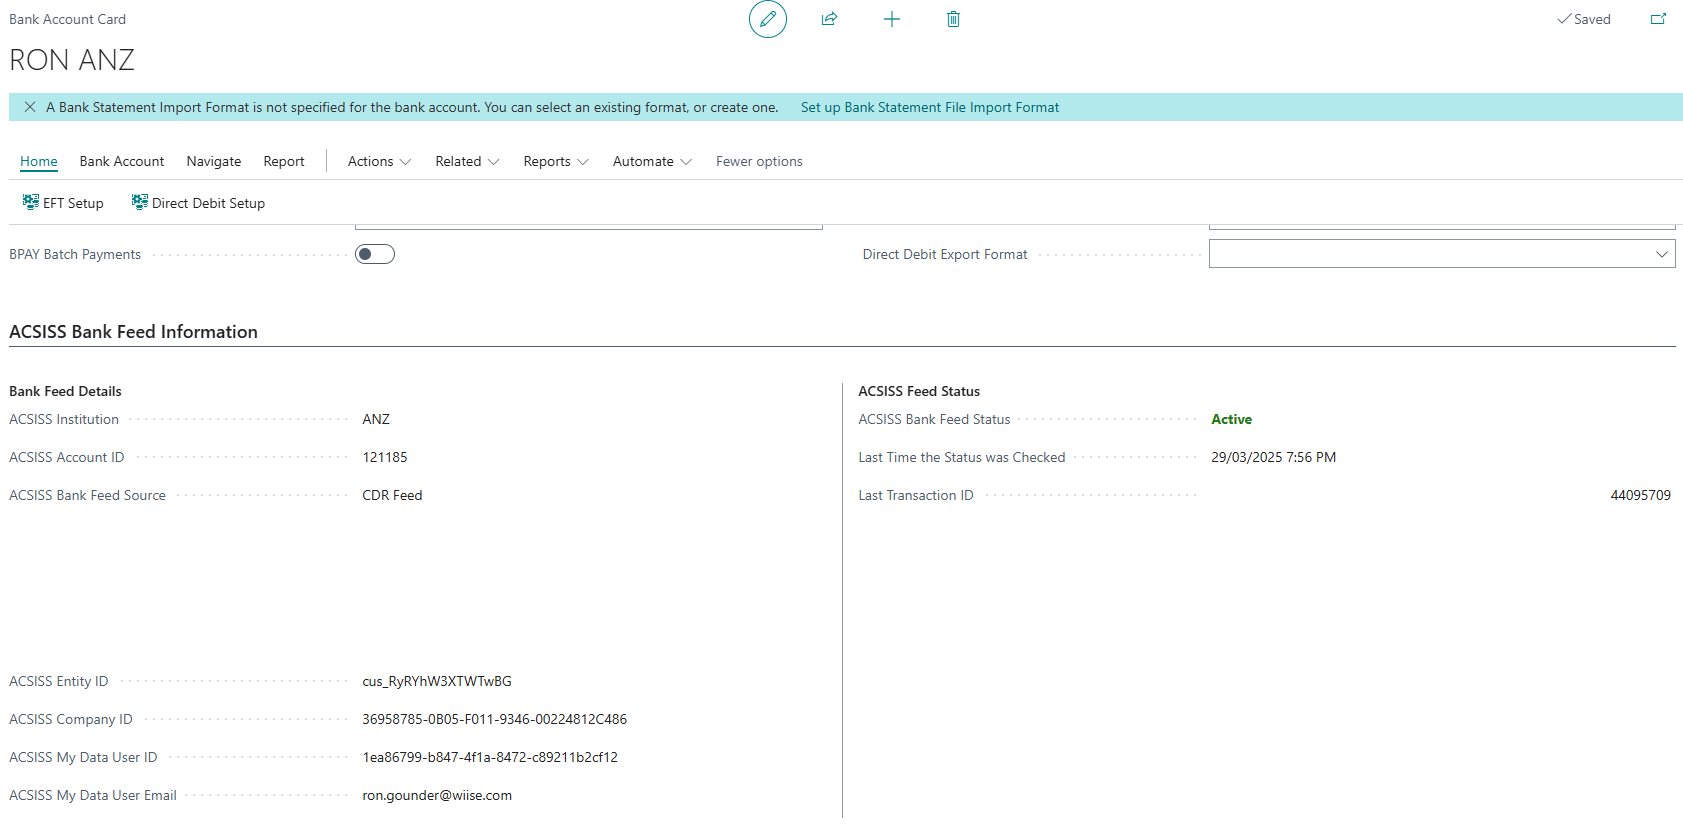
Note: When the ACSISS Bank Feed is Active, you can import the bank's feeds to the Payment Reconciliation Journal or Business Account Reconciliation.
5. Set up Job Queue Entries
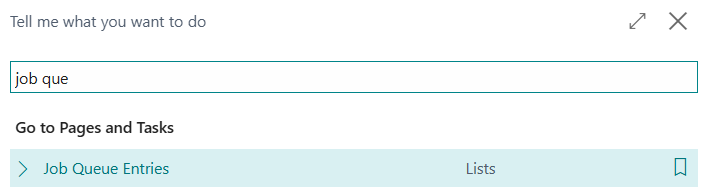
- Search for Job Queue Entries on the top right-hand corner of the page.

- Select the related link and Job Queue Entries page displays.

- Select + New to set up the job queue entry to run your ACSISS bank feeds.

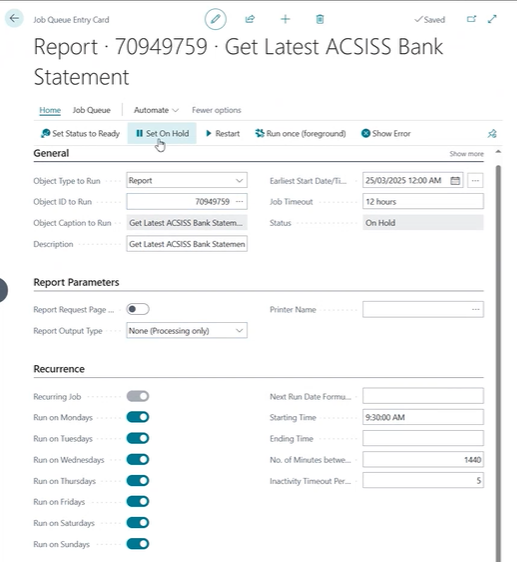
- Fill in the following fields:
- General section:
- Object Type to Run: Select Report.
- Object ID to Run: 70949759.
- Earliest Start Date/Time: Today’s date.
- Recurrence section:
- Select the toggle button to run the bank feeds every day.
- Starting Time: 9:30am (Sydney time/AEST)
- General section:
- Select Set Status to Ready.
- Select the back button. You can now see the job queue entry for the bank feed is in Ready Status.
- You’ve connected your bank accounts, mapped bank feeds and set up job queue entries.
Note: Bank transaction feeds are updated each morning at 9:30am (Sydney time) with data from the previous day. Only posted transactions will be imported into Wiise.
6. View and reconcile your bank transactions
Bank transactions are the source data for your reconciliation process. Once imported automatically via your scheduled job queue, they're stored in the ACSISS Bank Transactions table and used to match and post entries across all connected bank feeds, reducing manual data entry and improving accuracy.
- In the Wiise Bank Feeds panel, you can view your connected bank accounts and see how many transactions are ready to be reconciled.
- On a connected bank account tile, select Reconcile X records to open the Bank Account Reconciliations page.
- If you are using payment reconciliation, search for Payment Reconciliation Journal to begin matching transactions.
Note: On your Wiise Bank Feeds panel you can view your connected bank accounts and find out how many transactions need to be reconciled.
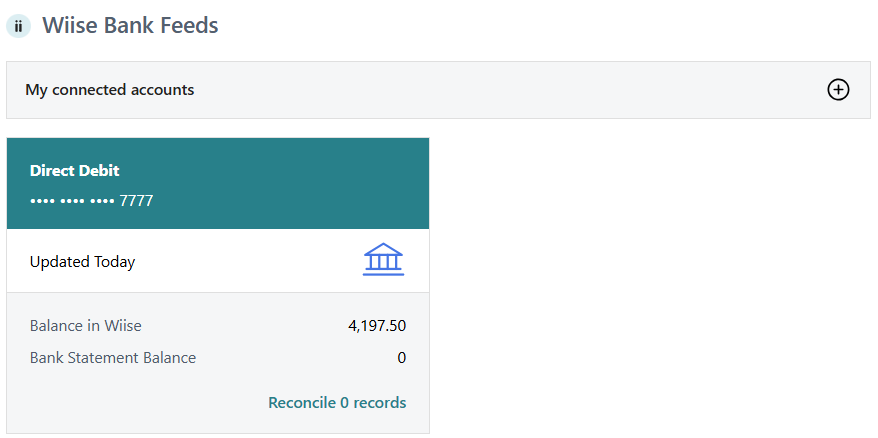
Note: On a connected bank account tile, select the Reconcile X records hyperlink that will direct you to the Bank Account Reconciliations list. You can view your bank statements here.
Note: If you’ve set up bank feeds for payment reconciliation, search for Payment Reconciliation Journal.
7. Perform Bank Account Reconciliation
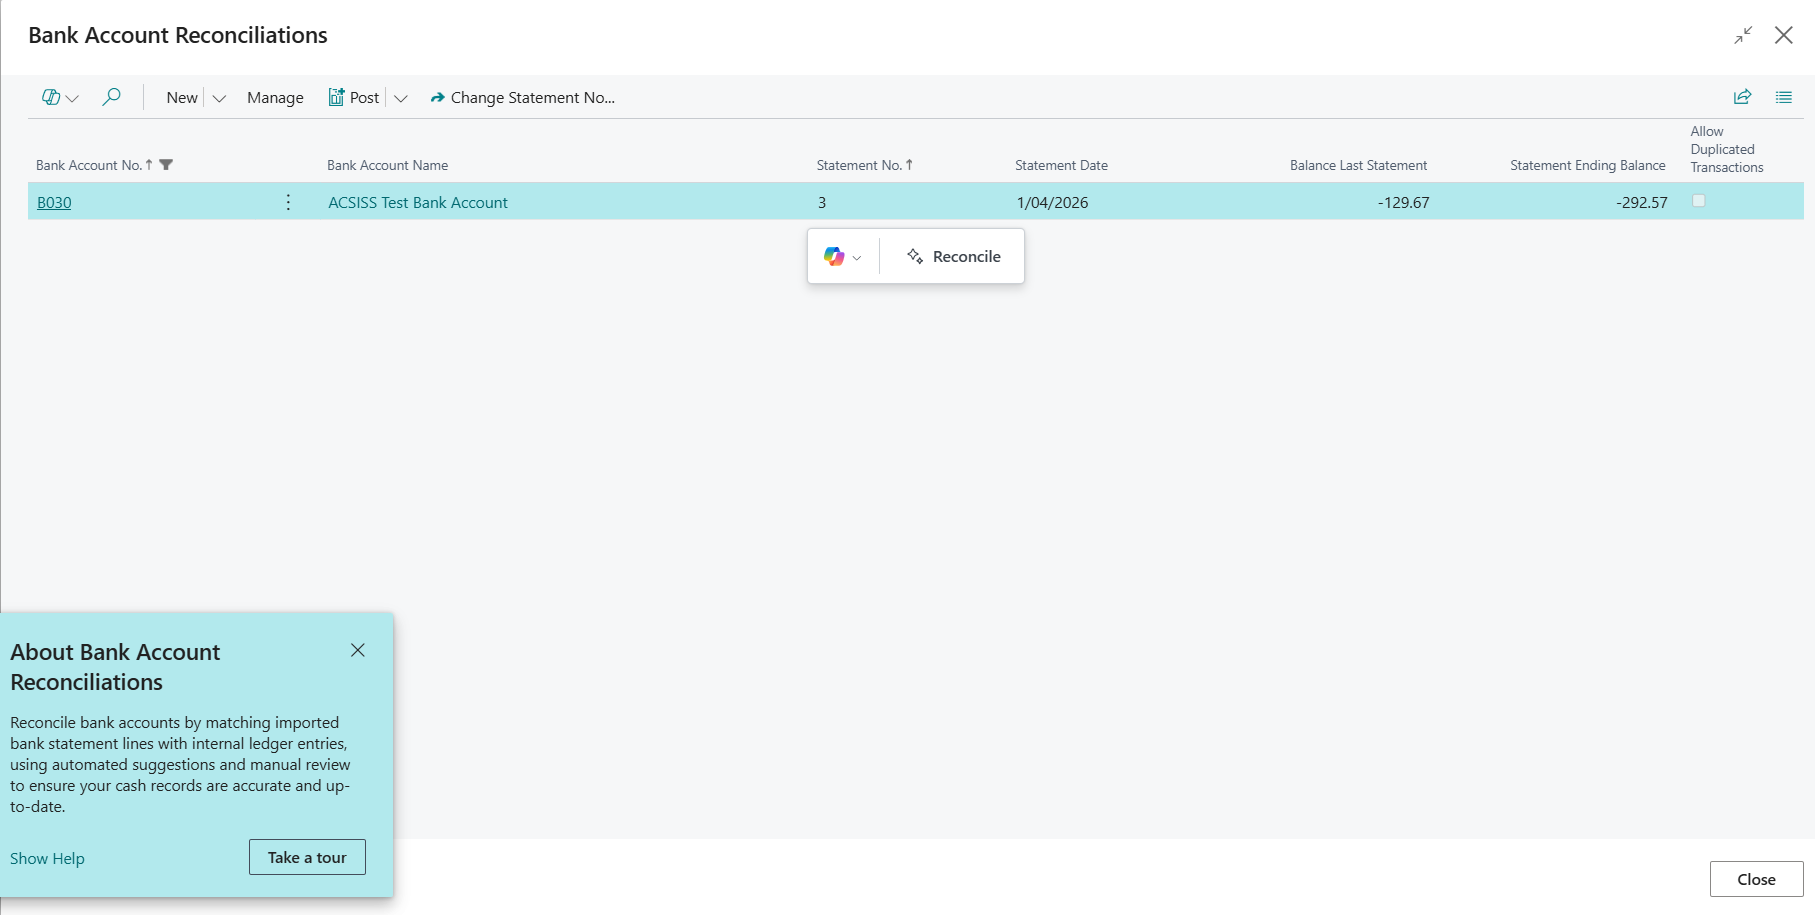
- Search for Bank Account Reconciliation on the top right-hand corner of the page. Select the related link and page displays.

Note: Alternatively, on a connected bank account tile, select the Reconcile X records hyperlink that will direct you to the Bank Account Reconciliations list. You can view your bank statements here.
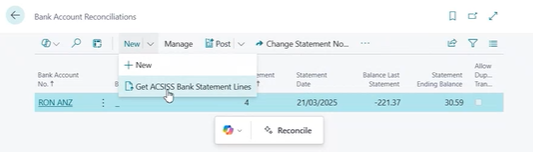
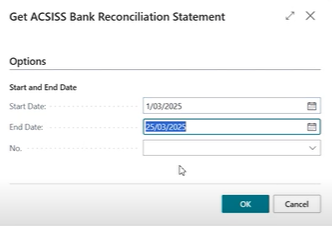
Tip: You can perform reconciliations using Microsoft Co-pilot if enabled. - Select New. Then, select Get ACSISS Bank Statement Lines.

- The Get ACSISS Bank Reconciliation Statement table displays.

- Select the Start and End Date to include unreconciled statements.
- Select the bank account No. Then, select OK.
- Return to the Bank Account Reconciliation page.

- Review and match the transactions.
- Perform your bank account reconciliation.
- You’ve reconciled your bank statements using bank account reconciliation.

Note: Once you’ve reconciled your transaction, the Reconcile X records for the bank account on the Wiise Bank Feeds panel reduces to zero records.
8. Perform Payment Reconciliation Journals
- Search for Payment Reconciliation Journals on the top right-hand corner of the page. Select the related link and page displays.
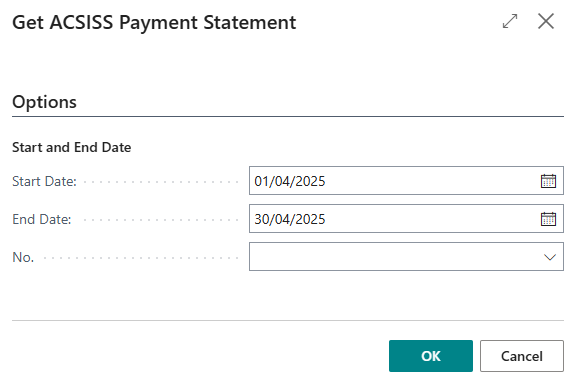
- Select More Options. Then, select Actions. From the drop-down select Get ACSISS Bank Statement.

- The Get ACSISS Payment Statement table displays.

- Select the Start and End Date to include unreconciled statements.
- Select the bank account No. Then, select OK.
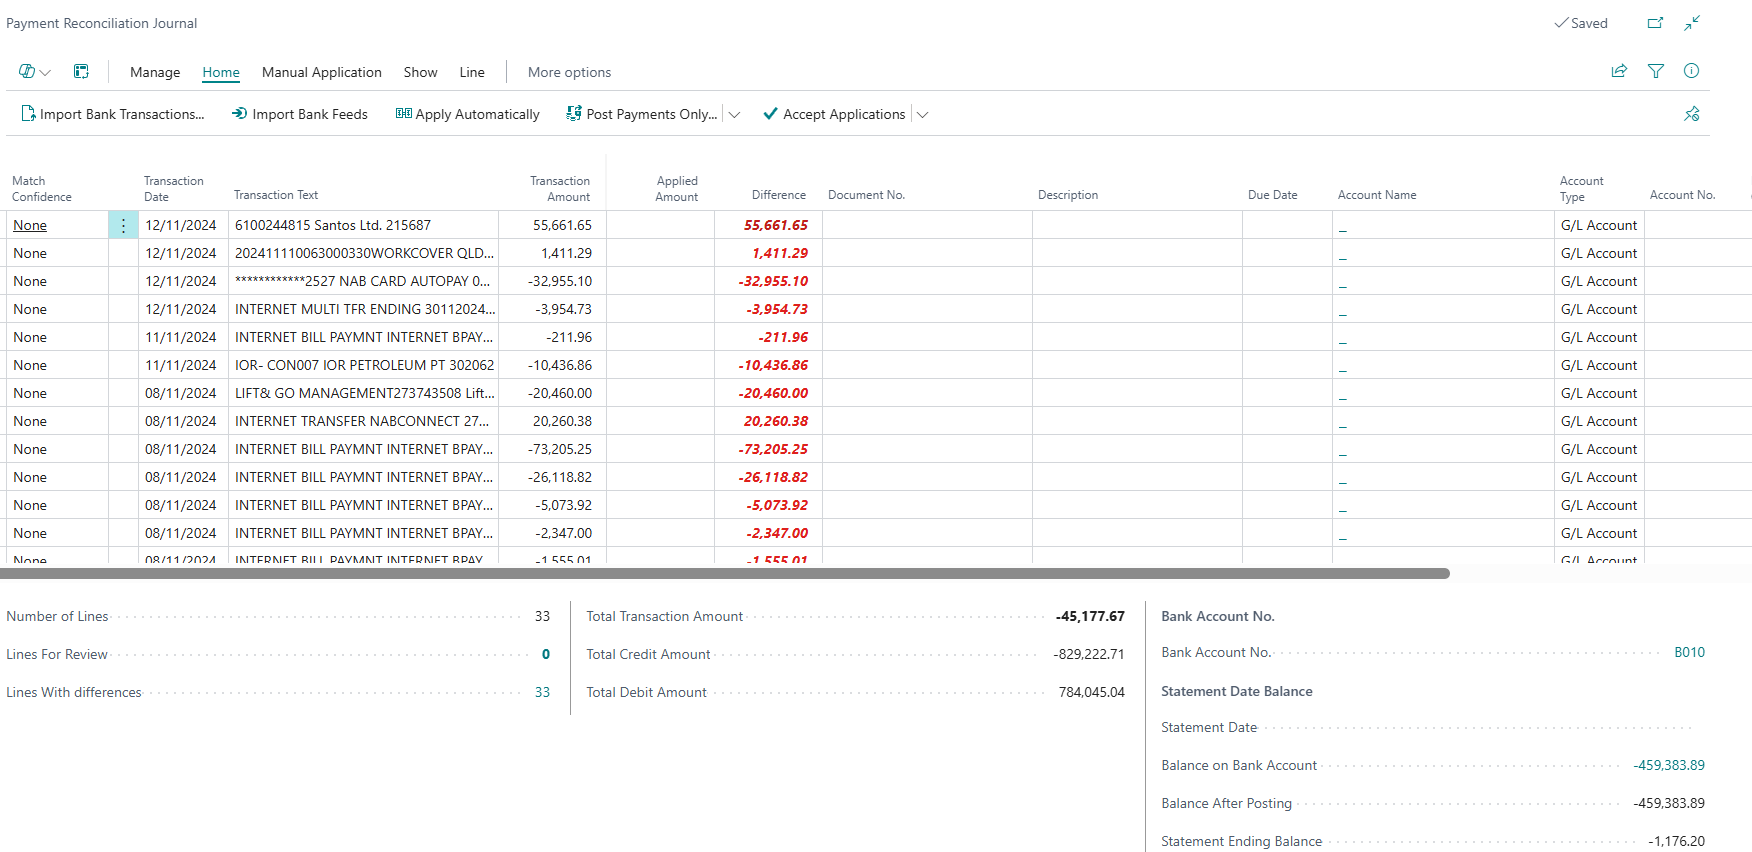
- The Payment Reconciliation Journals list populates the Bank Account No., and highlights the Remaining Amount to Apply to transactions.

- Select the relevant Bank Account No. The Payment Reconciliation Journal page for the bank account displays.

- Review and match the transactions.
- You’ve reconciled your bank statements using the payment reconciliation journals.


What’s next?
Find out how to read your ACSISS Bank Feed Status.
Having trouble?
- Check our bank feed system status updates
- Find more help using our bank feed troubleshooting guide
Need more help?
No problem, that's what we're here for. Reach out to support@wiise.com anytime you can't find what you're looking for.