Overview:
- Learn to set up a NDIS Customer
Why Set Up a NDIS Customer?
Setting up a NDIS customer lets you apply the correct GST settings and generate accurate invoices that comply with NDIS funding rules. It also streamlines claim management and keeps track of services delivered under the participant’s plan.
Note: Once the NDIS Proda Connection is set up, you can set up your NDIS Customers and Items. Additional NDIS specific sections and fields appear on the customer and item cards.
Note: You'll need to set up your Wiise NDIS Setup and update default posting details before you import the NDIS Product Catalogue.
How to Set Up a NDIS Customer?
- To set up a NDIS customer, first complete the standard customer setup in Wiise. Then return to the customer card to update the two NDIS-specific sections:
- NDIS Participant Details
- Plan details
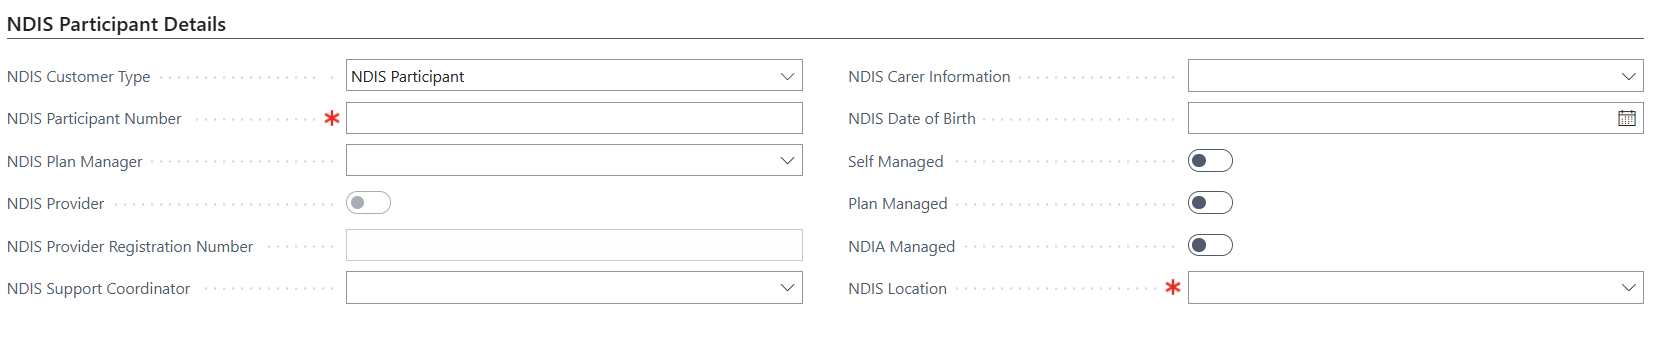
- Update the NDIS Participant Details section.

- NDIS Customer Type: Select as either Blank, NDIS Participant or NDIS Plan Manager.
- Blank: Use only if the customer is not NDIS-related.
- NDIS Participant: Select when the participant pays you directly (self-managed or partially managed)
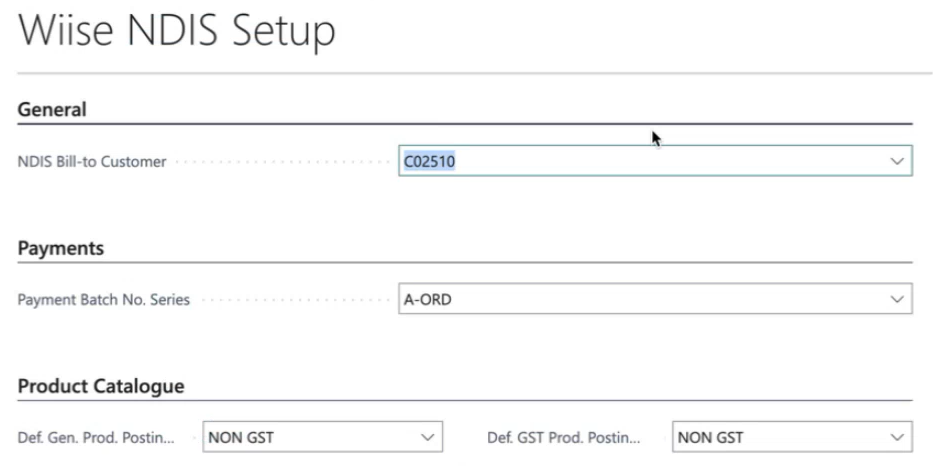
Note: When selecting NDIS Participant, you'll need to update the NDIS Bill-to Customer field in the Wiise NDIS Setup page to match this customer.
- NDIS Plan Manager: Select when the customer is a plan manager paying on behalf of the participant. Be sure to enter the participant's name into the contact details.
Note: The bill to the customer is defaulted to NDIS when the NDIS Plan Manager is selected as the NDIS Customer Type.
Note: When an NDIS Plan Manager is selected, all other fields are greyed out.
- NDIS Customer Type: Select as either Blank, NDIS Participant or NDIS Plan Manager.

-
- NDIS Participant Number: This field is mandatory when NDIS Participant is selected. Enter the unique participant number.
- NDIS Plan Manager: Search for or add the name of the person managing the NDIS plan.
- NDIS Provider: Disabled for NDIS Participants. You can enable this for non-NDIS customers or plan managers. Once enabled, enter the NDIS Provider Registration Number.
- NDIS Date of Birth: Mandatory field for NDIS Participants.
- Self-Managed, Plan Managed, NDIA Managed: Enable the appropriate toggle buttons to confirm how the funding is managed.
Note: Enable multiple options if the participant is funded by more than one source. Split invoices are required when funding is managed by more than one party to ensure each payer receives the correct invoice. - NDIS Location: This is a mandatory field. It determines the correct pricing and funding based on where the support was delivered, ensuring accurate billing and reporting.
Note: When you set up an NDIS customer, the Customer Price Group field in the Invoicing section is automatically updated to match the specified NDIS Location.
- Update the Plan Details section:

- Action buttons at the top:
- Refresh Plan Details: manually triggers a refresh of plan data from the NDIA API.
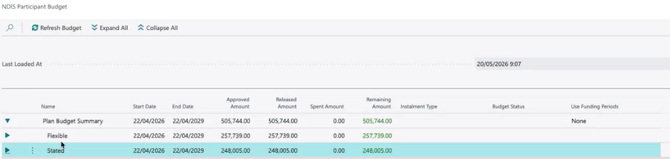
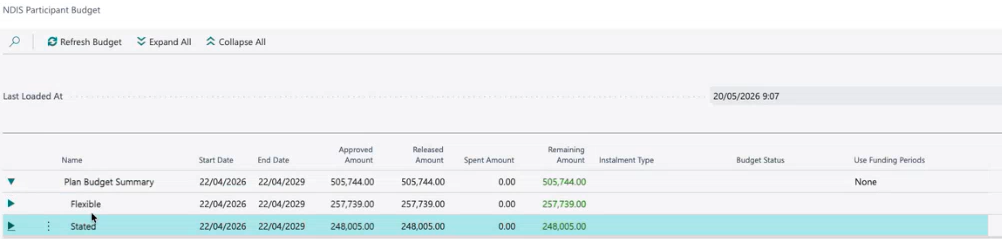
- View NDIS Budget: opens the budget details for the selected plan.
- View NDIS Plan Goals: opens the goals associated with the selected plan.
-
The plan row:
- Participant ID: Enter a clear name or reference for the NDIS plan.
- Plan Start Date: The date the plan begins. Invoices can only be submitted from this date onward.
- Plan End Date: The date the plan ends. You cannot claim services beyond this date unless a new plan is created.
- Plan First Start Date: This is the participant's first ever plan.
- Is PACE Plan: When the checkbox is ticked, confirming this is a PACE participant. When it is not ticked, it is a SAP participant.
- Spent Amount: What has been spent
- Remaining Amount: Remaining budget
- Approved Amount: The total approved funding for this plan.

5. You’ve now set up the NDIS customer card and completed the NDIS-specific sections. The customer is ready for invoicing under the NDIS program.
Note: Wiise automatically imports plan, budget, and goal data directly from the NDIA each day, so you're always working from current information without manual data entry. Having accurate plan and budget data on the participant's card means you can submit correct claims and support compliance with NDIS rules.
What’s next?
Find out how to process a NDIS Sales Invoice.
Need more help?
No problem, that's what we're here for. Reach out to support@wiise.com anytime you can't find what you're looking for.