Overview:
- Learn to set up a sales order on a location with an inventory pick option in Wiise
Note: This article covers raising a sales order on a location with an inventory pick option. You can set up a sales order without a location, or a sales order with a warehouse pick option enabled.
Why set up a sales order on location?
A sales order will provide you with information on whether your products are in stock. Having a location is useful to help keep track of inventory.
How to set up a sales order on location with an inventory pick option?
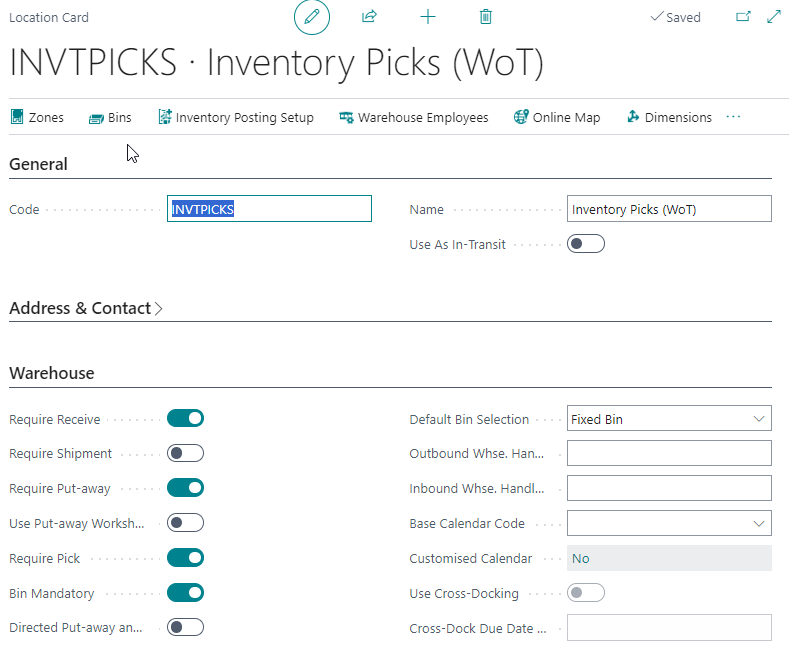
Note: Locations are places like your inventory or warehouses dedicated to storing goods to sell to customers. Wiise uses locations to help keep track of inventory in both simple and complex warehouse processes.
- Complete steps 1 to 8 in the set up a sales order article. Then return to this article to continue with the inventory pick option enabled steps.
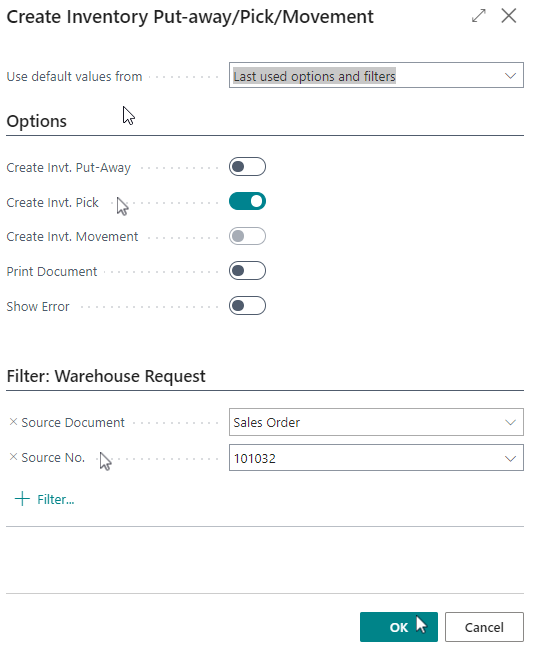
- You can now Create an Inventory Put-away/Pick. Select Home. Then, select Create Inventory Put-away/Pick.

- The Create Inventory Put-away/Pick/Movement table opens.

- Enable the Create Invt.Pick toggle button.
- Filter to the sales order you’re working on.
- Select OK when you’ve updated your selection or select Cancel to cancel the process.
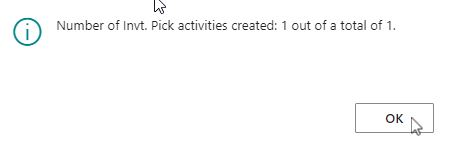
- When you’ve selected OK, a message box displays to inform you that an inventory pick activity has been created.

- Select OK to proceed.
- You’ll notice the Qty. To Ship and Qty. To Invoice is updated in the Lines section of your sales order.

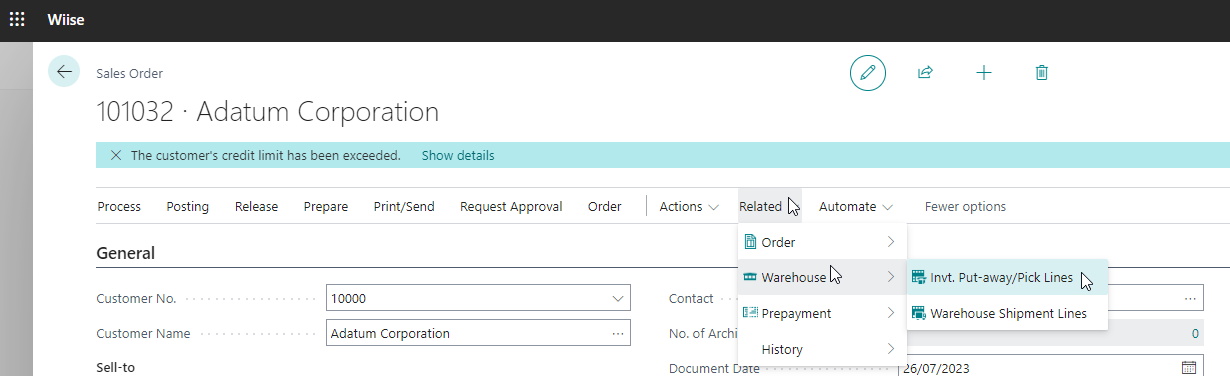
- You can now go to the inventory pick lines. Select Related, then select Warehouse. Then select Invt. Put-away/Pick Lines.
Note: If you can’t see Related on your menu, select More options.
- The inventory pick list displays. Select a Warehouse Activity by highlighting the related row. Then, select Card.

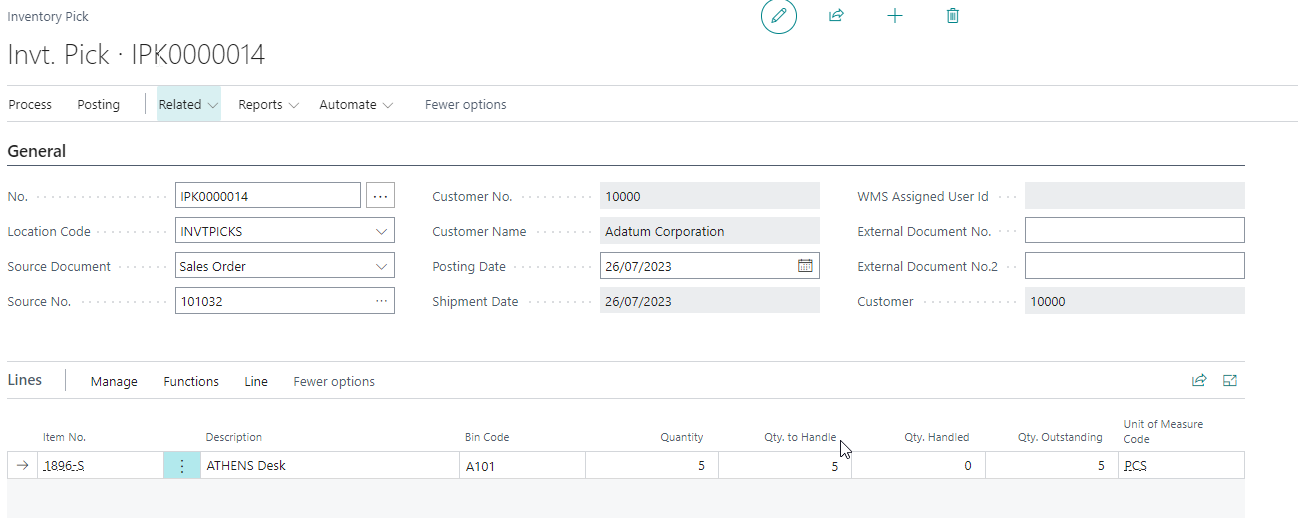
Note: The inventory pick card shows details of the inventory pick with the related sales order.
Note: Your warehouse worker picks the items for shipping and informs you of the quantity they’ve handled. - You’d need to manually update the Qty. To Handle field once you’ve been informed of how many items the warehouse worker has picked for shipping.

Note: The Qty. To Handle should not exceed the Quantity of items in the sales order. - Post the sales order to the customer.

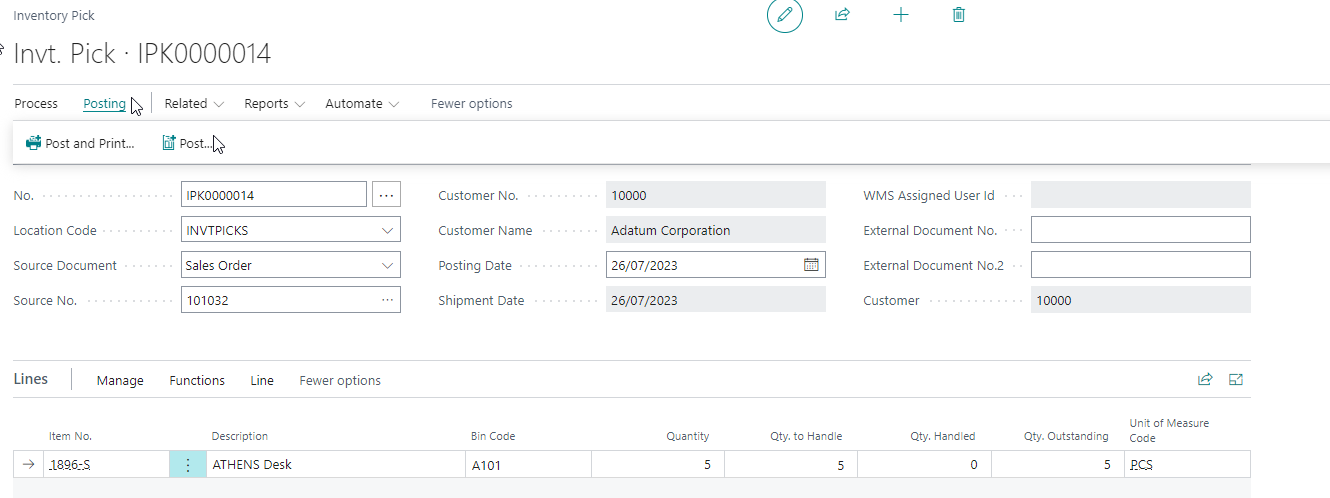
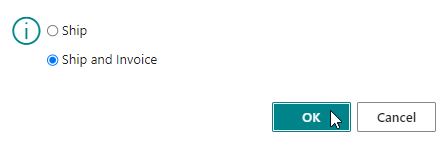
- You can Ship the sales order or Ship and Invoice directly from the inventory pick list.

- Select OK when you’ve selected your option or select Cancel to stay on the page.
Note: If you select the option to Ship and Invoice above, then your sales order is also invoiced. - If you select the option to Ship, you’ll notice that the Quantity Shipped field and Qty to Invoice field are updated in the Lines section of your sales order.

- After you’ve shipped the sales order, you can post an invoice from the sales order. Select Home. Then select Post. Select the option to Invoice. Your invoiced sales order will be available in the posted sales invoices list.

- You’ve created a sales order on a location with an inventory pick option in Wiise.


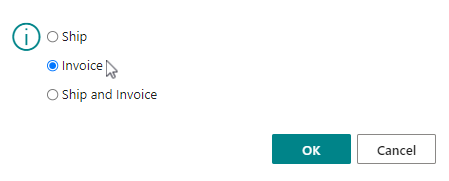
Note: If select Ship the sales order instead of Ship and Invoice, you can proceed to post an invoice from the shipped sales order.
What’s next?
Now that you’ve set up your sales order with a location with inventory pick option enabled, you can look to set up a sales order without a location, set up a blanket sales order or set up a sales order with warehouse pick option enabled. Then you can set up a sales invoice.
If you have any questions, please reach out to support@wiise.com