Overview:
- Learn to set up a sales invoice from a receipted sales order.
- Learn to set up a sales invoice without using a sales order.
Why set up a sales invoice?
A sales invoice when posted, records the amount a customer owes to your business for goods or services provided. This can be done by converting a sales order into a sales invoice or by creating a sales invoice directly.
Note: If you have warehousing enabled in your Locations, find out how to set up a sales order and post it into an invoice.
How to post a sales order into a sales invoice?
In this process, we’ll demonstrate how to post a previously created sales order into a sales invoice.
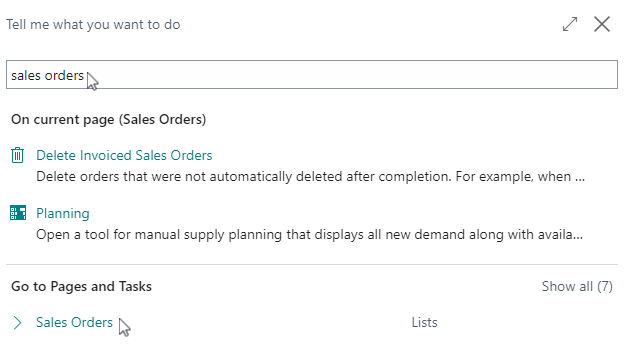
- Search for Sales Orders from the top right-hand corner of your page and select the related link.

Note: You can navigate to sales order from your Wiise landing page. Select Sales. Then, select Sales Orders to be taken to the sales orders list. - The sales order list displays. Select the sales order that you want to post into a sales invoice.
- Then, review the sales order. Here are the steps:
- Review the sales order and ensure that all items, quantities and prices are accurate.
- Check if you’re offering any discounts or special terms.
- Confirm that there is sufficient inventory availability to fulfill your sales order.
- Update the Requested Delivery Date field in the General section, as this is the date that the customer has asked for the order to be delivered.
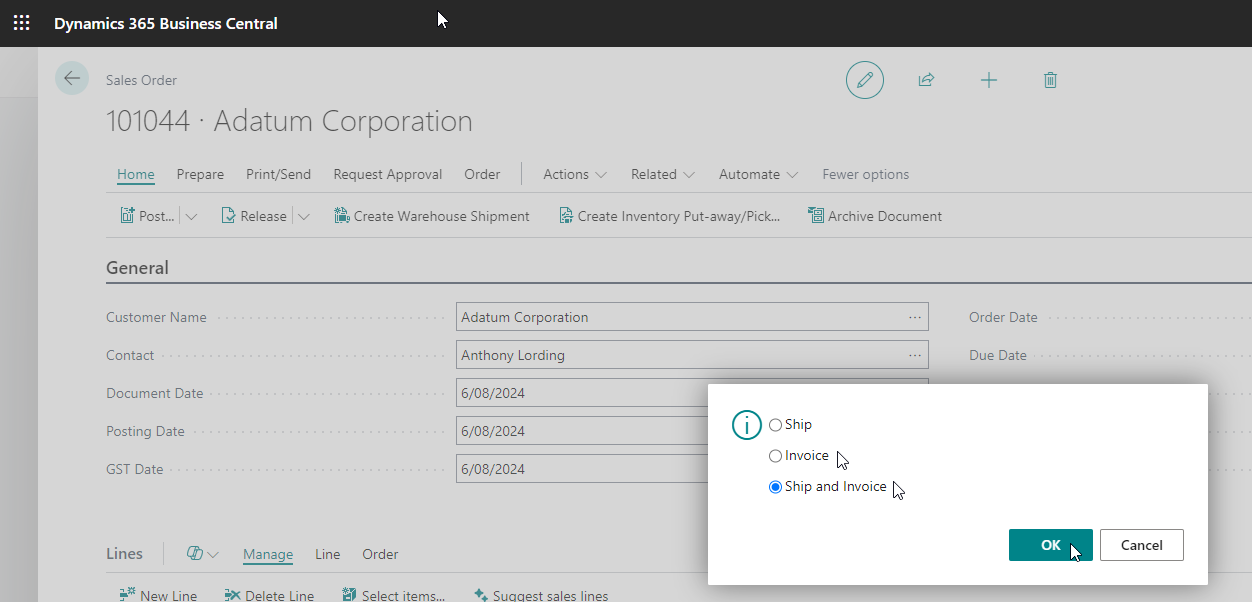
Note: Sales orders are created by staff to manage customer orders for goods or services. When the goods are ready for shipment or delivery, the warehouse or sales staff processes the sales orders. These orders must be invoiced to the customer to record the sale and request payment. - You can now post the sales order. Select Home from action ribbon. Then, select Post. Select Post again.
- A message box displays requesting you to confirm if you want to Ship, Invoice or Ship and Invoice.

- Select Invoice or Ship and Invoice.
- Then, select OK to continue.
- A message box displays requesting you to confirm if you want to Ship, Invoice or Ship and Invoice.
- You’ve now posted a sales order into a sales invoice.
How to create a sales invoice?
You can create a sales invoice without using a sales order when working with a location that doesn't have a warehouse setup, or when entering supplier invoices directly using general ledger accounts.
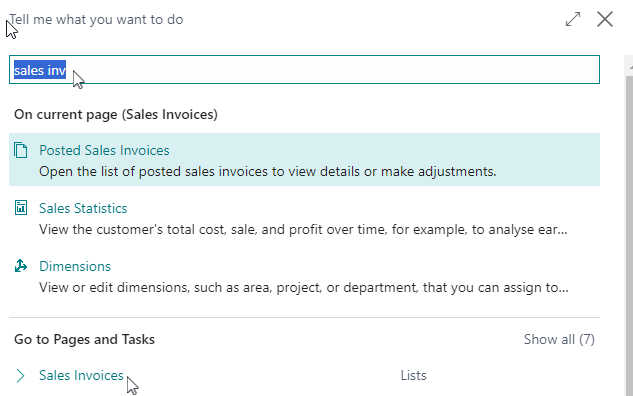
- Search for Sales Invoices on the top right-hand corner of the page.

- Select the related link. The list displays.
- Select +New to create a new sales invoice.
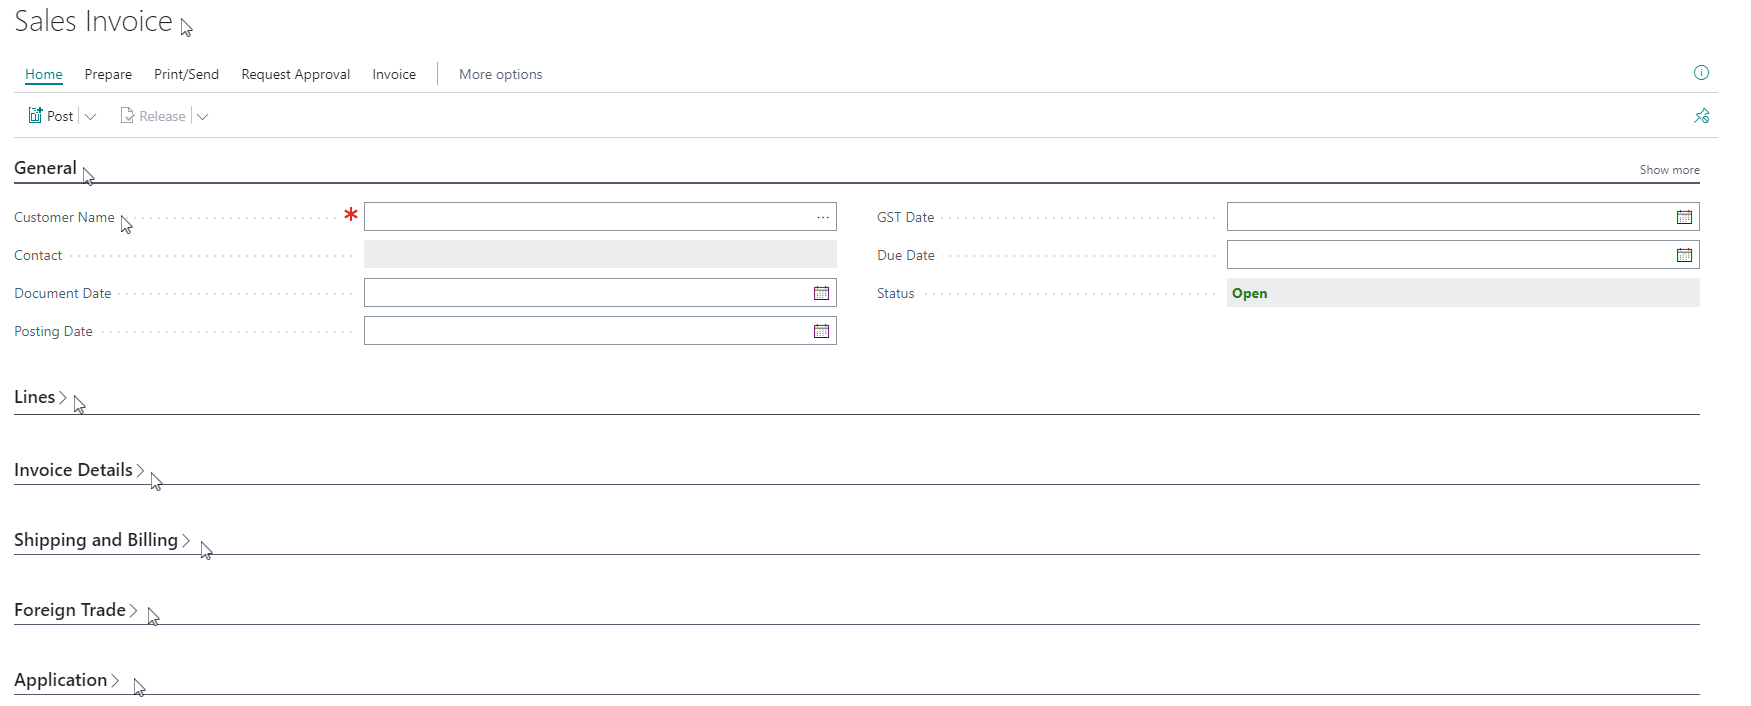
- A new Sales Invoice card displays. There are five fasttabs also known as sections, to update. These sections are General, Lines, Invoice Details, Shipping and Billing, Foreign Trade and Application.

- Fill in the relevant fields in the sections:
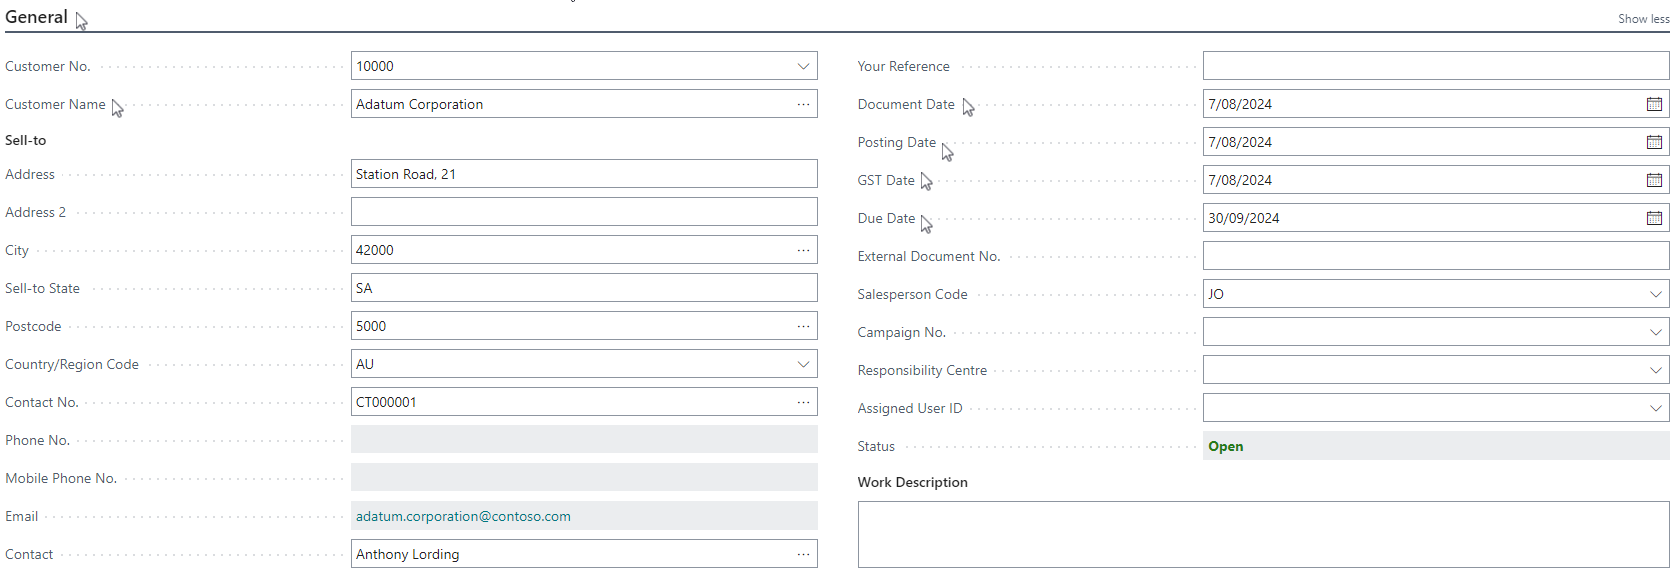
- General section:

- Select the Customer Name who the invoice is for from the drop-down menu. The detail of the customer auto populates the fields in the section.
- The Posting Date defaults to today’s date. This is the date the invoice is being posted. You can change it if you need to back date an invoice.
- The Due Date field auto calculates based on the payment terms you’ve set for the customer. You can adjust the due date in the invoice.
- Update the External Document No., reference that refers to the customer’s numbering system. This helps in tracking and customer reference.
- The Salesperson Code is optional as you can select the salesperson associated with the sales invoice.
Note: When you select the customer, their address details will be auto populated. If these details are different for the sales invoice, you can update them.
Note: Wiise calculates the Due Date based on today's date and the Payment Terms Code, which is the period within which payment must be made according to the terms set from receipt. If the sales invoice is not paid immediately, ensure that the Payment Terms Code and Due Date (the date by which the customer's payment is due) are correct.- Lines section:

- Select Item in Type. Then, identify the items that your customer is purchasing in the No., field from the drop-down list.
- The Description will be auto filled in. You can edit this if you need to.
- Update the Location, Quantity and Unit Price fields.
- You can include a Line Discount % based on the payment terms.
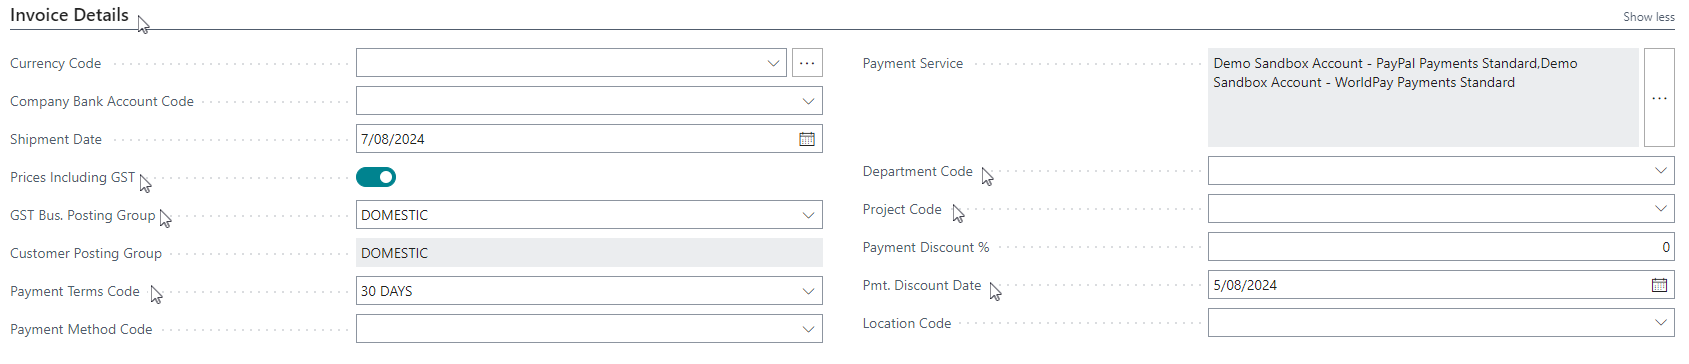
- Invoice Details section:

- Toggle on the Price Include GST button if the invoice is subject to GST. Otherwise, you can leave it toggled off.
- The GST Business Posting Group and Payment Terms Code will automatically update based on your customer selection as these are set up on the customer card.
- If you use Department Code and Project Code dimensions, then you can update them from the drop-down list.
- Update the Payment Discount % field that indicates the discount if your customers make the invoice payment before the due date.
- Update the Pmt. Discount Date field on the date the payment must be made for the payment discount to apply.
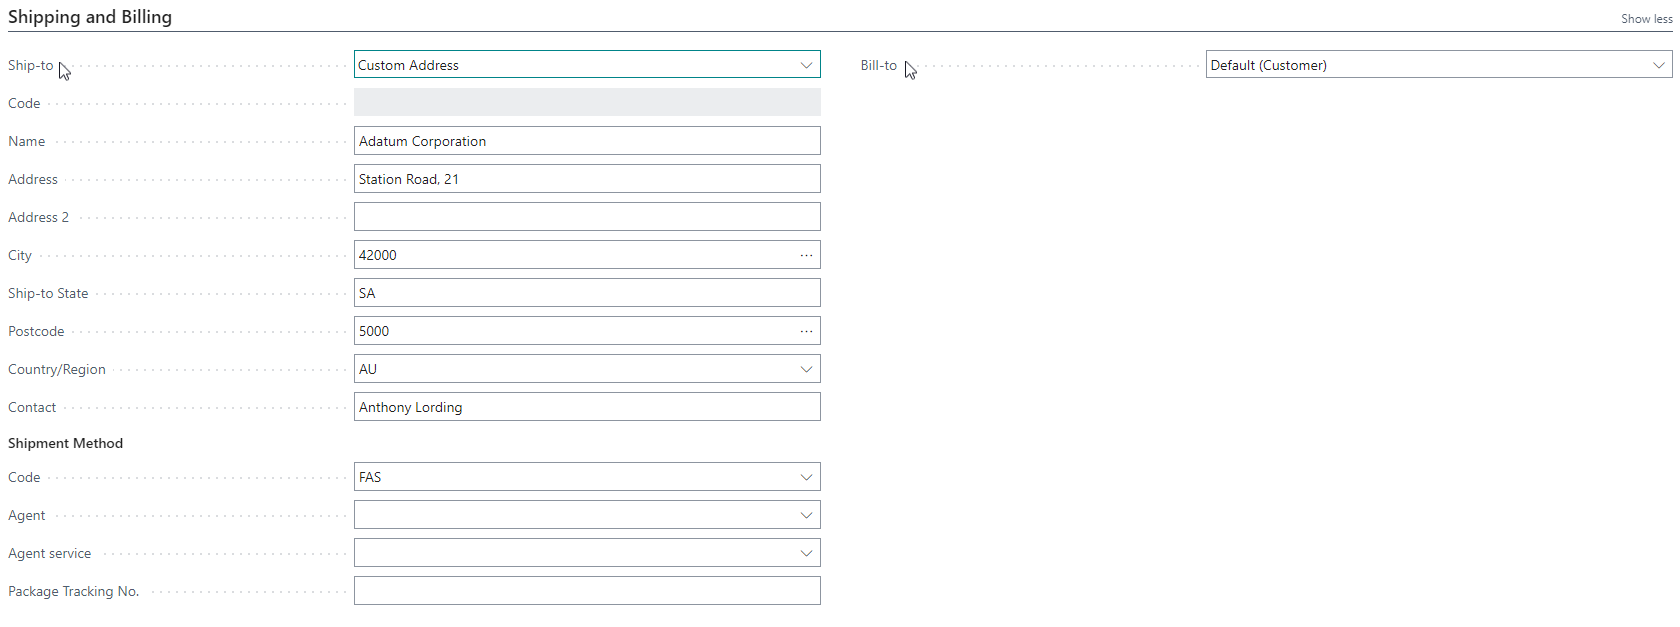
- Shipping and Billing Section:

- You can specify the Ship-to field as a default customer address that is on the customer card, or add an alternative address saved on the customer card. Or, you can add a custom address to the fields in this section.
- In the Bill-to field, you can set the default customer identified in the sales invoice, or you can get the sales invoice billed to another customer or set a custom address in this section.
- Application Section:

- You can use this section to update details so that the posted sales invoice can automatically be applied to an outstanding open credit memo.
- Applies-to Doc. Type: Select the appropriate document type to apply this invoice to.
- Applies-to Doc. No.: Use the dropdown to select the specific document the invoice applies to.
- You can use this section to update details so that the posted sales invoice can automatically be applied to an outstanding open credit memo.
- You’ve updated the relevant sections of the sales invoice.
- General section:
- Select Release. Then, select Post.
- Select Yes to post the invoice or No to remain on the page.

- The invoice will post. Select Yes to view the posted document or No to exit the screen.

- The invoice will post. Select Yes to view the posted document or No to exit the screen.
- You’ve created a sales invoice.


Note: After an invoice is posted, find it again in the Posted Sales Invoices list.
Note: After you’ve posted the invoice, you can print the invoice and email it directly to your customer from Wiise.
What’s next?
Find out how to set up a sales credit memo.
Need more help?
No problem, that's what we're here for. Reach out to support@wiise.com anytime you can't find what you're looking for.