Overview:
- See which bank feeds are available.
- Set up bank feeds for your bank account in Wiise.
- Set up your bank account in Wiise.
- Set up reconciliation frequency for your linked bank accounts.
Note: Use this process flow if you’re on the existing Wiise bank feeds. Learn how to transition to ACSISS Open Banking in Wiise Australia.
Bank feeds available in Wiise Australia
Wiise currently offers ACSISS direct bank feeds to streamline financial management for businesses. This solutions offers:
- Direct Connection: These feeds establish a direct connection between Wiise and the bank, allowing for automatic and secure import of transaction data into the accounting software.
- Enhanced Accuracy: Since the data comes directly from the bank, it minimizes errors and ensures that the information is up-to-date, providing businesses with accurate financial data.
- Bank Support: ACSISS direct feeds are supported by major Australian banks, offering a reliable and seamless integration for businesses using these institutions across most banking products.
Supported banks
The following details the banks supported by ACSISS in Australia:
- ANZ
- Bank of Melbourne
- Bank of Queensland
- Bank of SA
- Bendigo Bank
- CommBank
- Macquarie Bank
- NAB
- St George
- Rabobank
- Rural Bank
- Westpac
Eligible account types
- Everyday transaction accounts with a Bank Branch No. (BSB) and Bank Account No.
Unsupported account types
- Credit card accounts
- International bank accounts
- Trust accounts
If your account type isn't eligible for a ACSISS feed, you can manually import your bank statements into Wiise.
Note: The list of all supported bank transaction feeds are updated each morning at 9 am with data from the previous day.
Before you get started
1. Ensure you have the right permissions.
2. Enable bank feeds in Wiise.
3. Register for ACSISS bank feeds in Wiise.
4. ACSISS processes your request and sends it to your bank.
5. Your bank enables bank feeds.
6. Bank feeds are registered in Wiise. You can then complete your setup.
Depending on how long it takes ACSISS and your bank to process your request, this process to can take 5 to 10 business days.
1. Ensure you have the right permissions
Wiise permissions
You will need to be assigned one of the following roles to set up bank feeds:
- Business Manager
- Business Manager Evaluation
- Accountant
You must also be set up as a Banking Officer to use Wiise Bank Feeds.
You can check your permissions with your system administrator. If you don't have the right permissions, reach out to your system administrator to enable your access in Wiise.
Bank permissions
To enable bank feeds you will need to have the right delegation of authority and bank access.
2. Initiate your bank feed in Wiise
- Select Bank Accounts from your landing page menu or search for it using the search at the top right-hand corner.

- Select the bank account from the list page by selecting the hyperlinked row in the No. Column to edit the bank account. Alternatively, select the vertical three dots on the row of your bank account between the No. column and Name column.
- Then, select Edit in the drop-down menu.

- You’d need to set up a bank account if the bank account is not available in your bank account list.


3. Set up a bank account
- First, select Bank Accounts from your landing page menu or search for it using the search at the top right-hand corner.

- Select New and a new Bank Account Card will be opened. There are 5 sections (FastTabs) on this bank account card.
Tip: You can select Show more at the top right-hand corner of the general section to see all the fields.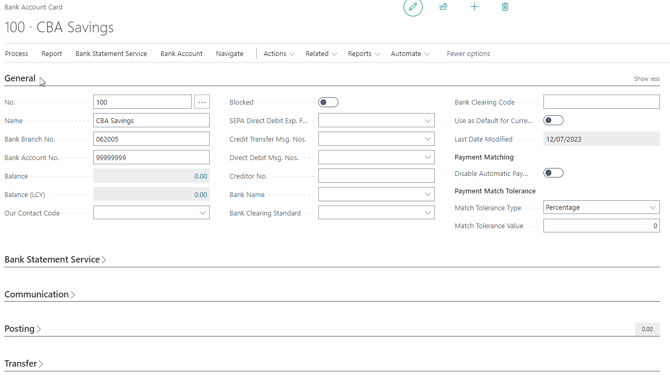
- Under the General section, complete all the details of the new bank account that you are setting up.
- General section: The No. field is mandatory and will populate automatically as you start to fill out the Name of the bank account. It is a reference for your bank account. Fill in the other necessary fields.
- The Bank Branch No. field is required for keeping records and when you set up your bank feeds.
- The Bank Account No. field is required with your Bank Branch No. field for keeping records and when you set up your bank feeds.
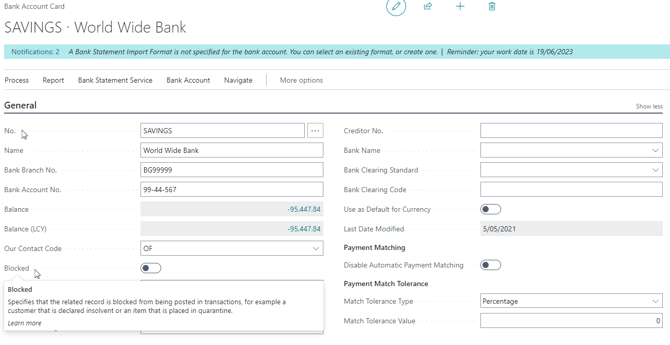
- The Blocked toggle is to be left unselected to allow post transactions to take place. Hover over the field to read the description.
- To make the bank account the default for sales and service documents, turn on the Use as Default for Currency toggle. This helps you save time on data entry.
- General section: The No. field is mandatory and will populate automatically as you start to fill out the Name of the bank account. It is a reference for your bank account. Fill in the other necessary fields.
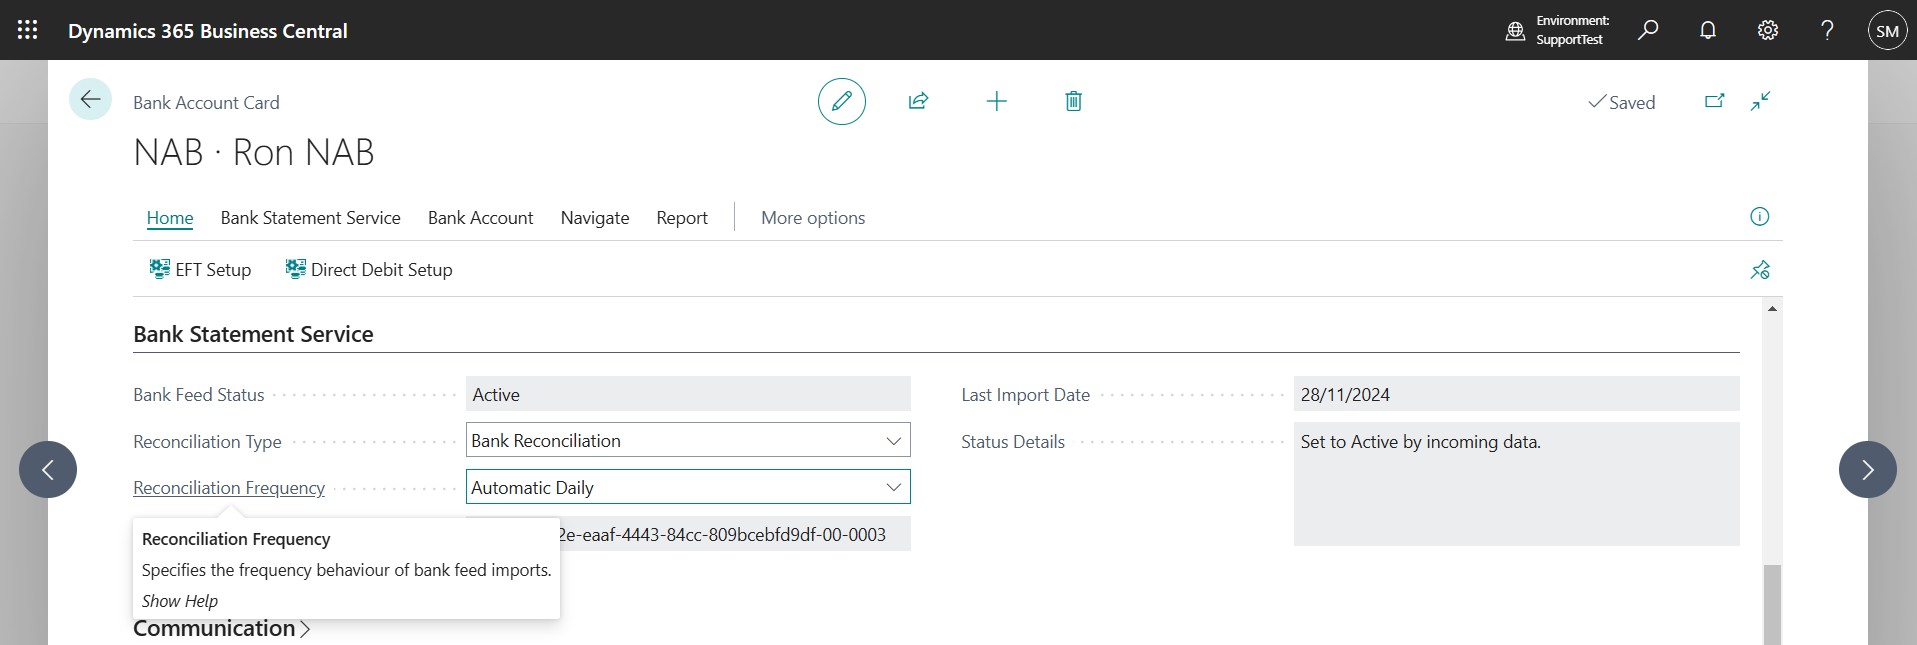
- The Bank Statement Service section is used when a bank feed is registered with the bank account. Setting up your bank feeds refers to registering your bank account to enable automated bank feed imports.

- Reconciliation Frequency: Check your active and enabled Bank Account cards to confirm there is an Automatic Daily reconciliation frequency assigned.
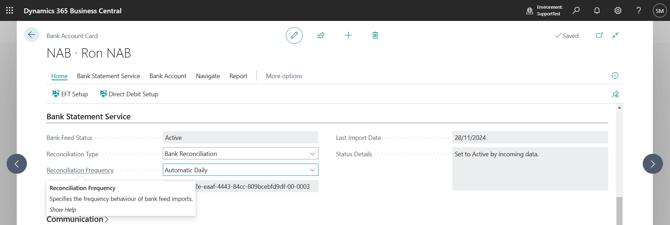
- Reconciliation Frequency: Check your active and enabled Bank Account cards to confirm there is an Automatic Daily reconciliation frequency assigned.
- The Communication section is used to record the contact details of the bank account.


- The Posting section is important to update when you’re posting transactions for the bank account.

-
- The Currency Code field refers to the type of currency you select for the bank account. If all transactions in the bank account are in the local currency (LCY) for the current company, leave the currency code blank. If not, specify a currency code by selecting the drop-down arrow on the currency code field.
- The Bank Acc. Posting Group field is a setup that determines the G/L account into which the bank transactions will be posted for this bank account.
- By selecting the drop-down arrow, you can select the pre-populated posting group. To see the full list, select the link ‘Select from full list’.
- The Last Statement No. and Last Payment Statement No fields will automatically populate when a payment reconciliation or bank reconciliation process is run.
Note: When you create a new bank account, you can reuse an existing bank posting group. Bank transactions will be posted to the same general ledger accounts as other bank accounts sharing that bank posting group.
- The Transfer section relates to the import and export of bank feeds and files.
- The Bank Statement Import Format field is to identify an import format. This is handy if you’re creating a bank account for EFT or Direct Debit.

- The Bank Statement Import Format field is to identify an import format. This is handy if you’re creating a bank account for EFT or Direct Debit.
- Your bank account has been set up now. You can use your bank accounts to keep track of your banking transactions.

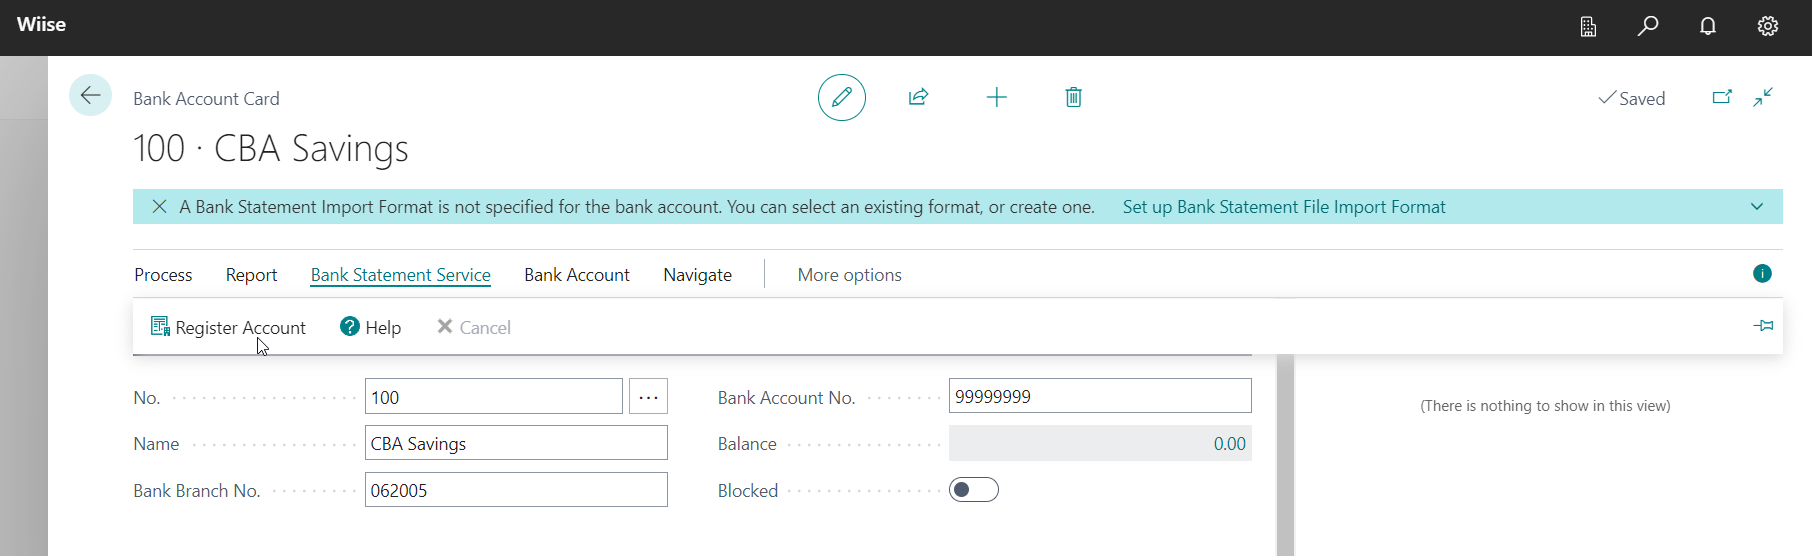
4. Register your account
- Select the Bank Statement Service menu and from the drop down, select Register Account.
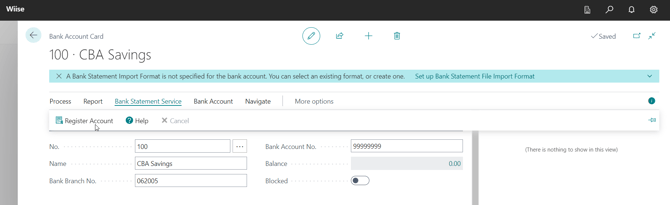
Note: If the Register Account menu item doesn’t appear then your Bank Branch No. (BSB) isn’t supported for bank feeds. Re-check your bank details to make sure your BSB and Bank Account No. are correct.
Note: If you have any issues at this point, please reach out to Wiise Support so we can check with ACSISS for you. - Once you’ve selected the Register Account, a partially completed PDF form will be generated for you to download and save it to your PC. The form would have partially completed details from the creation of your bank account.
- The registration process varies by bank. For some, you’ll need to complete and sign the PDF form and return it to ACSISS, while with some banks you can complete an online process to activate your feed.
- SISS will contact your bank to set up the data feed and check the authority on the account.
Note: Please make sure to include the signatures of all signatories who are registered for the business bank accounts on the registration form. It's important to ensure that all necessary parties have authorised the registration process. - When ACSISS registers your data feed successfully, your Bank Feed Status will show an Active status and transaction data should start showing on the Bank Feed Entries screen within 24 hours.

- Go to your Bank Account Card and select Bank Statement Service.
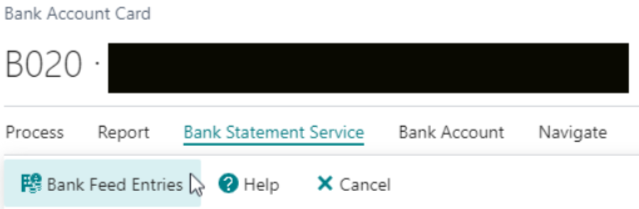
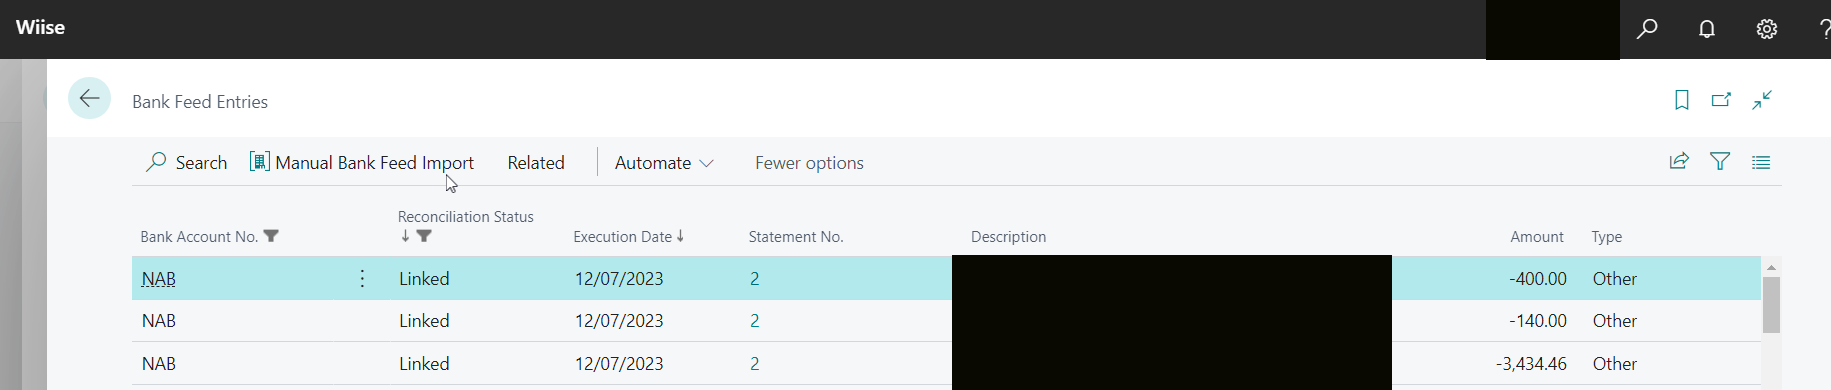
- Select Bank Feed Entries. You’ll see a list of transactions imported from SISS for this bank account.

Note: During the bank feed registration process, you can check the Bank Feed status of your bank account to track the progress. - Go to your Bank Account Card and select Bank Statement Service.
- You’re done. If you see the Bank Feed Status of your bank account as Active, you’ll be able to see your active daily bank feed entries in Wiise within 24 hours.


5. Link your bank account to your bank feed
Note: Find out how to set up bank and payment reconciliations using bank feeds.
- You’ve now linked your bank account to your Wiise bank feeds.
Note: Bank transaction feeds are updated each morning at 9am with data from the previous day. Only posted transactions will be imported into Wiise.
Note: If the Import bank feeds in the Job Queue entries page are in error, please restart the job queue. Please ensure the user executing the Restart action has been assigned a Wiise full user license with SUPER permissions. The Scheduled field is selected, allowing the job queue entry to run automatically as scheduled.
Note: For any missing bank feed transactions, go to the Bank Feed Entries page, and manually import the missing bank feed transactions.
What's next?
Now you know how bank feeds work, you’re ready to reconcile your bank account via the bank account reconciliation or payment reconciliation journals.
Having trouble?
- Check our bank feed system status updates
- Find more help using our bank feed troubleshooting guide