Overview:
- Learn how to set up physical order recording at your warehouse.
Why set up physical order recording?
Physical order recording gives you a real-time view of your actual inventory, helping to fix any differences between what's on your warehouse shelves and what's in your system.
How to set up physical order recording?
Create a new physical inventory order
- Select Physical Inventory Orders on your Wiise landing page from your Inventory Manager role.

- The page displays. Select New to create a new inventory order. A new inventory order displays.
- Fill in the necessary fields in the General section.

- Provide a brief inventory order Description.
- Update a Location for the inventory order.
- Include a Person Responsible for the order or leave blank.
- Update the Order Date and Posting Date.
- If required, update the dimensions for the order.
Note: You can create many inventory orders, for example, one different order for each location. - Fill in the necessary fields in the General section.
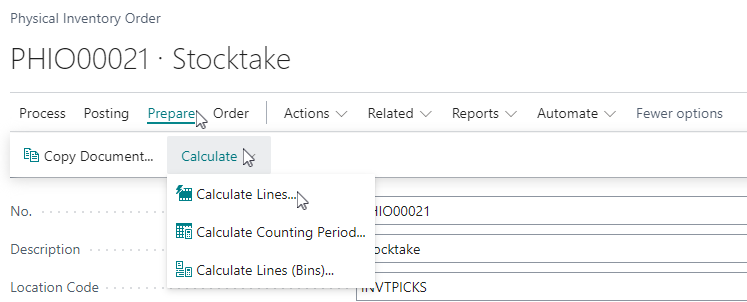
- Select Prepare. Then, select Calculate. From the drop-down menu, select Calculate Lines.

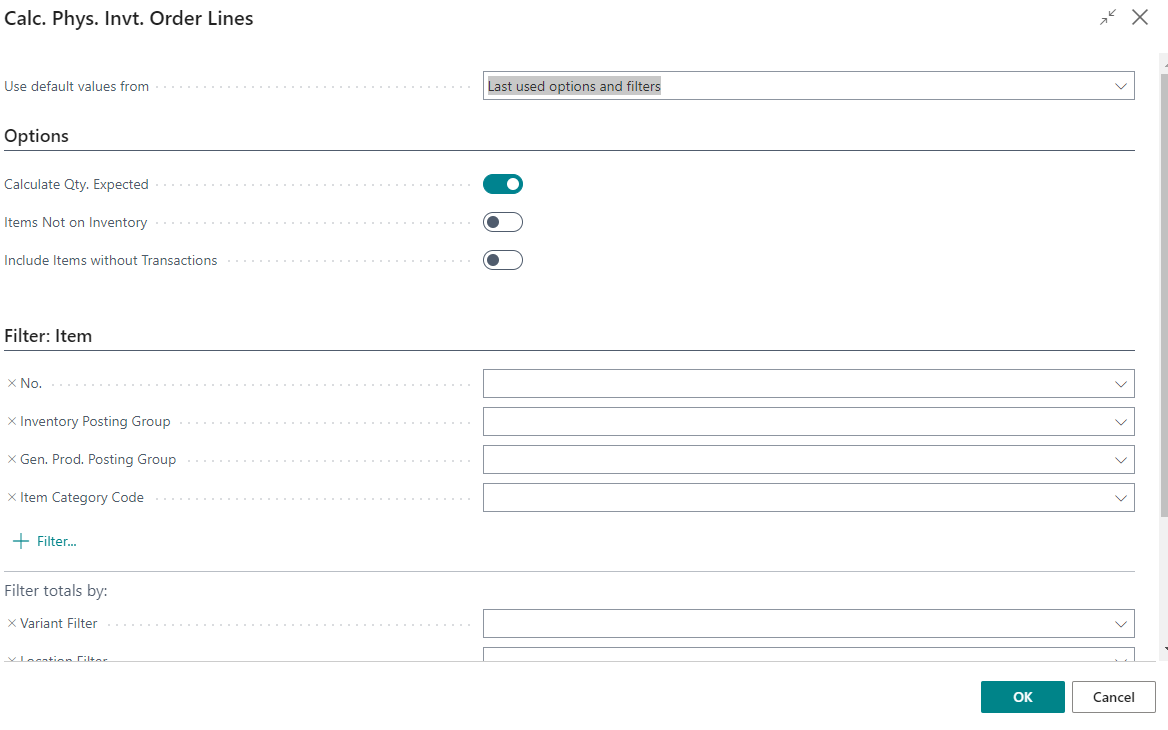
- The Calc. Phys. Invt. Order Lines displays.

-
- Fill in the Options and Filter: Item sections.
-
-
- Options section:
- Calculate Qty. Expected: Enable this field to calculate and insert the quantity expected for new physical inventory order lines.
- Items Not on Inventory: Enable this field to specify if the inventory order lines should be created for items, items where the value in the Qty. Expected (Base) field is 0.
- Include Items without Transactions: Enable this field for items not on inventory or in any transactions.
- Filter: Item section:
- Include your desired filters on the request page.
- Options section:
-
5. Select OK to proceed. Line items are created and added to the Lines section.
6. You can now make a new inventory recording which is a manual process without going through OnTime.
Note: To generate the stocktake process in OnTime, after you've calculated lines in the physical inventory order, select New Device Recording. This process creates the Stocktake process in the To-do list on the OnTime app.
Warehouse bins are separated which allows a different warehouse worker to perform the stocktake count.
Note: You can use the Warehouse OnTime app to complete the Stocktake process. When the warehouse worker completes the stocktake process on OnTime, the physical inventory order in the Wiise ERP desktop is updated as a Finished status.
Set up physical order recording
Note: You can set up one more physical order recording, all related to one single inventory order.
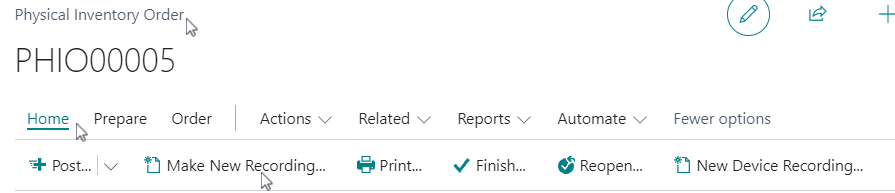
- On the Physical Inventory Order, select Home. Then select Make New Recording.

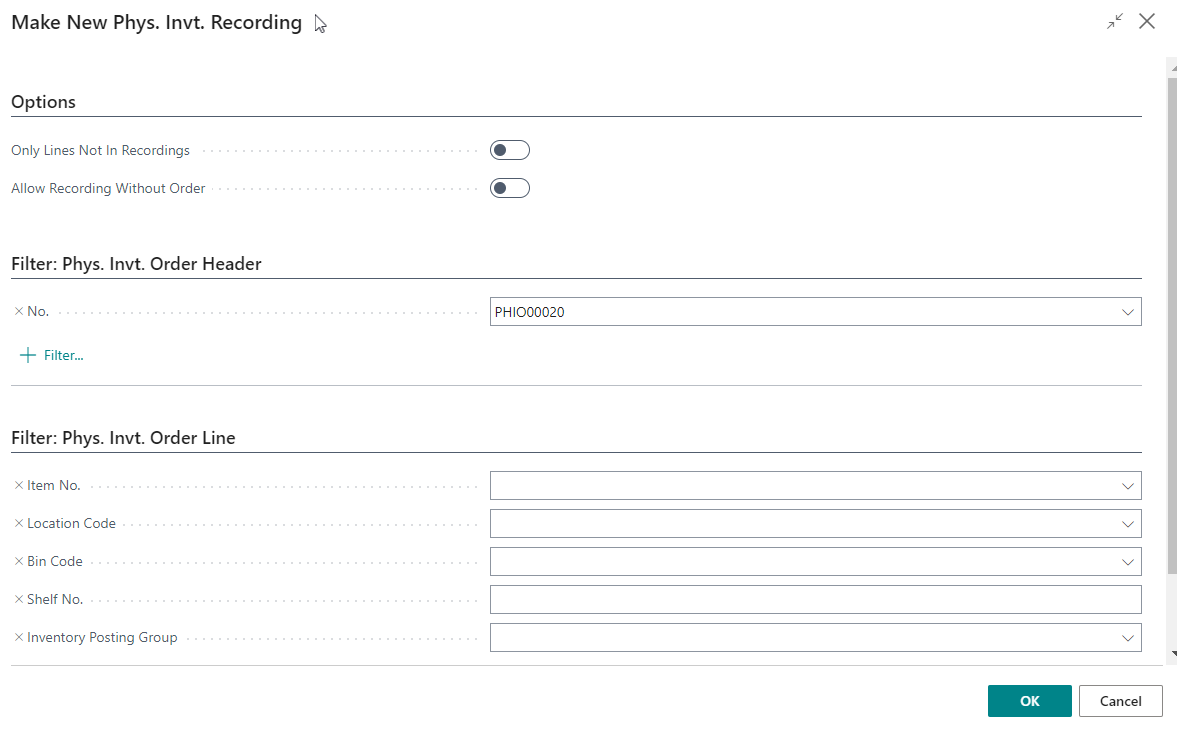
- The Make New Phys. Invt. Recording request page displays. Update the sections as required.

- Select OK when done.
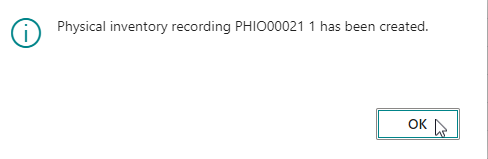
- An information box displays confirming that a physical inventory recording has been created.

- Select OK to confirm.
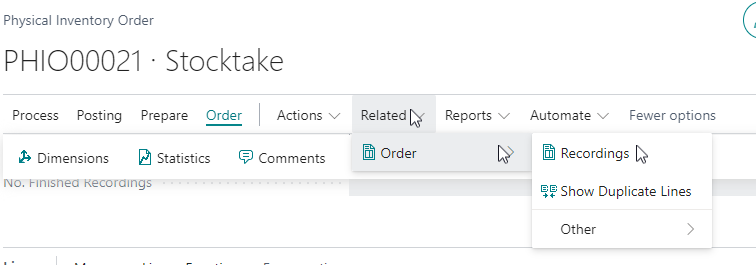
- Select Related. Then, select Order.
- From the drop-down menu, select Recordings. This action opens the new inventory recording document directly from your inventory order.

- The Phys. Inventory Recording List displays. The list contains all physical order recordings. Select your related order recording.

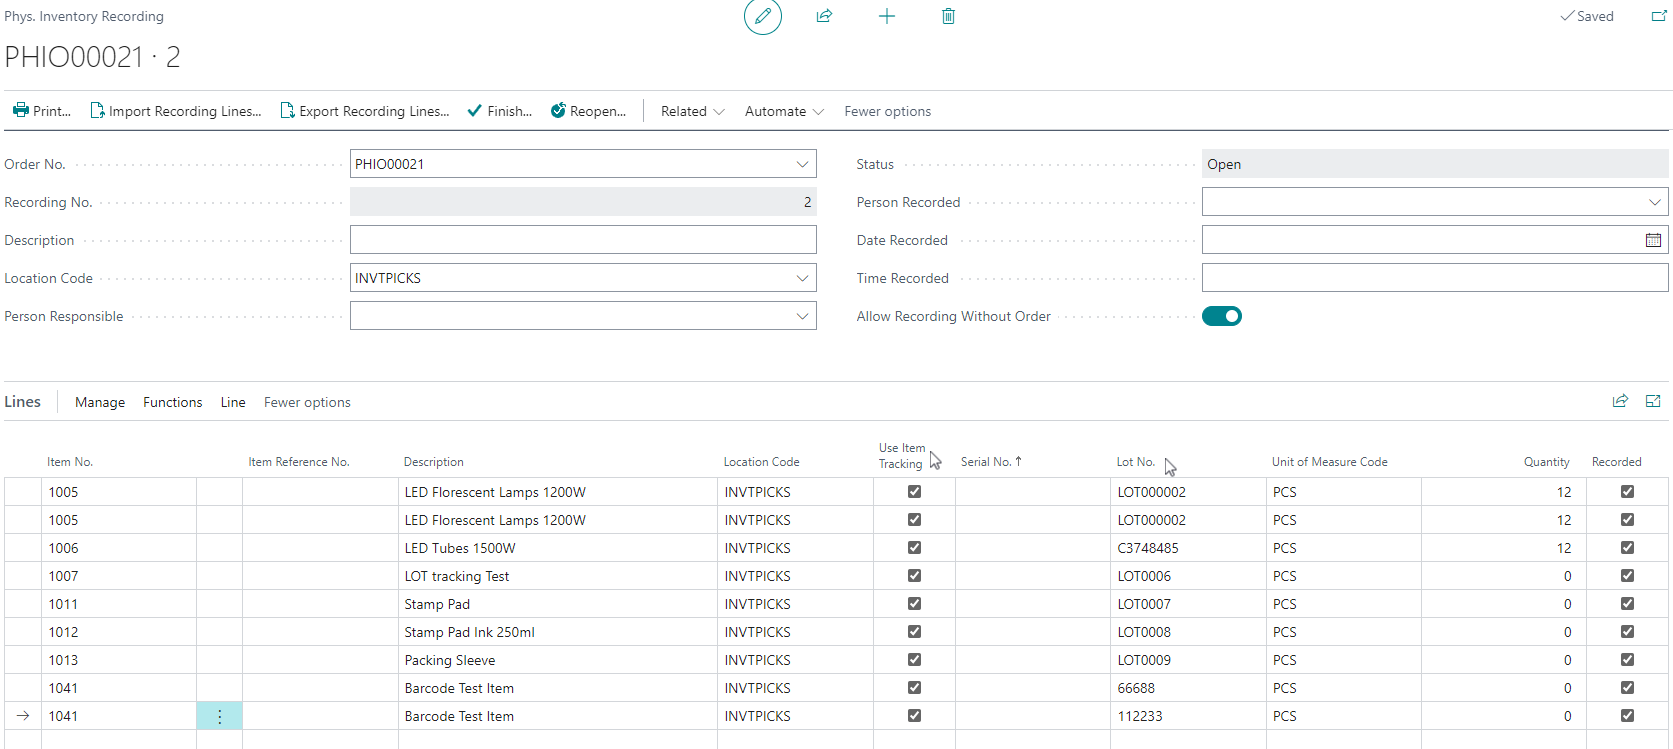
- The Physical Inventory Recording displays.

- General section:
- Provide a brief Description as this is populated on the Stocktake task in OnTime.
Note: In the General section, enable the Allow Recording Without Order toggle button to automatically create recording lines for items not on the physical inventory order if the following fields are missing such as Item No., Variant Code, Location Code, and Bin Code.
Note: If the Use Item Tracking fields are enabled, the Serial No., and Lot No., will need to be updated. - Provide a brief Description as this is populated on the Stocktake task in OnTime.
- General section:
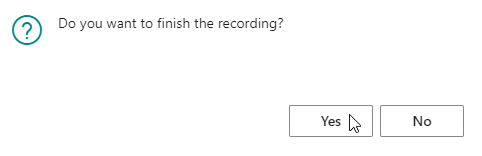
- If you've manually updated the stocktake without using OnTime, select Finish to post the physical inventory recording and update the status to Finished.

- A prompt display to confirm “Do you want to finish the recording?”. Select Yes to proceed.

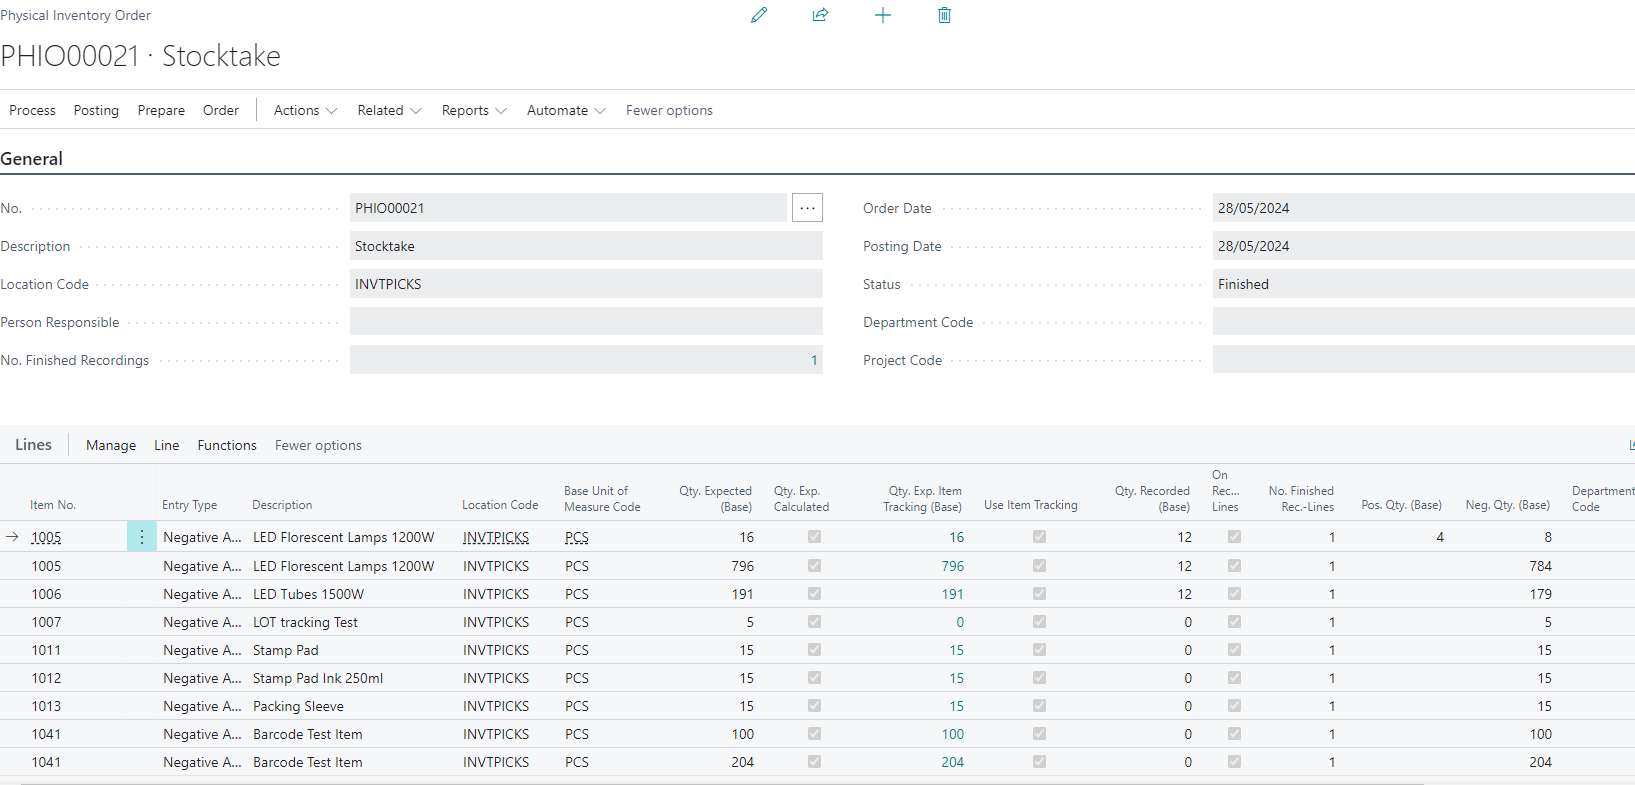
- The physical inventory recording status is updated as Finished. Go back to your physical inventory order and you can see the Qty Recorded (Base) field rows have been updated.

- Select Process, then select Finish to update the status on your physical inventory order.
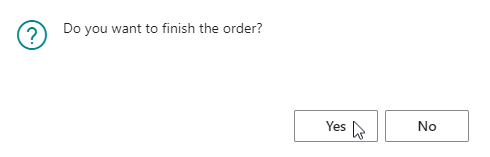
- A prompt displays to confirm “Do you want to finish the order?”.
- Select Yes to proceed or No, to stay on the page.

- Select Yes to proceed or No, to stay on the page.
- The status is updated as Finished.
Note: Wiise populates the Entry Type, Pos.Qty (Base) and Neg.Qty (Base) fields based on the Qty.Recorded (Base) that was set.
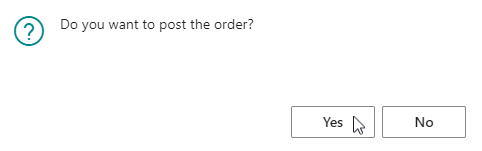
- Select Posting, then select Post. Item ledger entries are created, and the physical order is posted.
- A prompt displays to confirm “Do you want to post the order?”.
- Select Yes to continue. The physical inventory order is posted and the page closes.

- Select Yes to continue. The physical inventory order is posted and the page closes.
Note: You can find the Posted Physical Inventory Order by searching on the top right-hand corner of the page. From there, you can print the Posted Phys. Inventory Order Difference List and use that to conduct physical stock take.
Note: You can print the Physical Inventory Order Difference List before counting stock and posting the numbers.
Note: You can find all the posted inventory orders from the item ledger entries. - A prompt displays to confirm “Do you want to post the order?”.
- You’ve set up physical order recording.


Note: The Warehouse Ontime app can be used to complete a stock take.
What’s next?
Find out how to conduct a physical stock take at your warehouse.
Need more help?
No problem, that's what we're here for. Reach out to support@wiise.com anytime you can't find what you're looking for.