Overview:
- Learn how to personalise Wiise for you.
Why personalise Wiise?
You can use the Personalisation function to change the layout on a page, by adding or hiding fields, displaying or removing columns and in some cases reorganising the layout.
Note: Personalisations affect only your workspace in Wiise. You can personalise all types of pages, including the Wiise landing page.
How to personalise Wiise for you?
- Go to the page you want to personalise.
- Select the Settings icons on the top right-hand corner of the page. From the available options, select Personalise.

- The Personalising banner displays. Here are some things you can do:

- See what page you’re on the top left corner of the banner page;
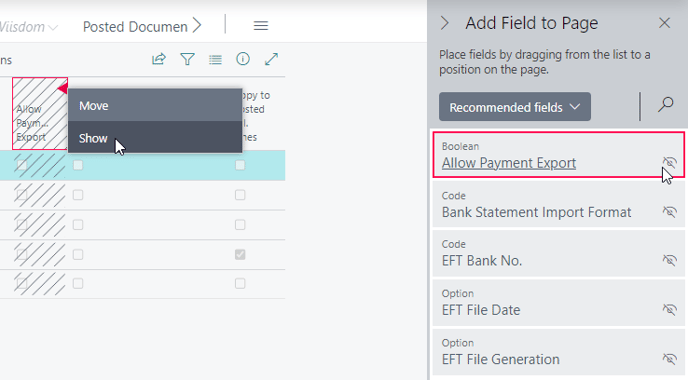
- To add a field, select +Field. From the Add Field to Page pane, drag and drop a field into your desired position on the page.
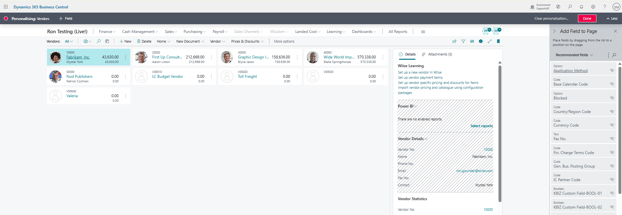
- You’re provided with recommended fields you can add to the page. You can see if a field is already displayed or is hidden.
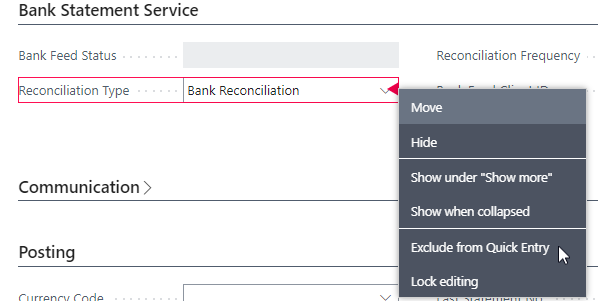
- Point your cursor to an action field to change it. The field highlights with a red arrowhead or border depending on the options available. You can move, show, or hide the field.
- On a Fasttab:
- You can select a field to Show always or Show when collapsed to display important fields.
- You can lock any further editing or unlock fields that you’ve previously locked.
Note: Some fields are locked by default either by design or by a profile admin who has customised the page. These fields can’t be unlocked using the Personalisation function.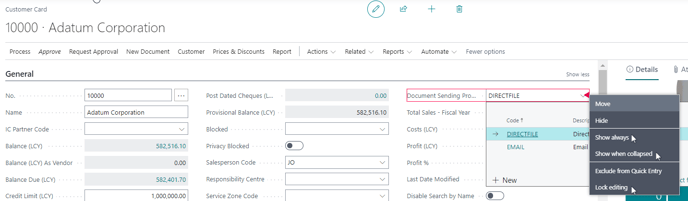
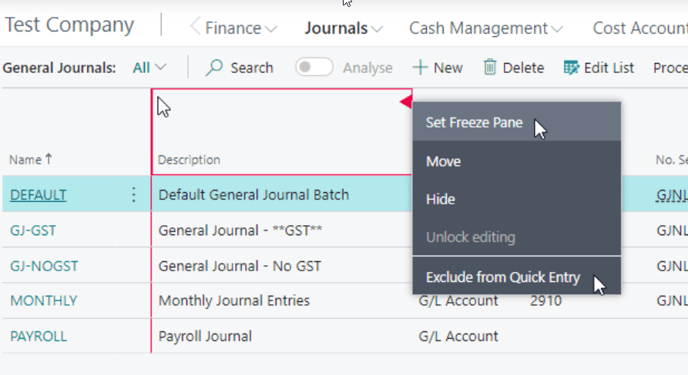
- Set Freeze Pane or Clear Freeze Pane in a column and move the freeze pane to another column.
- Resize a column on any list, so you can get a clearer view of the information on your page. Using your left mouse clicker, double-click the boundary between two columns to autofit the width of the column. The width of the column adjusts to an optimal size.
- Note: : Simplify your data entry by using Quick Entry. You can use the Enter key on the keyboard to move through only the fields that you’re interested in. Quick Entry works on fields (card pages) and in lists (rows and columns). It is useful when you’re doing repetitive typing tasks that require creating multiple records in sequence.
- In the Personalise banner, select the field you want to update and select either Include in Quick Entry or Exclude from Quick Entry.


Note: Need to get to a function not included in Quick Entry? Find out how to speed up your day with keyboard data entry shortcuts.
-
- When you’ve completed your updates, select Done to exit the Personalisation function.
- You’ve personalised Wiise for your workspace.
Note: You can clear any personalisation. Once cleared, you’ll need to redo the personalisation if required.
What’s next?
Find out how to navigate Wiise for Accountants.
Need more help?
No problem, that's what we're here for. Reach out to support@wiise.com anytime you can't find what you're looking for.