Overview:
- Learn to find your way around Wiise
- Use Get Started checklist to set up Wiise step by step
Why use Get Started Checklist?
The checklist helps you to set up key features you need to start using Wiise. You’ll be guided through a step-by-step process, reducing errors and save time on your initial setup.
Before you Begin
- You’ll need a new company created in Wiise
Note: If you’re logging in to Wiise for the first time after it has been provisioned, you can use the Get Started checklist to complete your setup.
How to use Get Started Checklist?
- Go to your new Wiise company.
Note: The Get Started checklist displays on the top of your Wiise landing page just above Wiise Insights.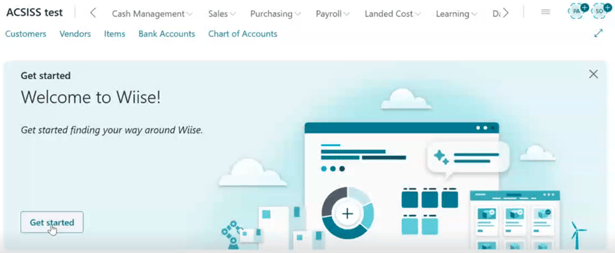
- Then, select Get Started to launch the step-by-step process. You'll need to work through the steps.
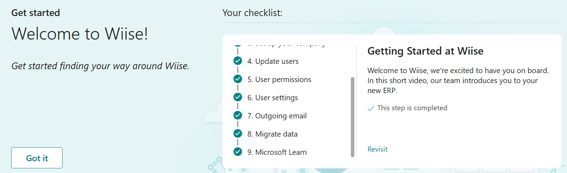
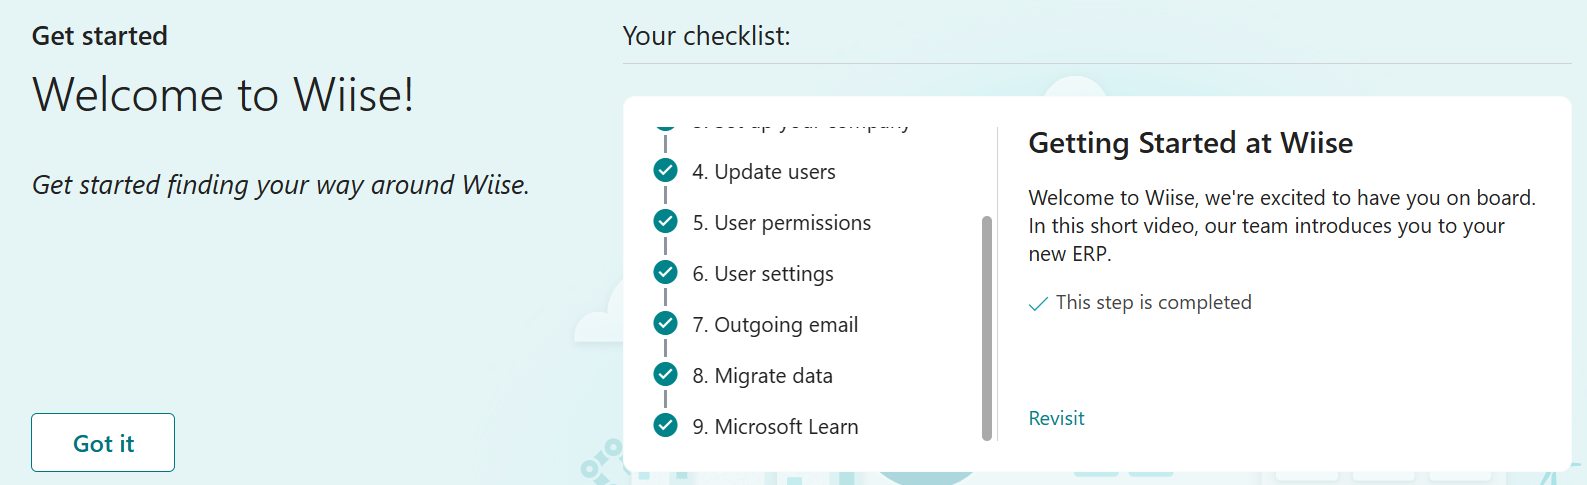
- There are eight steps to getting started at Wiise:

- Welcome to Wiise: Watch an introduction video.
- A first look around
- Set up your company
- Update users
- User permissions
- User settings
- Outgoing email
- Migrate data
- Microsoft Learn
- Complete the step-by-step process to start using Wiise for your business.
- Select Got it to close the checklist. The checklist disappears from your Wiise landing page.

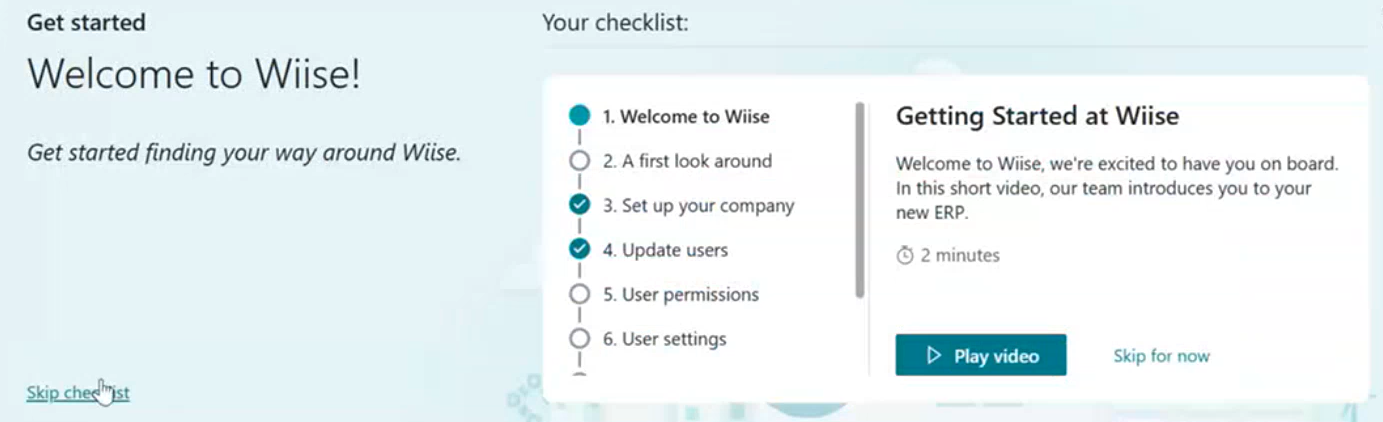
Note: You can always display the Get started checklist by searching for Show the checklist on the top right-hand corner of the page. Select the relevant link and the checklist displays on your Wiise landing page.
Tip: You don’t need to complete all tasks in one go. You can come back later to complete the setup. If a task isn't relevant for your business, you can skip it.
What’s next?
Find out how to set up your company using Assisted Setup.
Need more help?
No problem, that's what we're here for. Reach out to support@wiise.com anytime you can't find what you're looking for.