Set up your company in Wiise
Overview:
- Set up your company using the assisted setup guide.
Why use the assisted setup guide in Wiise
The Set up your company assisted setup is a guided process to setup your company in Wiise without missing any required information.
For example, your company’s address will be displayed on invoices and other documents, and selecting the right industry group allows Wiise to create your industry specific chart of accounts.
How to set up my new company in Wiise
- Log into Wiise and go to your newly created company.
- In your chosen company, search for Assisted Setup and select Assisted Setup in the Go to Pages and Tasks section.
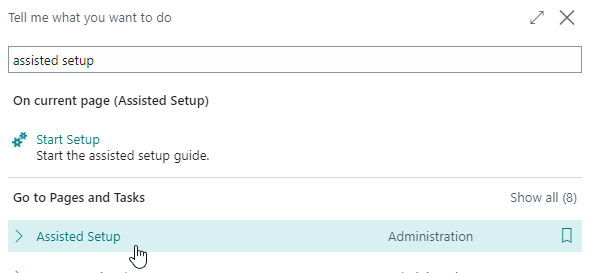
- Select Set up your company action.

- The Company Setup assisted setup wizard page displays.
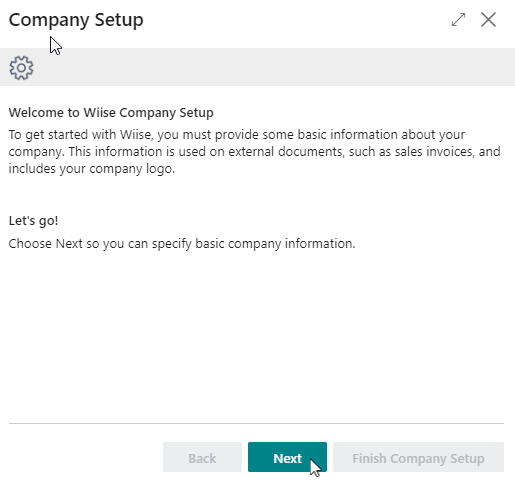
- Select Next to update your company’s address information and logo.
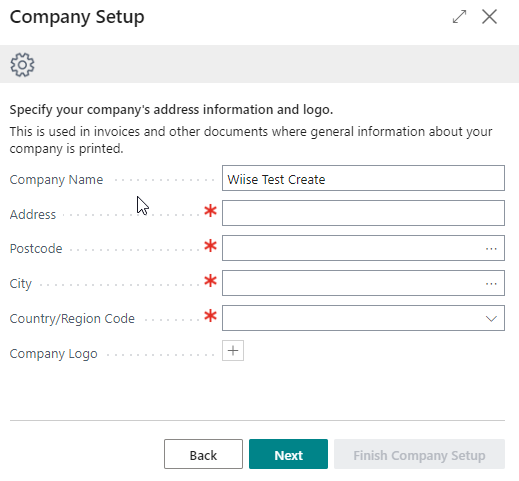
- Fill in the fields marked with the red asterisks (*) as these are mandatory. Update the company’s address, postcode, city, and region, and upload a company logo.
Note: You’re only allowed to upload a PNG file for your company logo. Other file formats are not accepted. - Select Next to continue.
- You’ll now need to specify the contact details for your company. Update the phone number, email, and home page which is your company’s website.
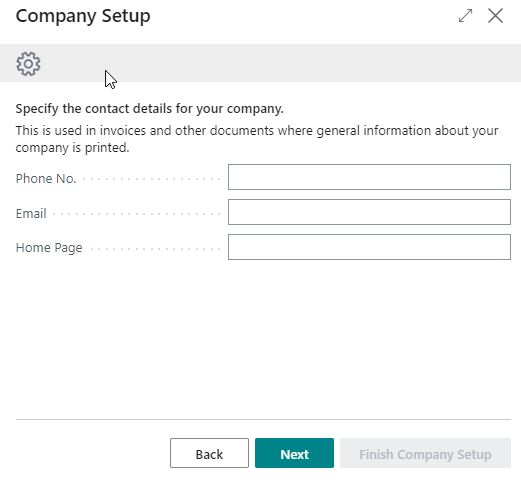
- Select Next to continue.
- You'll need to update your company’s bank information.
- Fill in the fields marked with red asterisks as these are mandatory.
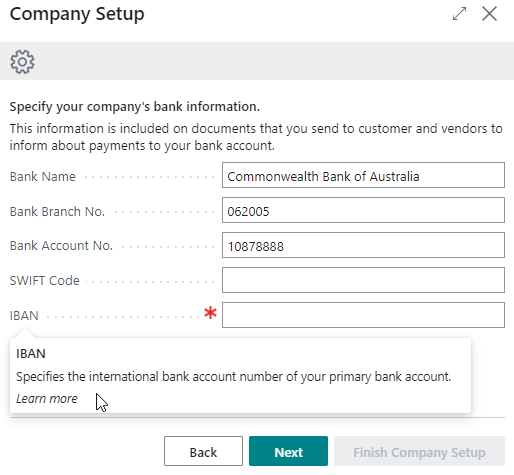
Tip: If you're unsure of the meaning of the fields, not a problem. Hover your mouse pointer over the field to know what it means. - You’re doing well at this point. Let’s keep going.
- Once you’ve completed updating your bank information, select Next to continue.
- The next screen asks you to configure your accounting method by filling in your details.
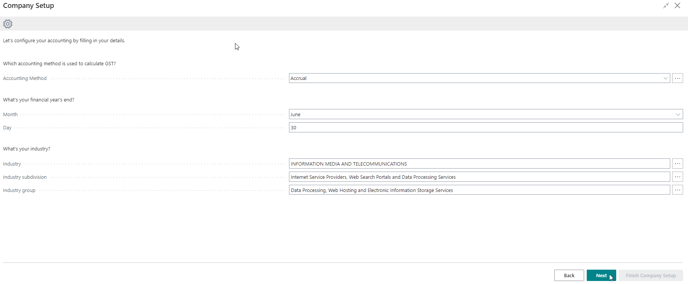
- What is your accounting method? Accrual or Cash?
- What’s your financial year’s end? June 30?
- What’s your industry? By specifying your industry, an industry-specific chart of accounts is populated into this company for you to use.
- When you’ve completed all the details, select Next to continue.
- In the next screen, you’ll be asked to update your reporting insights by setting up reporting tags which are Wiise dimensions.
Note: Dimensions are used to categorise your transaction data for reporting and analysys purposes. There are two global dimensons and six shortcut dimensions.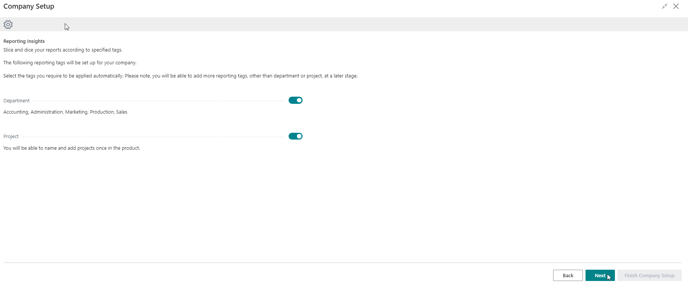
- Once you’ve updated your reporting insights, select Next to continue.
- Finally, select Finish Company Setup to prepare Wiise for first use.
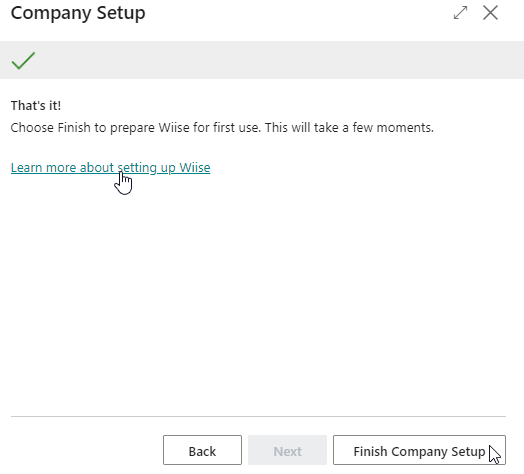
- That’s it and you’re done.
- For more information, select Learn more about setting up Wiise.
What's next?
Find out more about how to set up your chart of accounts.
Need more help?
No problem, that's what we're here for. Reach out to support@wiise.com anytime you can't find what you're looking for.