Overview:
-
Learn to set up back-order notifications
-
Learn to use back-order management with sales order
-
Email your customer on back order or fulfillment notification
-
Use reports for back order management
Why use back-order management?
Back-order management helps you track and fulfil delayed orders efficiently in Wiise ERP desktop. It keeps customers informed, improves stock allocation, and ensures you deliver items as soon as they become available.
Before you begin:
-
Item Cards are set up on Reserve field as either Optional or Always.
-
Item Cards have the appropriate Vendor you’d be purchasing from.
-
Sales Orders must exist in Wiise ERP for items that do not have stock available.
How to use back-order management?
You’ll need to set up back order notifications first as Wiise requires a designated email template and contact rules before it can send any back-order or fulfilment emails. Without this setup, the system doesn’t know who to notify or which message format to use.
Here are the steps:
-
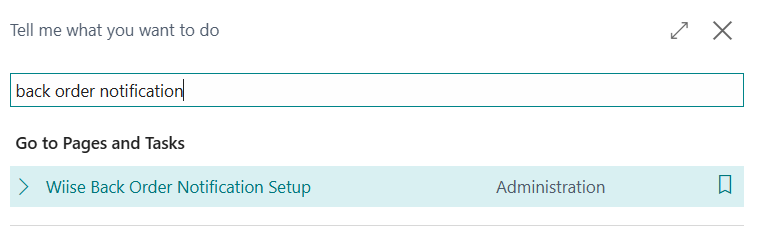
Search for Wiise Back Order Notification Setup on the top right-hand corner of the page.

-
Select the relevant link and the page displays with the the Back Order Notification and Fulfillment Notification templates.

-
If you're setting up these email templates for the first time, select Actions. Then, select Reset to Default.
Note: You can always reset to default at any time.
Note: A user with SUPER access can customise the templates and set rules for when emails are sent. These emails automatically notify customers if an order is on back order or ready to ship.
Note: When you send the email, the system replaces the placeholders with real values:
-
%1: Customer Name
-
%2: Item Number
-
%3: Item Description
-
%4: Order Number
-
%5: Quantity
-
%6: Unit of measure
-
%7: Expected availability rate
-
-
You’ve now set up your back order notification.
Understand how read the Wiise Back Order Management list
-
Select Sales on your Wiise landing page. Then, from the drop-down menu, select Wiise Back Order Management.

-
Wiise Back Order Management list displays details of each back-ordered item:

- Location: View orders linked to the warehouse location.
-
Item No: The item SKU or number
Note: You can select Show Item Card on the item header to view the item details.
-
Description: Description of the product
-
Sales Order No: The sales order number for the back order. Select the hyperlink to view the full order.
Note: You can select Show Sales Order action menu or select the hyperlink to view the full sales order.
-
Customer: Identifies the customer associated to the sales order
-
Supply From: Identifies the vendor associated to the back order
-
Shipment Date: The date you plan to send the goods to the customer.
-
Quantity: The quantity that is being shipped to the customer.
-
Unit of Measure Code: The unit type of the item
-
Qty. Needed (Base): Quantity needed for fulfillment. The item is shown in red if stock is not available.
-
Reserved Qty. (Base): Quantity that’s reserved for the order
-
Qty. Available (Base): How much stock is available in the selected location
-
Qty. to Order (Base): The amount of items that need to be ordered.
-
Available for Transfer (Base): Any available stock in other location that can be transferred to this location
-
You now understand how to use the back order management.

Note: Each line shows a back order waiting for action or fulfilment.
Note: Red values in the quantity fields indicate stock shortages.
Note: Select Create Purchase Order to create a purchase order directly from the line and procure stock.
Note: Select Refresh Data to update the Back Order Lines list with the latest status.
Note: Select Send Back Order Email or Send Fulfillment Email to notify them when a back order is created, delayed, or ready for shipping.
Create Purchase Order with Reservation
-
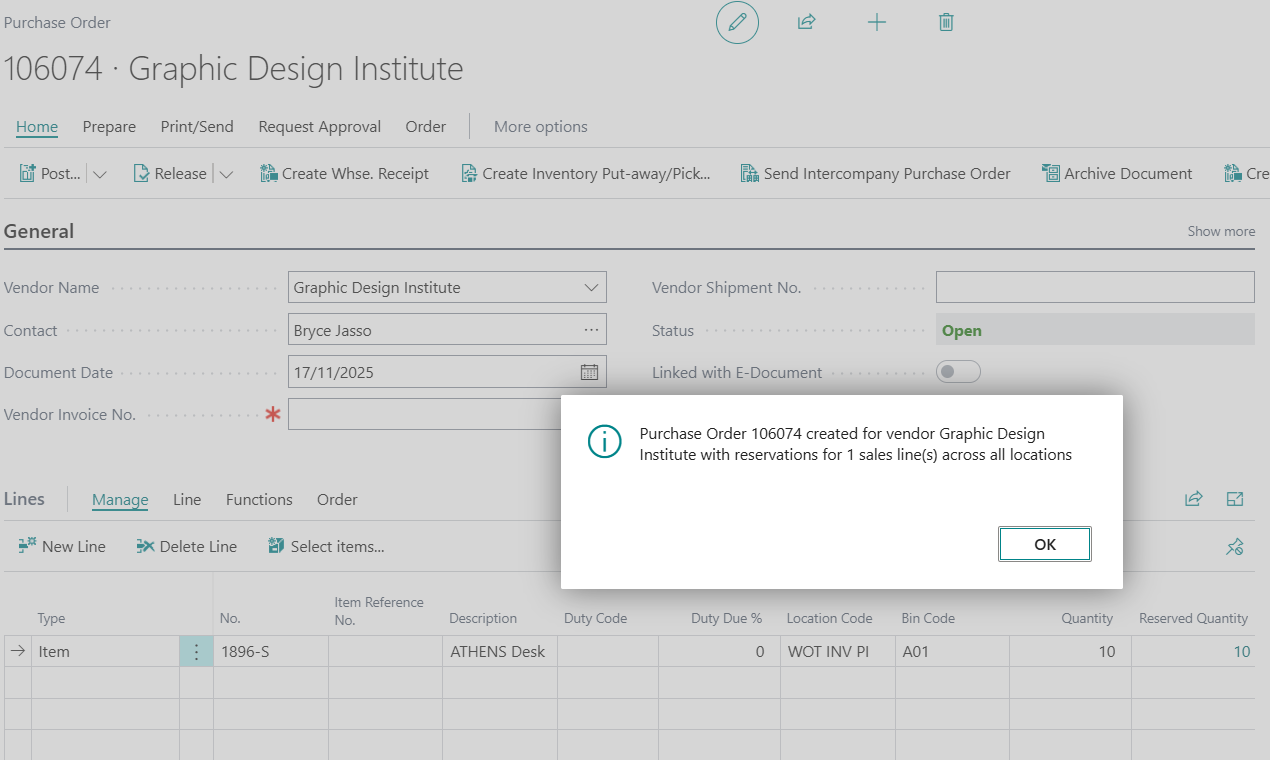
Select Create Purchase Order on a selected back-order line.
-
A new purchase order is created and the number of quantities reserved is allocated to the order.
Note: The Reserved Quantity field on Lines section is updated when the purchase order with reservation is created.
-
A message displays the details.

-
Select OK to close the message.
- You’ve created a purchase order with reservation.
Note: You can now complete the purchase order process.
Note: You can also create purchase order by vendor with reservation by selecting Create PO by Vendor. You just need to make sure that the Item Cards have the appropriate Vendor you’d be purchasing from.
Note: Select Item Availability by Location to view stock for each line across all warehouses. Even if your own location has stock, the system treats each line individually and suggests alternate locations where the item is also available. This helps you decide the best location to fulfil the back order or if you need to raise a purchase order to avoid delays.

Before you begin:
- Ensure that the Back Order Notification Setup is set up.
- There are two options which are Send Back Order Email and Send Fulfillment Email.
- Select a back-order line. Then, select Send Back Order Email.

4. The Back Order Notification email template is auto populated from the Back Order Notification Setup.
Note: You can review and edit the message, add attachments and when you’re ready, Send email.
Note: Use the same process for the Back Order Fulfillment email.
Note: Back orders are filled in before new sales orders. You can change this if you have a new order that is urgent.
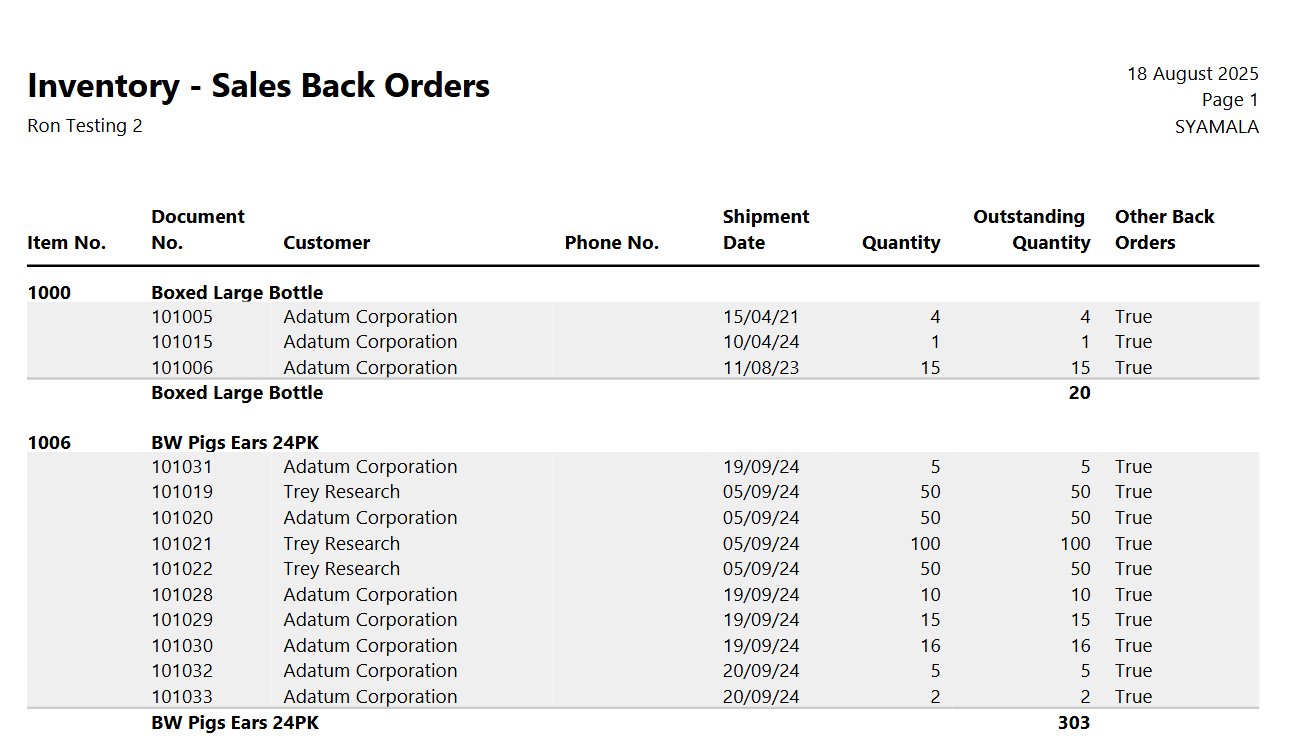
Note: Use the Inventory for Sales Back Orders report to see sales orders that can't be shipped due to out-of-stock items. It shows overdue lines along with order and customer details.
What’s next?
Find out how to update the delivery date on a Purchase Order.
Need more help?
No problem, that's what we're here for. Reach out to support@wiise.com anytime you can't find what you're looking for.