Overview:
- Learn how to use planning worksheet.
Why use the planning worksheet?
The planning worksheet is a tool for managing material needs and production schedules. It helps automate planning to ensure you have the right materials in the right amounts, at the right time and place. This helps balance supply and demand, reducing inventory costs and ensuring products are available when needed.
How to use the planning worksheet?
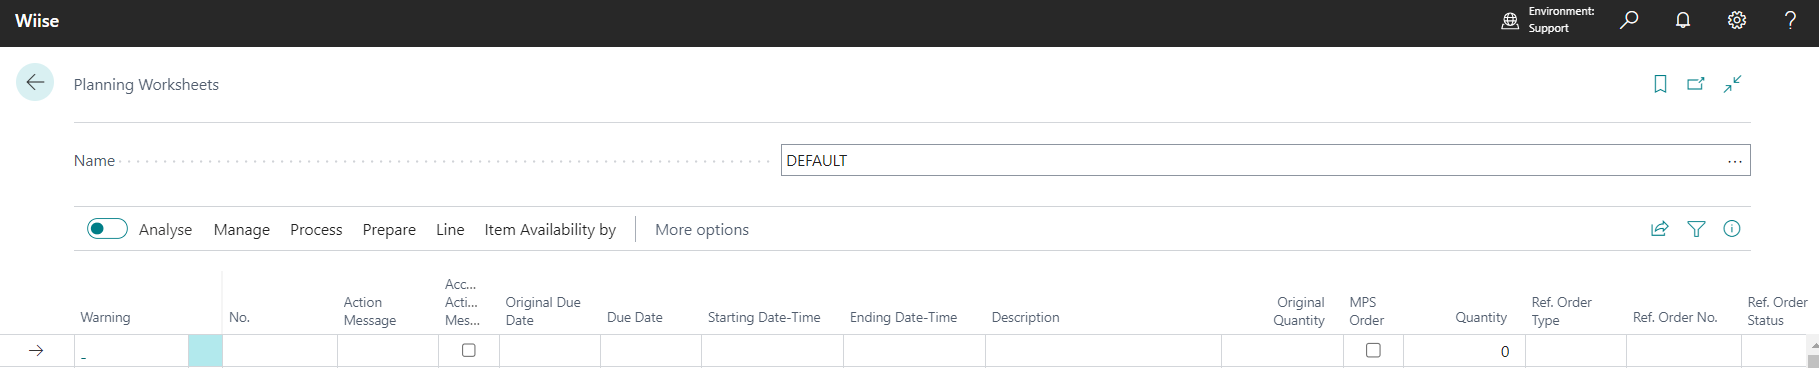
- Search for Planning Worksheets on the top right-hand corner of the page. Select the related link. The planning worksheets page displays.

- Select Prepare. Then, select Calculate Regenerative Plan batch job.

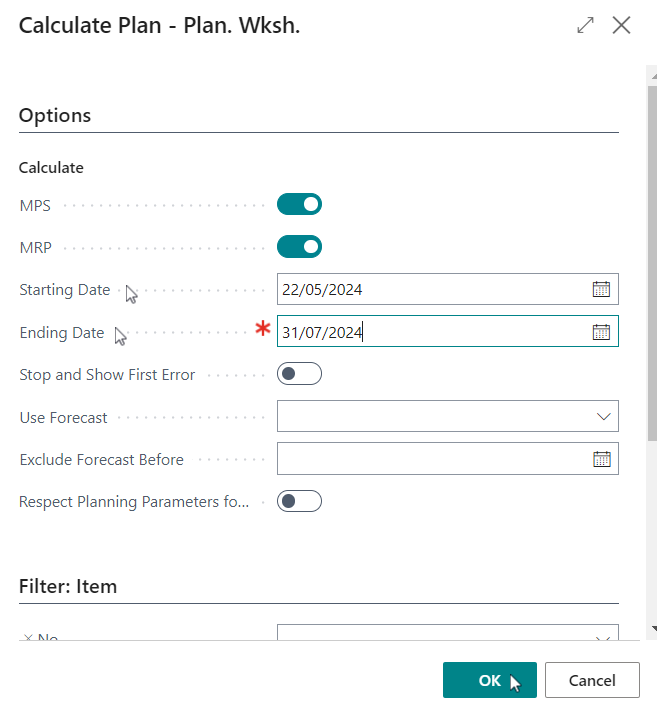
Note: The Calculate Regenerative Plan batch job plans for all items, even if nothing has changed since the last run. Use this when there are changes to master data or capacity that impact all items and the entire supply chain. - The Calculate Plan – Plan. Wksh. request page display.

- In the Options section, set a Starting Date and Ending Date.
- The Starting Date field indicates the date for new orders used to assess inventory.
- The Ending Date field indicates the date when the planning period ends. Demand is not included beyond this date.
- Enable the Stop and Show First Error toggle button: This stops the planning run when it encounters an error. If it stops, a message will display details about the first error.
- The Use Forecast field is a forecast you’ve set up that should be included as demand when running the planning batch job.
- Enable the toggle button for Respect Planning Parameters for Exception Warnings: If you check this box, planning lines triggered by safety stock will follow the planning parameters such as Reorder Point, Reorder Quantity, and Maximum Inventory, as well as all order modifiers. If you do not check this box, planning lines will only meet the exact demand quantity.
- Include filters in the Item section if required.
- Select OK to continue.
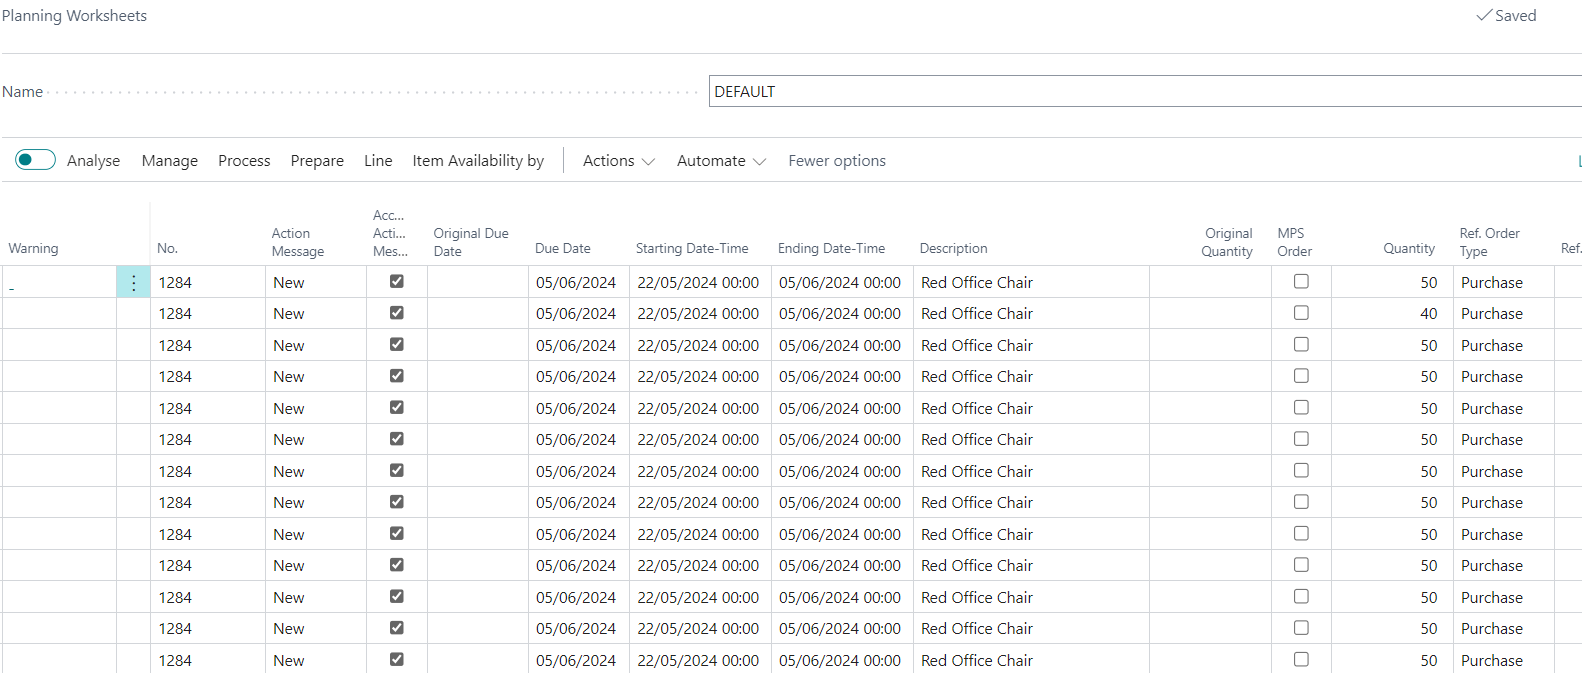
- The Planning Worksheet is generated with all items based on the demand forecast.

- In the Options section, set a Starting Date and Ending Date.
- When you’ve reviewed the planning worksheet list and updated which items need to be reordered, select Process, then select Carry Out Action Message. The carry out action message uses the batch job to help you create actual production, assembly, purchase or transfer orders. The Carry Out Action Msg. - Plan request page displays.

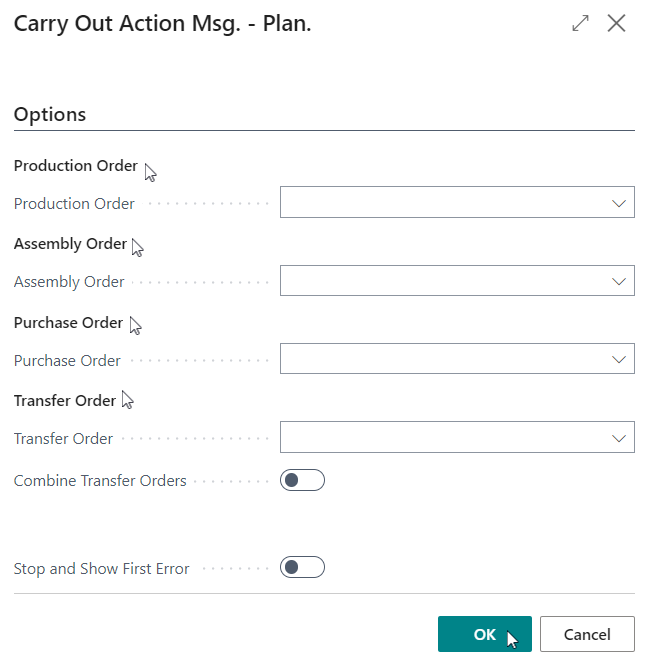
- From the Options section select the appropriate type of order from the drop-down menu that you want to make on the planning worksheet.
- Production Order: Select this order if you want to create production orders for an item using the Prod. Order replenishment system. You can choose to create either planned or firm planned production orders.
- Assembly Order: Select this order created for items with the Assembly replenishment method.
- Purchase Order: Select this order to create purchase orders for items with the Purchase replenishment method.
Note: You can copy your planning worksheet purchase orders to the requisition worksheet to consolidate all your planning data allowing you to review and adjust before you generate purchase orders. - Transfer Order: Select this order if you want to create transfer orders for items with the Transfer replenishment method in the stockkeeping unit card.
- Select the Combine Transfer Orders toggle button if your orders are being sent to and from the same location.
- Select OK to continue.
- You’ll now see that the system has printed the necessary orders.
- From the Options section select the appropriate type of order from the drop-down menu that you want to make on the planning worksheet.
- You’ve used the planning worksheet to plan item orders and process any production, assembly, transfer, or purchase orders.

What’s next?
Find out how to use requisition worksheets.
Need more help?
No problem, that's what we're here for. Reach out to support@wiise.com anytime you can't find what you're looking for.