Overview:
- Set up a new vendor in Wiise.
Why set up a new vendor card?
Vendors in Wiise are your suppliers from whom you'd purchase goods and services. By creating a vendor, you can record all your purchases, credits, and the relevant payments for those vendors in Wiise.
How to set up a new vendor card in Wiise?
- From the Wiise landing page (role centre), select Vendors. This displays your list of vendors.

- Select +New.
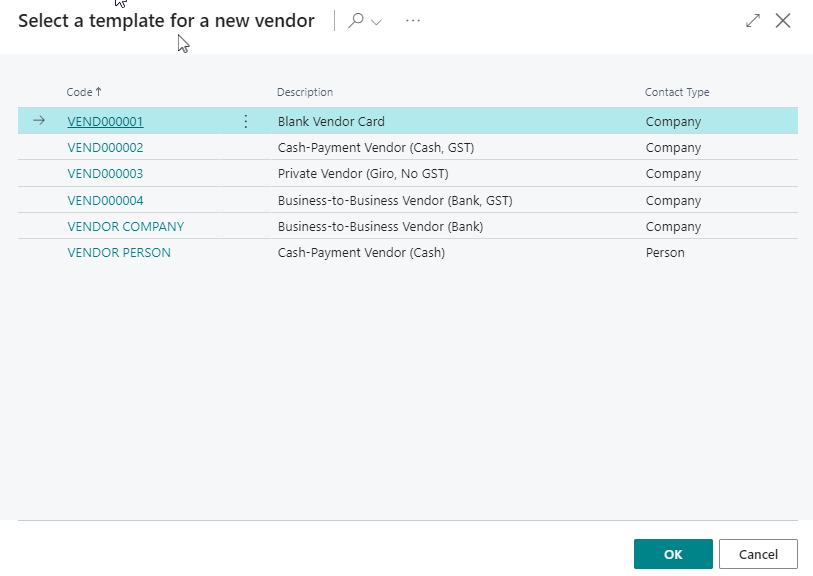
- Select a template for a new vendor to create a new Vendor Card.

Note: You can add new vendors manually by filling out the Vendor Card page or use templates that contain predefined information. The default template for a new vendor is the Blank Vendor Card. You can create unlimited templates for the type of vendors you have. - A vendor card is created with some of the fields completed for you.
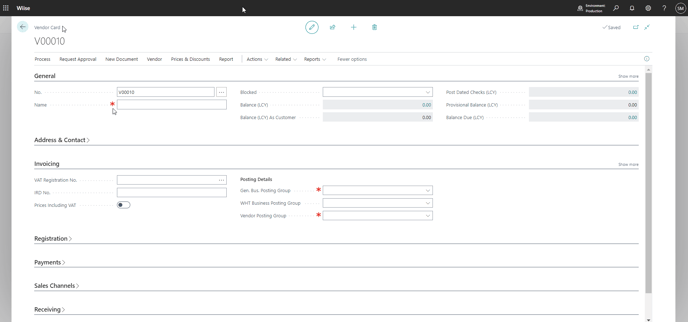
- Fill in or edit the fields on the vendor card. There are seven FastTabs (sections). All fields with red asterisks (*) must be completed as they are mandatory fields.
Tip: Select Show more from these sections to reveal extra fields.
Note: For more information, hover your mouse cursor over a field to read a short description.- General section

- The No. field is a record identifier. It’s automatically populated when a vendor card is created with the next sequential number. Or you can change the No. field.
- The Name field is the vendor’s name.
- Address & Contact section

- Fill in the vendor address and contact details.
- Invoicing section

- Gen. Bus. Posting Group: The General business posting group is a grouping that can be used to classify the vendor businesses into a category by grouping purchases into for reporting purposes. Examples include grouping vendors as domestic and foreign vendors.
- Vendor posting group are used to create a grouping of vendors that allow you to determine how you'd post the payables transactions, such as payables account, service charges, and payment discounts in the respective GL accounts in your chart of accounts.
- Registration section

- Fill in the business registration details of the vendor.
Note: Find out how to set up and use the ABN Look Feature in this section.
- Fill in the business registration details of the vendor.
- Payment section

- If you’re paying your vendor via EFT payment you can update the EFT lodgement reference so that it shows up on the vendor EFT statements.
- The Payment Method Code identifies the type of payment you make to the vendor.
- Wiise Landed Cost section

- Select a landed cost vendor to use and toggle on Used for Budget if you're using the landed cost feature in Wiise.
- Note: For more information, hover your mouse cursor over a field to read a short description.
- General section
- Your new vendor has been created. You can use the vendor information on the vendor card to create purchase documents.


Tip: If you're creating a new purchase document, and if your vendor does not exist, you will be prompted to create a new vendor from your purchase document.
What’s next?
If you pay your vendors using EFT as a payment method, you can set up a vendor bank account.
If you have any questions reach out to support@wiise.com