Overview:
- Learn to set up documents to send by bulk email
Why send documents with bulk email?
Sending documents such as customer statements, invoices and vendor remittances with bulk email is a quick way to share important information with many people at once, ensuring everyone gets the same message.
Note: You can send customer statements, invoices or vendor remittances using the bulk email feature.
How to send documents with bulk email?
Here are the steps to set up the bulk email feature and send documents.
Set up Bulk Email Definition.
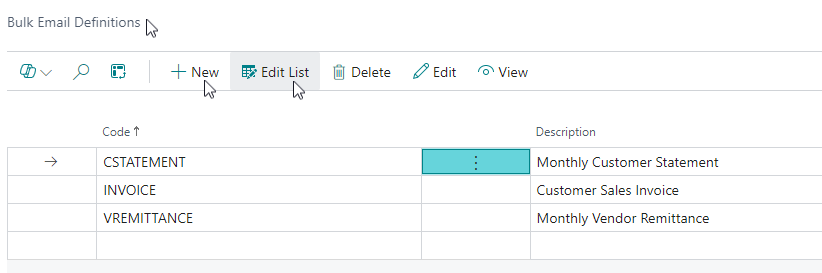
- Search for Bulk Email Definitions on the top right-hand corner of the page. Select the related link. The list displays.

- Select New to add a new bulk email definition or edit an existing list.
- For this example, we’ll set up the customer statement definition. Highlight the customer statement row, then select Edit.
- The cstatement definition displays.

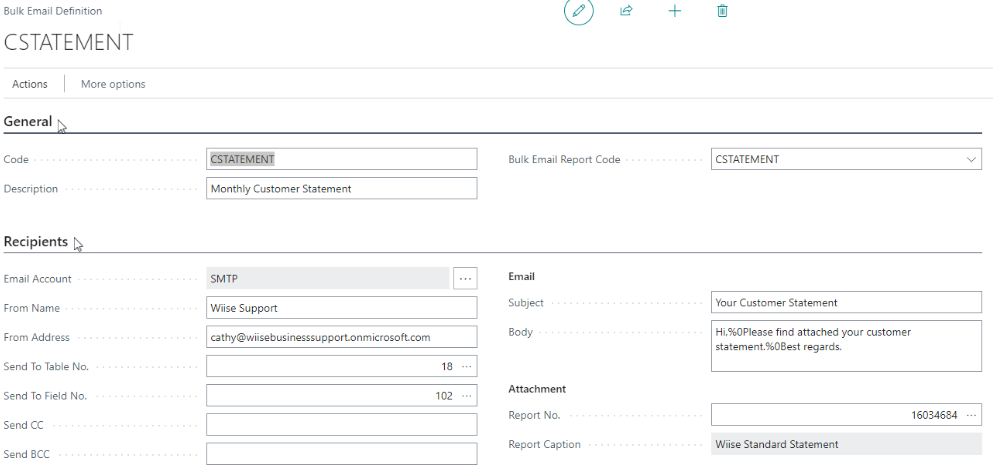
- In the General section:
- Enter a Code for your bulk email definition.
- Provide a Description to define the definition
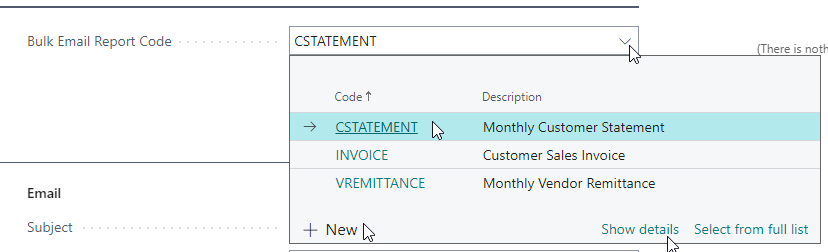
- Set up the Bulk Email Report Code.
- Set up a new code or select Show details on an existing set up code

- Set up a new code or select Show details on an existing set up code
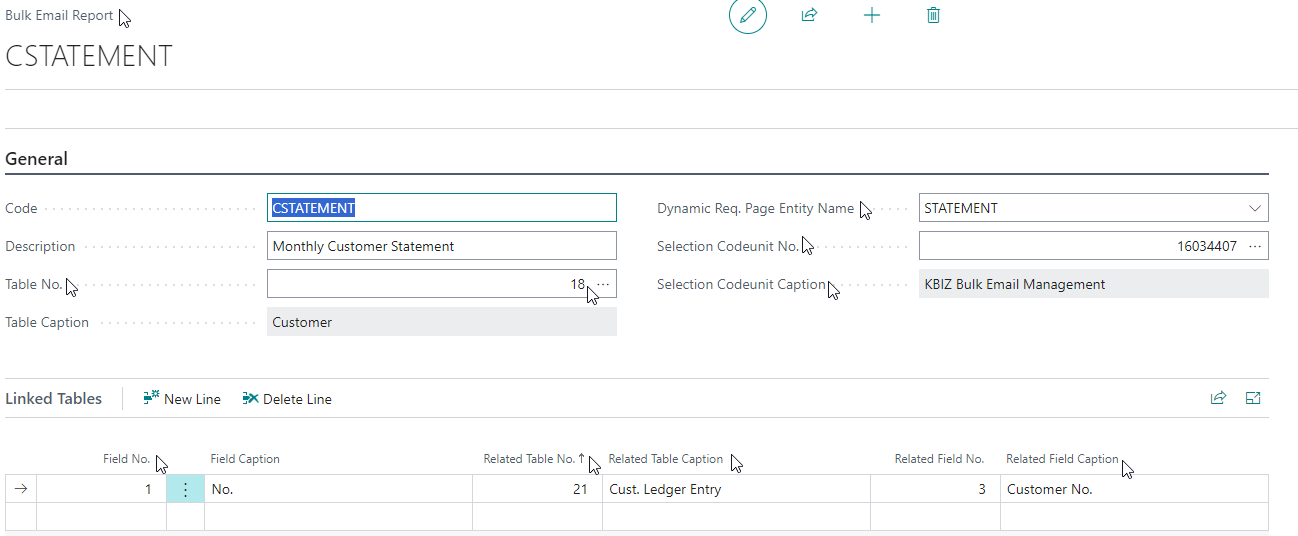
- In the Bulk Email Report, you’ll need to update the following:

- General section:
- Identify Table No., field as 18 for a customer.
- Specify the Dynamic Request Page Entity Name for the bulk email report. Select the type of document you’re sending via the bulk email. Select Statement from the drop-down list.
Note: The Selection Codeunit No., would have been selected during your assisted setup. If this is not set, please select the codeunit number as per the screenshot above. - Then, set up the linked tables by Field No., Related Table No., and Related Field No.
- When you’ve completed the bulk email report codes, select the back button to return to Bulk Email Definition page.
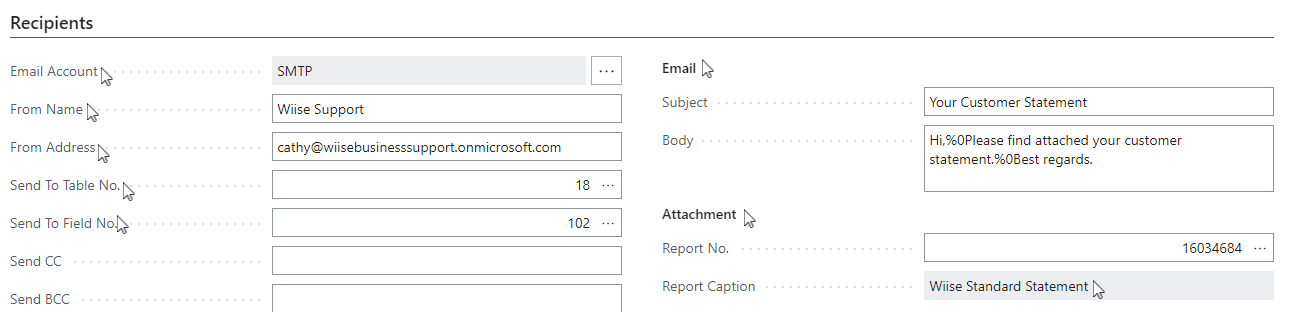
- Recipients section:

- The Email Account needs to be set up as SMTP.
- Identify a dedicated From Name and From Address fields to send out emails from Wiise.
Note: If you have set up several Email Accounts, you can select which Email Account whether it’s from a shared mailbox, a current user or SMTP that you want to use as the Recipient. - The Send to Table No., field and Send to Field No., must be set. You can select from the three horizontal dots to make your selection.
- Set up the Email contents which includes the Subject and Body fields.
- The Report No., field you want to select would be the Wiise Standard Statement.
- General section:
- Your Bulk Email Definitions has been set up. You can now run bulk emails.
Run Bulk Emails
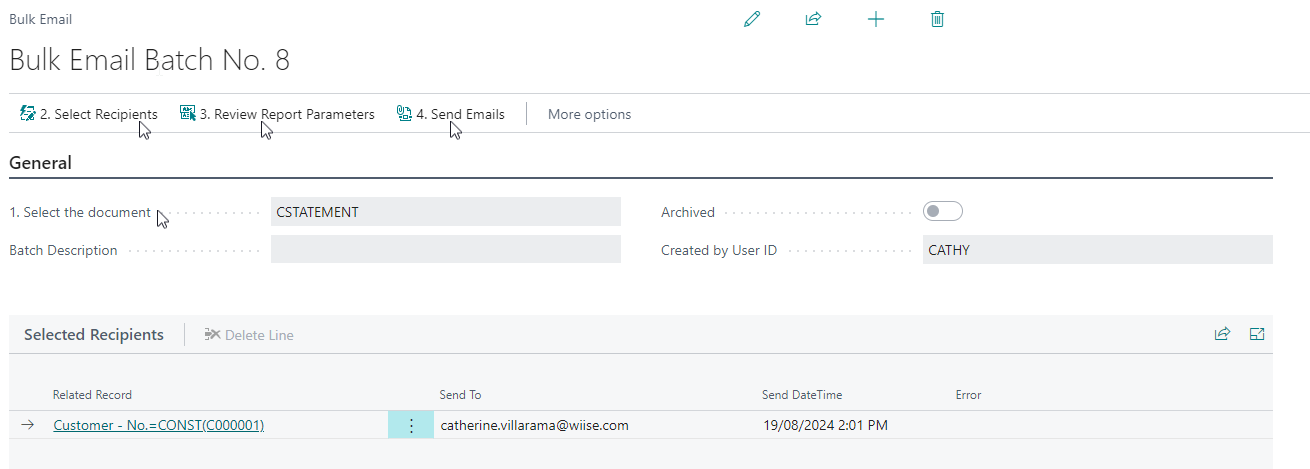
- Search for Bulk Emails on the top right-hand corner of your page. Select the related link. The Bulk Email list displays.
- Select to view the bulk email definition that you want to bulk email. Update the following fields:

- General section:
- In 1. Select the document field, you can see that you’ve selected the customer statement.
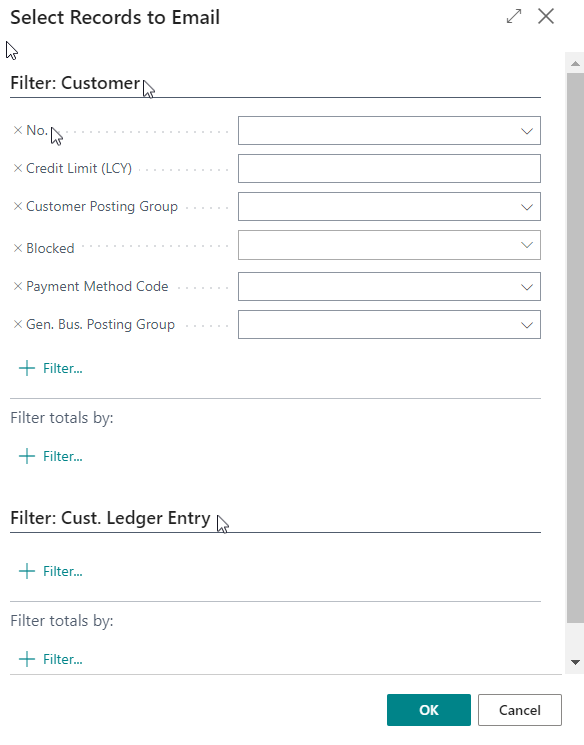
- Select 2. Select Recipients that you want to send bulk emails out to. The Select Records to Email request page displays.

Note: You can filter the email request page by specific customers or their ledger entries. In the Customer Ledger Entry table, you can exclude paid invoices. While you can leave the filters blank, using them helps target a specific group of customers.
Note: In Filter: Customer, you can add a Balance field, then filter as <>0 so the statement will not populate customers with a zero balance.-
- Select OK to confirm your email recipients.
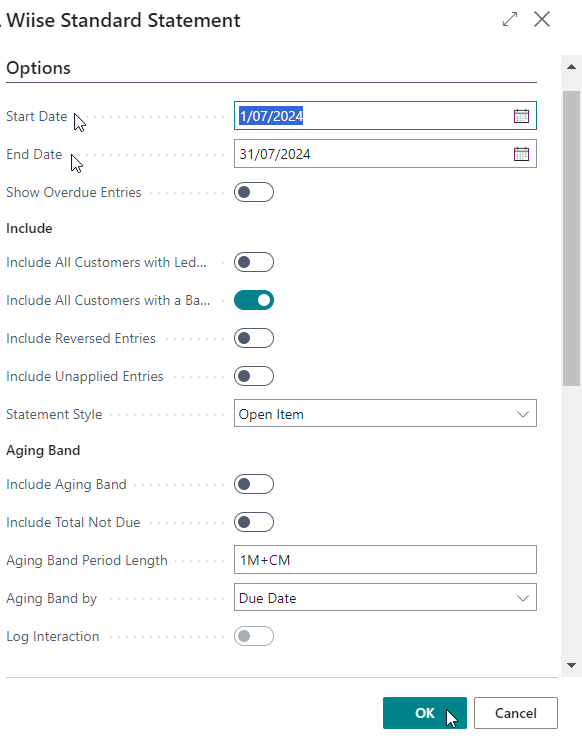
- Then, select 3. Review Report Parameters. The Wiise Standard Statement request page displays.

- Update the Start Date and End Date based on the description of the bulk email that’s going out.
- Enable the Include All Customers with a Balance as you want to target customers that have a balance owing to you. Enable any other toggle buttons that are required.
- Please ensure that the Report Output is set to Email.
- Select OK to continue with your update.
- Select 4. Send Emails. This generates the push of bulk emails out to your selected recipients.
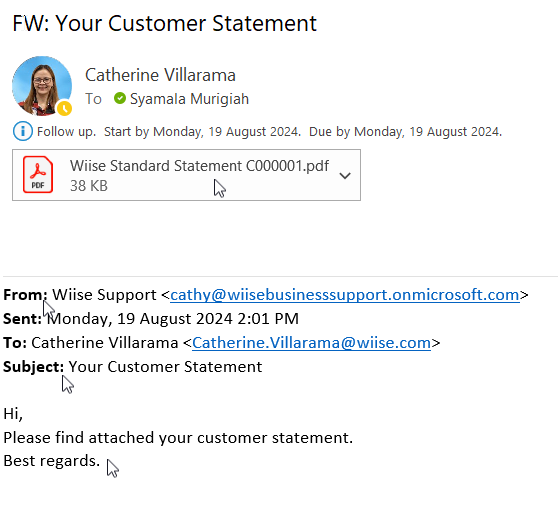
Note: You can search for Sent Emails from the top right-hand corner of your page to confirm that bulk emails have been emailed out to your recipients. - Your customer receives their customer statement in their email inbox with an attachment based on how you had set up the bulk email in Wiise.

- General section:
- You’ve now sent customer statements to your customers with bulk email.
Note: To send customer statements individually in Wiise, in the Wiise Standard Statement, under Filter:Customer you can specify the individual Customer No.
Caution: If there is no Customer filter set in the Wiise Standard Statement, all customer statements get generated and sent to all customers when your Report Output is set to Email.
What’s next?
Find out how to run an aged accounts receivable report.
If you have any questions, please reach out to support@wiise.com