Overview:
- Learn how to post payroll journals in Wiise
Note: When you’ve completed a pay run in Wiise Payroll, you can import transactions and post the pay run journal in Wiise.
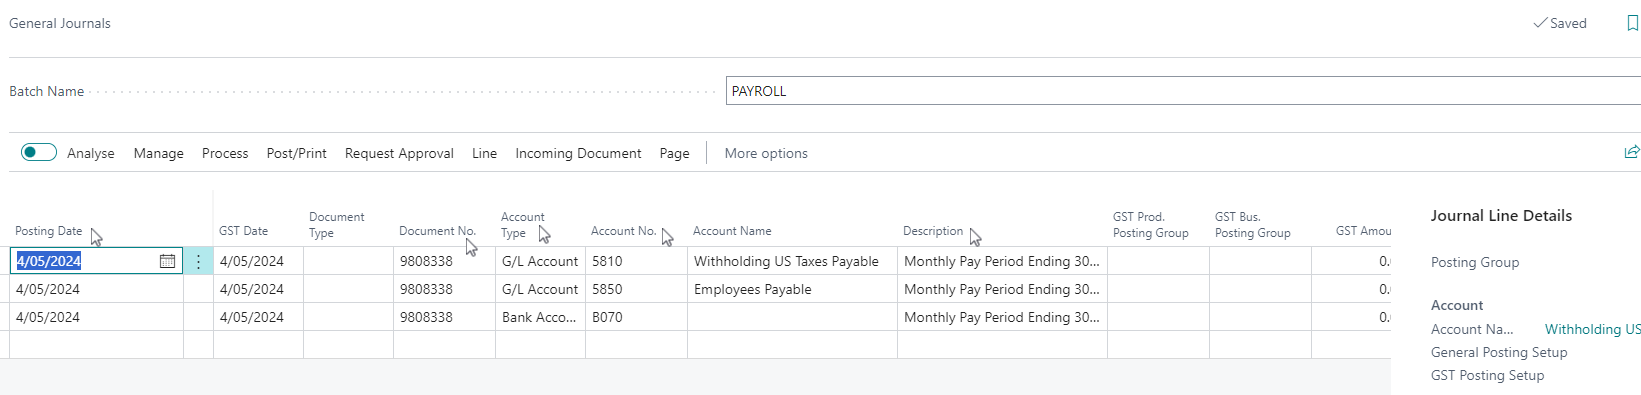
Note: Payroll journals now inherit dimensions directly from timesheet entries. Journals posted to Wiise ERP automatically include the Project, Task, Department or Location dimensions.
Tip: You can update the Payroll Setup in Wiise to enable the Auto Post Payroll Journals toggle button after you’ve imported transactions or manually review and post the payroll journals.
Note: When you import transactions, the employees’ dimension values which are information categories used for reporting as set up in Wiise Payroll are included in the ledger entries.
Why do we need to post payroll journals in Wiise?
The Pay As You Go (PAYG) information submitted to the Australian Taxation Office (ATO) via Single Touch Payroll (STP) must be reflected correctly on the bank account and in the bank account reconciliation in Wiise as this process reflects the completeness and accuracy of your financial reporting.
How to post payroll journals in Wiise?
Here are the steps to post payroll journals manually in Wiise. This process takes place after you’ve finalised the pay run in Wiise Payroll.
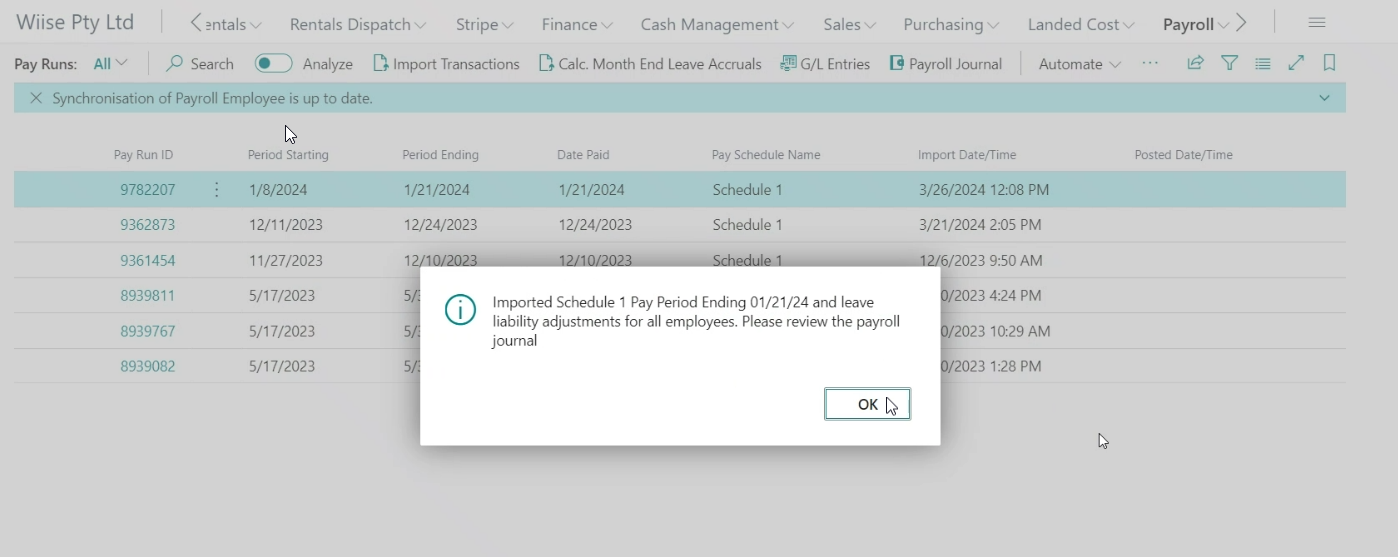
- Select Payroll in Wiise. Then, select Pay Runs. The Pay Runs window displays, showing your recently finalised pay runs imported into Wiise.

Note: The Pay Run row contains information indicating a finalised pay run has been processed in Wiise Payroll. The information shows the corresponding Pay Run ID, Period Starting and Period Ending, the date employees are paid and Pay Schedule Name. When transactions have been imported into Wiise, the column Import Date/Time is updated.
Note: If you haven’t yet and it’s your first-time importing transactions to post your payroll journals, make sure to set up your G/L Account Setup before you post the payroll journals. - Highlight the Pay Run ID row to import transactions and complete the payroll journal post process.
- Select Import Transactions. This will import Wiise Payroll transactions into the payroll journals in Wiise.

Note: After you’ve imported transactions and if you have enabled auto post payroll journals, Wiise creates and posts the payroll journals automatically as a debit to PAYG liability and credit to a bank account which shows the balancing account number. - Select Payroll, then select Payroll Journal to access the journal. Review the payroll journal entries.

- When you’ve completed your review, select Post/Print.
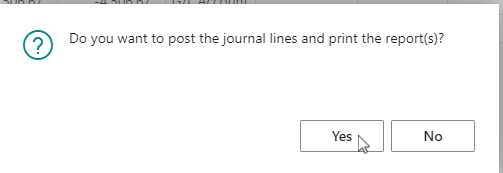
- You have the option to either Post, Preview Posting, Post and Print or Test Report.
- A message displays asking if you want to post the journal lines and print the report(s)?

- Select Yes to proceed. Your payroll journals are posted as a debit to PAYG liability and credit to a bank account which shows the balancing account number.
- You’ve completed the process of posting payroll journals in Wiise.

Note: Payroll administrators would need to perform checks to make sure that journals posted were accurate by reviewing the G/L account setup to the Pay Run ID and pay amounts and reviewing the payroll leave liabilities to see the loading dollar value against the leave categories accrued.
What’s next?
Find out how to perform the month-end close.
Need more help?
No problem, that's what we're here for. Reach out to support@wiise.com anytime you can't find what you're looking for.