Overview:
- Learn to automate replenishment on purchase and transfer orders
- Learn to optimise stock levels
Note: When planning to manage your purchase orders, you can use either the Planning Worksheet or the Requisition Worksheet. The planning worksheet is used for comprehensive planning across production, transfers, and purchases. The requisition worksheet focuses only on purchasing and transfers, excluding production orders.
Why use the requisition worksheets?
Use the requisition worksheet to create manage the purchasing of goods when there is a demand created for the items. You can manage the requisition worksheets across multiple locations.
Note: You can create a forecast to use with a Requisition Worksheet that predicts future inventory needs to meet your sales.
How to use the requisition worksheet?
- Search for Requisition Worksheets on the top right-hand corner of the page and select the related link. Select a template. The page displays.

- Add items to the order by running the batch jobs to call existing sales orders and sales forecast based on the replenishment policies.

Run the Calculate Plan Batch Job
You can automatically generate a replenishment plan for items set to reorder by Purchase or Transfer. The calculate plan batch job suggests actions like increasing quantities or creating new orders.
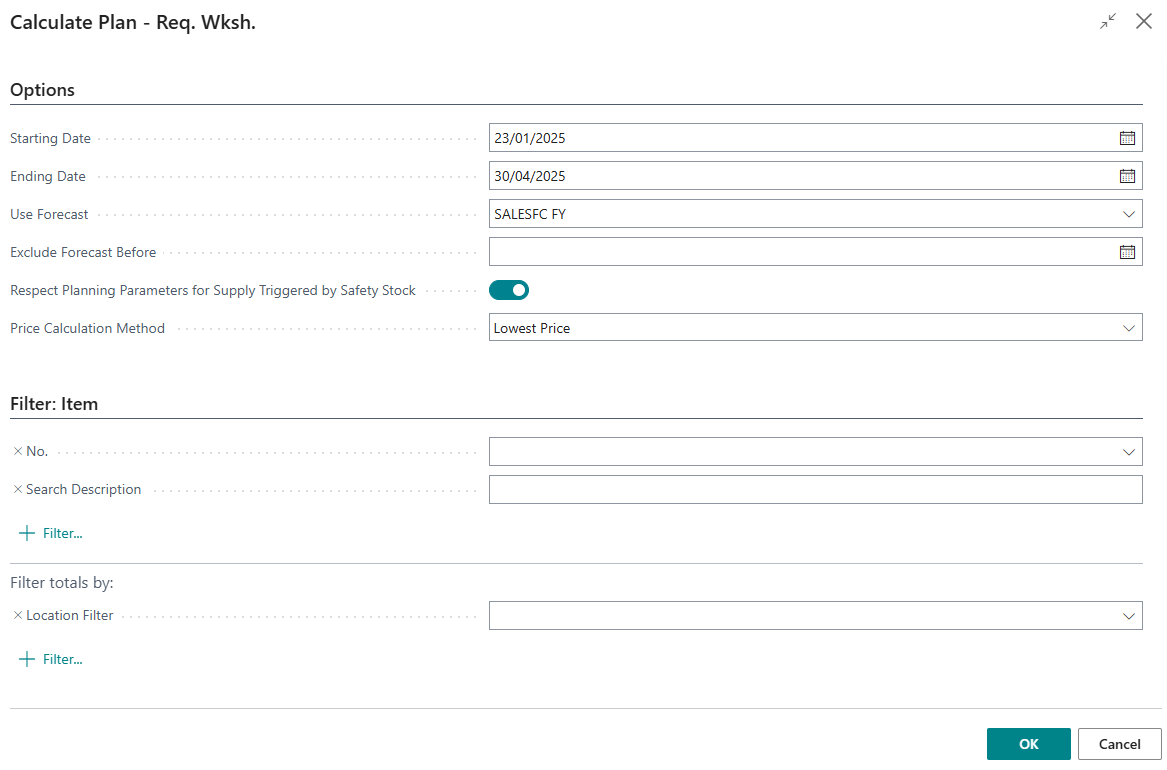
- Select Home, then select Calculate Plan Batch Job. The Calculate Plan - Req. Wksh. page displays. Fill in the required sections.

- Options section:
- Starting Date: Set to today’s date so current inventory on hand is considered.
- Ending Date: Enter the longest lead time to receive new orders. You can plan forward based on your business requirements.
- Use Forecast: Select the sales forecast previously set up with future predicted demand.
- Filter: Item section: Apply filters to specific items or locations. Leave blank to include all items.
- Select OK to run the batch job. The Calculate Plan batch job runs and displays results.
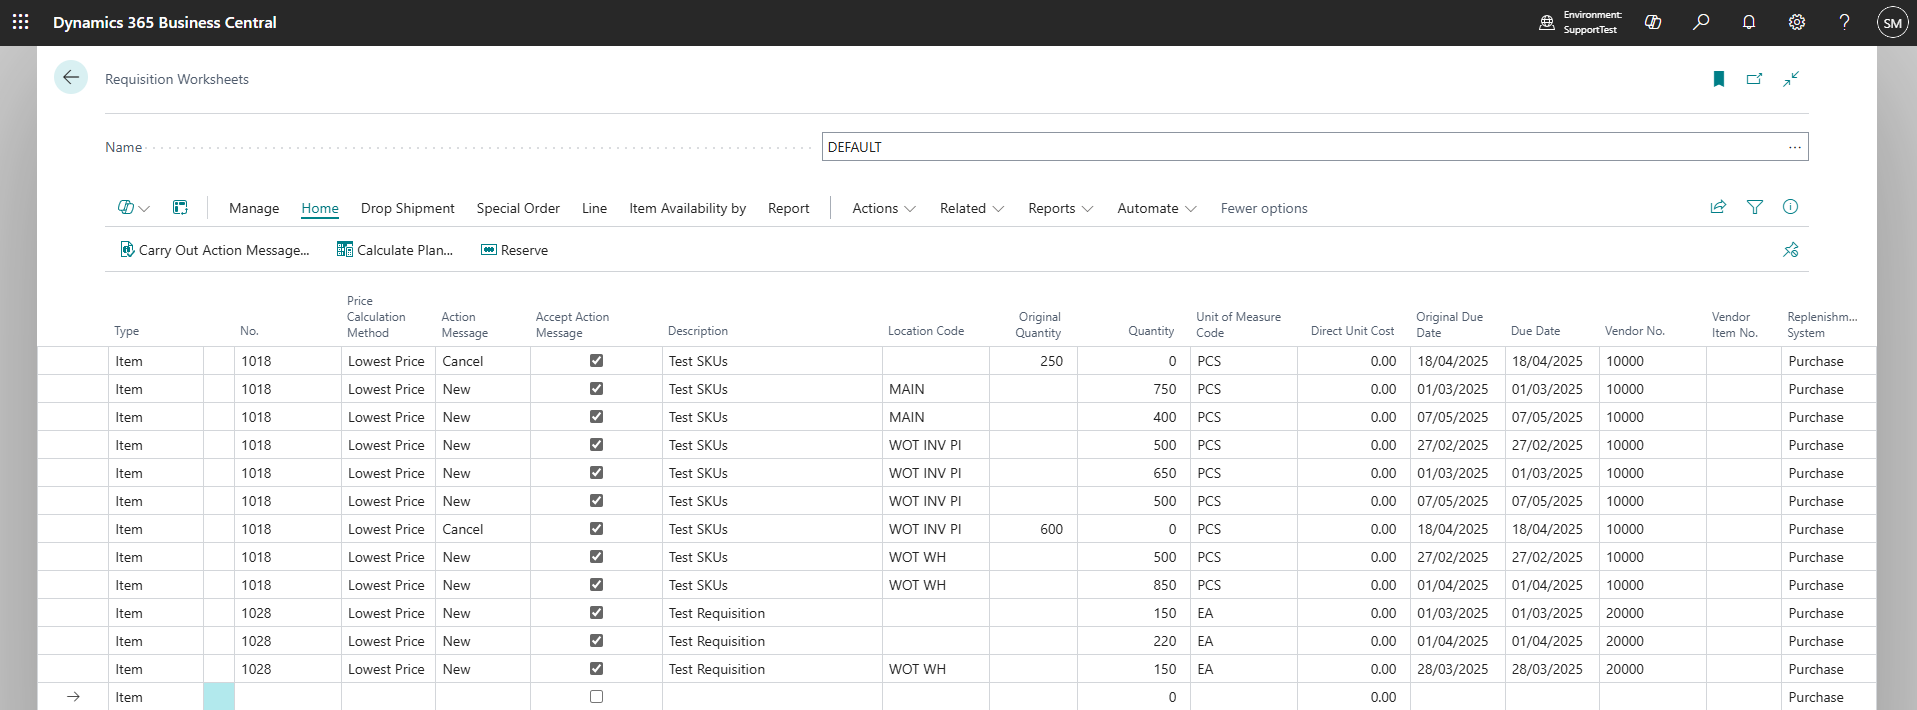
Note: Wiise processes the data and generates suggestions for replenishment based on your settings. To optimise the plan, set the Location Filter to specify the warehouse or location if required. - Review the requisition worksheet lines.

- Check suggested actions and identify warnings that require immediate attention. Adjust the requisition worksheet if needed.
- Options section:
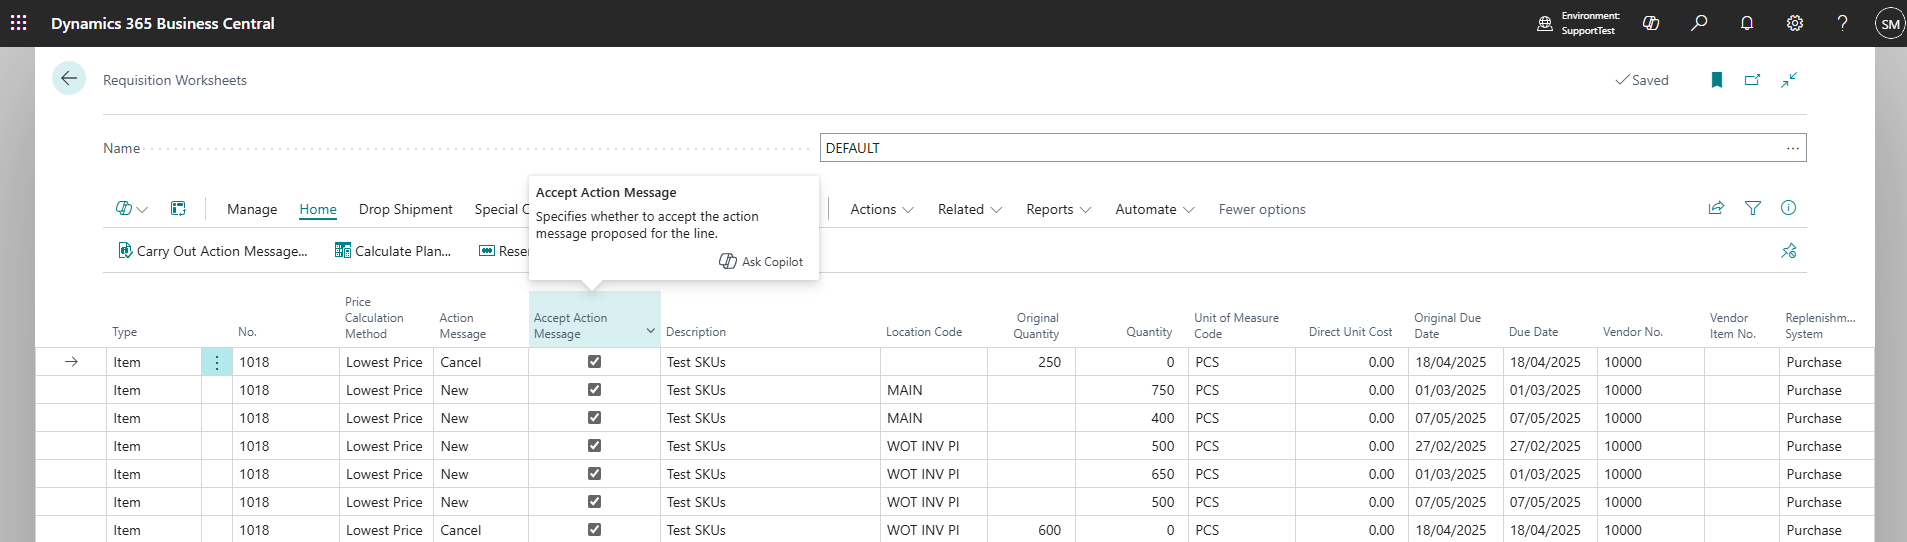
- Select the Accept Action Message for each requisition worksheet line you want to proceed with.

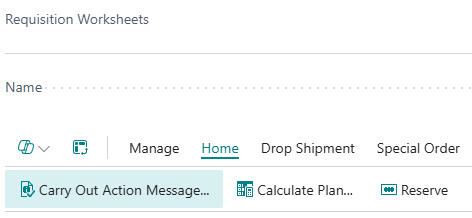
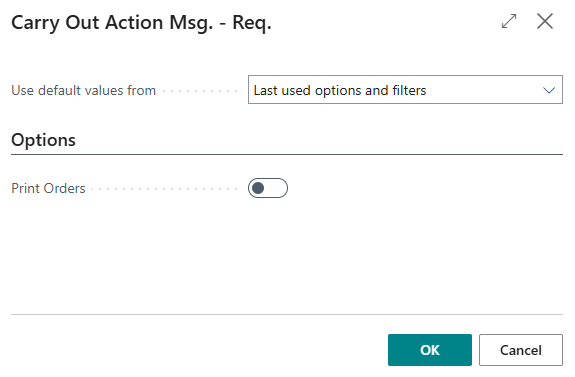
Note: The Cancel action message suggests cancelling an order or transaction. This happens when the system determines that the item or transaction no longer needs to be replenished due to changes in demand, stock levels, or other factors. - Select Home. Then, select Carry Out Action Message to execute the suggested orders.

- The Carry Out Action Msg. - Req batch job displays.

- Update Use default values from
- If you enable Print Orders in the Options section, the system will print purchase or transfer orders based on the Replenishment System for each requisition.
- Select OK to continue.
Note: The action creates purchase orders, transfer orders or makes necessary adjustments based on your selections. - Navigate to the purchase orders or transfer orders page and verify your orders are created as expected.
- You’ve set up and run the requisition worksheet in Wiise.
Note: If you have many items to manage, use the Edit in Excel feature on the Requisition Worksheets page.
This allows you to make bulk changes in Excel and then update the data back in Business Central.
What’s next?
Find out how to close outstanding purchase orders.
Need more help?
No problem, that's what we're here for. Reach out to support@wiise.com anytime you can't find what you're looking for.