Overview:
- Learn how to set up specific pricing for vendors
- Learn how to set up vendor line discounts
- Learn how to set up vendor invoice discounts
Why Set Up Vendor-Specific Pricing and Discounts for Items?
Setting vendor-specific pricing and discounts helps your business track costs more effectively and take advantage of agreed vendor terms. This can significantly reduce purchase costs.
Note: Before you create price lists, define your pricing and discount rules on the Purchase & Payables Setup page. Identify whether the discount type should be a Line Discount or an Invoice Discount. You can also define these on individual Vendor Cards.
How to Set Up Vendor-Specific Pricing and Discounts for Items?
Here are the steps to setting up vendor-specific pricing, line discounts, and applying an invoice discount for the vendor:
1. Set up specific pricing and line discounts for vendors
- Search for Purchase Price Lists on the top right-hand corner of the page. Select the related link and the page displays. You can see a list of all purchase prices and discount lists assigned to a type.

- Select +New to set up a new entry.
- A new Purchase Price List card displays.

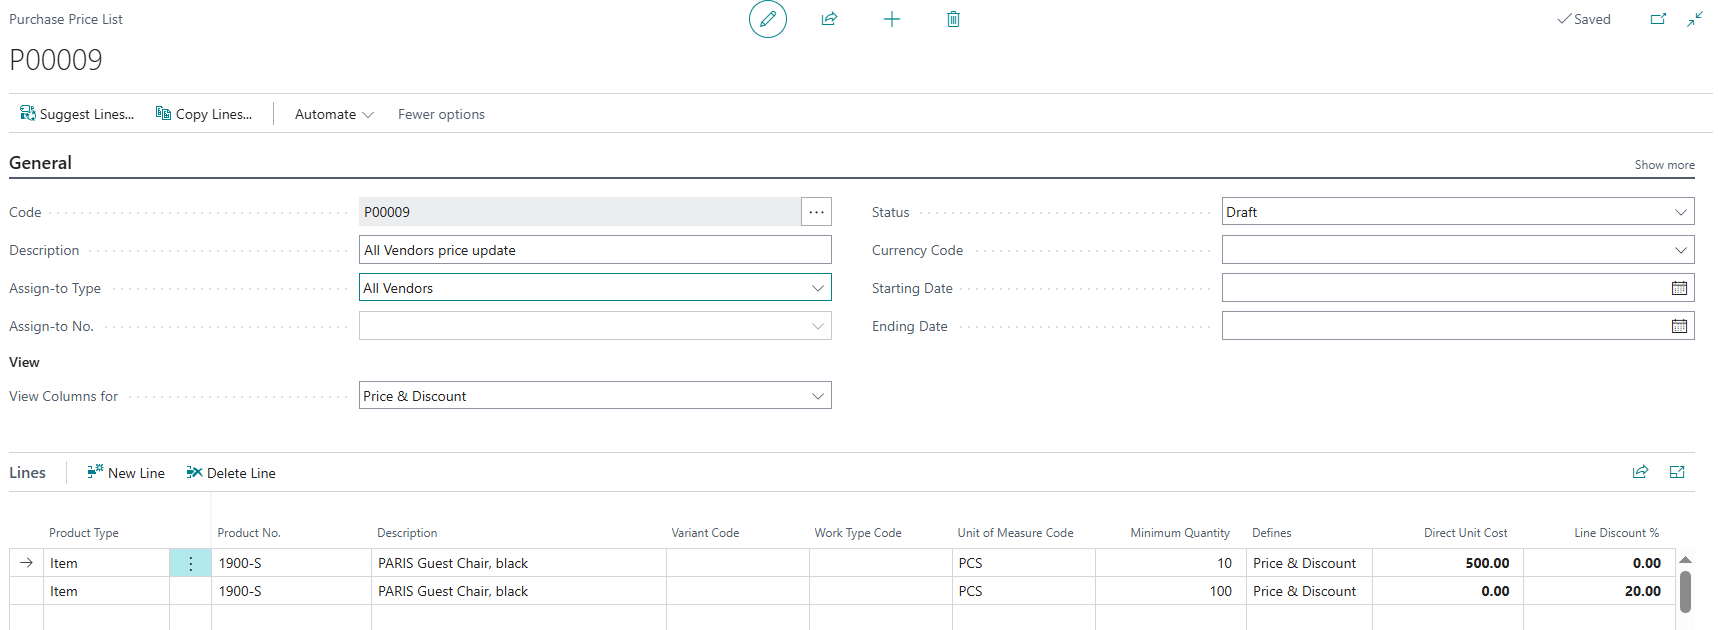
- Fill in the required fields in the General and Lines section.
- General section:

- Code: Enter a unique code in the price list. If a serial number is set up, you can use that.
- Description: Provide a brief description.
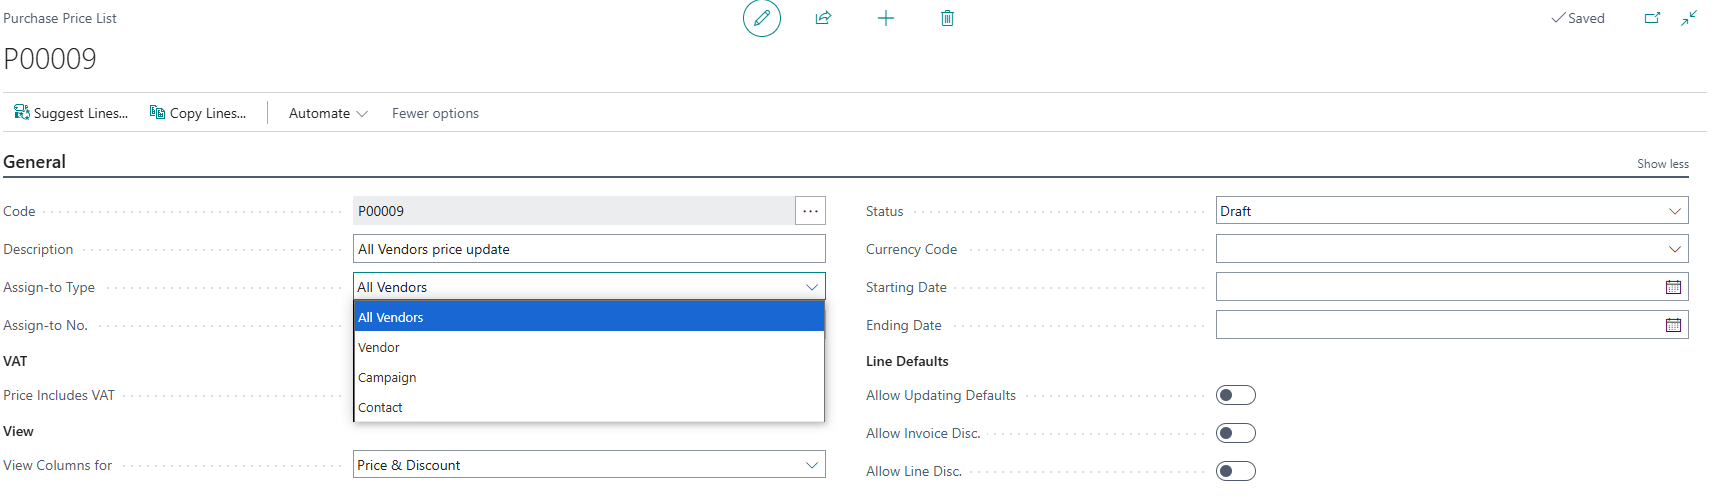
- Assign-to Type: From the drop-down menu, select to include all vendors, a specific vendor, a campaign or a contact.
- View Columns for: This updates how you view the Lines section. It can be Price & Discount, or Price or Discount only.
- Status: Set to Active when ready to use.
- Starting Date / Ending Date: Define a valid period.
Note: Turn on Allow Updating Defaults to automatically apply discount settings to new lines.
Note: Allow Invoice Disc. applies discounts based on the total invoice amount.
Note: Allow Line Disc. applies discounts to individual items or lines.
- Lines section:

- Product Type: Specify product type. For this purpose, select Items.
Note: Use Resources to set up non-inventory items, such as services or labour. - Product No: Identify the related product number.
- Minimum Quantity: Enter the minimum quantity that is within the special purchase price
- Direct Unit Cost: Update the price associated with the item. This is different from the standard pricing.
- Line Discount: Define the discount percentage.
Note: Add a line for each combination of vendor and item that requires a special purchase price.
- Product Type: Specify product type. For this purpose, select Items.
- General section:
- You’ve set up vendor-specific pricing and line discounts.


Note: You can set up specific pricing or line discounts directly on the vendor card. From the vendor card, select Related, then Purchases, and select Other. In the drop-down menu, select Purchase Prices or Purchase Discounts to enter the details.
2. Set up an invoice discount for the vendor
Identify the vendors that offer invoice discounts, and note the terms they provide.
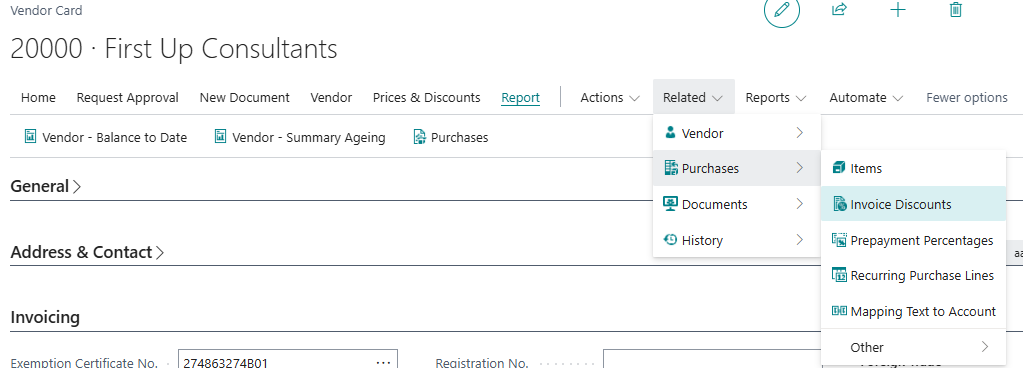
- On your selected Vendor Card, select the Related action menu. Then, select Purchases. From the drop-down menu, select Invoice Discounts.

- The Vend.Invoice Discounts page displays.

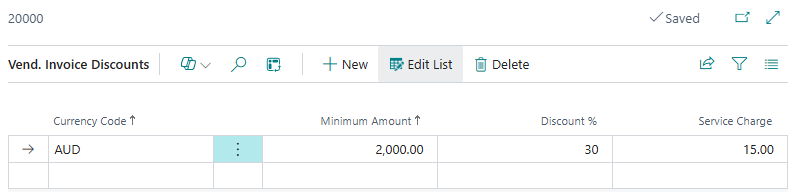
- Fill in the required fields to define the terms:
- Currency Code: Specify the applicable currency. Leave this blank if it’s in local currency.
- Minimum Amount: Enter the amount required for the invoice to qualify for the discount.
- Discount %: Specify the discount that applies to invoices when it meets the minimum amount.
- Fill in the required fields to define the terms:
- You’ve set up vendor invoice discounts.
Note: Update the Invoice Disc. Code in the Invoicing section of the Vendor Card to apply a percentage discount when the invoice total meets a minimum amount. You can reuse the same code for vendors with similar terms to save time and keep discounts consistent.
What’s next?
Find out how to import vendor pricing and catalogue.
If you have any questions, please reach out to support@wiise.com