Overview:
- Set up and post Wiise landed cost receipts
- Set up a budget invoice
- Set up actual invoice and reverse budget invoice
- Close the budget
Why Set Up and Post Wiise Landed Cost?
Setting up and posting Wiise Landed Costs ensures that additional costs like freight, duties, port charges, and insurance are accurately allocated to your items. This provides true item costing, helping you maintain correct margins and financial reporting.
Before You Begin
Ensure the following set up is complete before processing warehouse receipts using Wiise Landed Costs:
- Wiise Landed Cost Setup is configured.
- The Item Card is enabled for landed cost processing.
- Item Charges are created and ready for use.
- Budget vendor for landed cost and actual vendor for landed cost is setup
- A valid Purchase Order exists for the item being received
How to Set Up and Post Wiise Landed Cost?
Step 1: Search for an existing purchase order and create a Wiise landed cost receipt
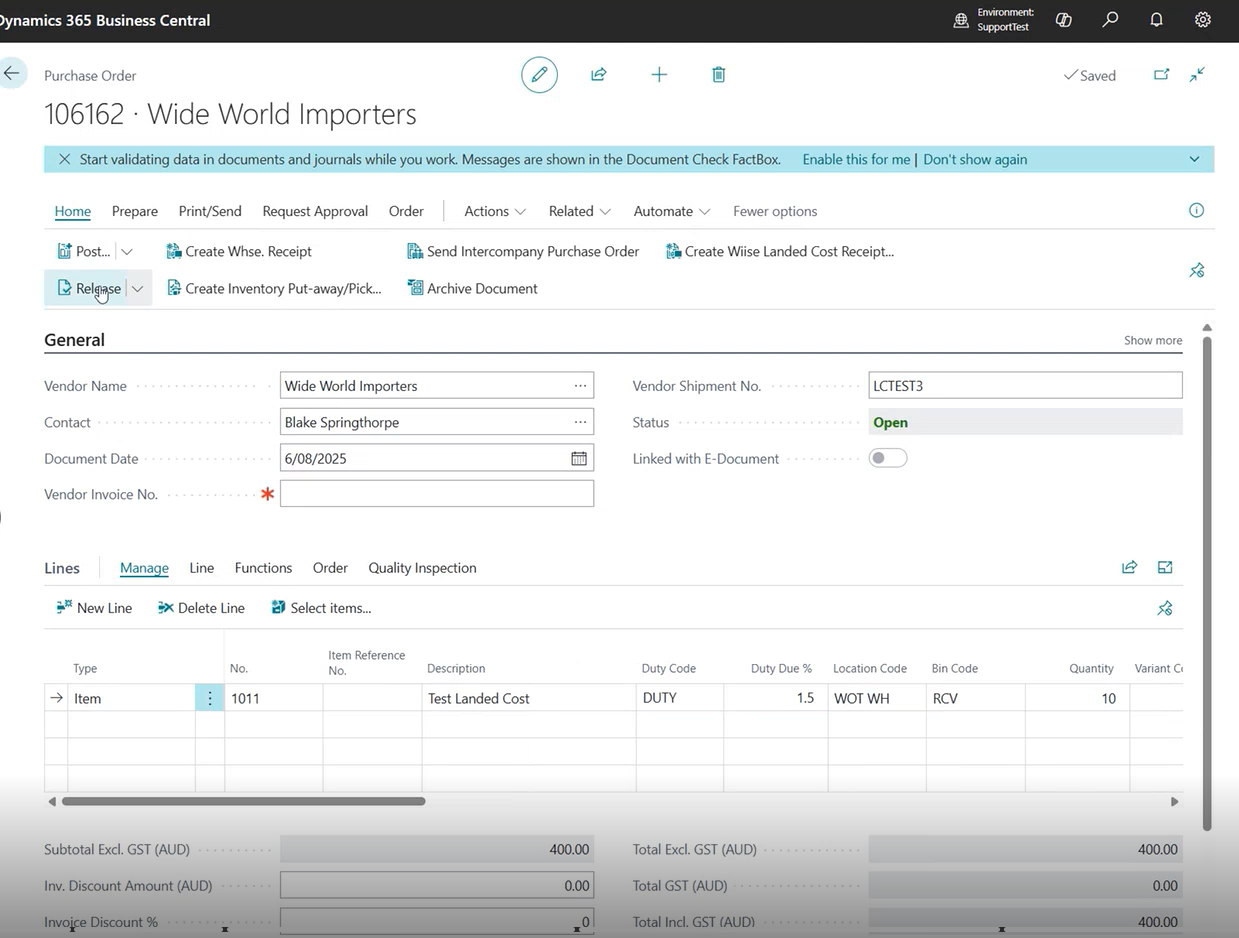
- Open your existing purchase order.

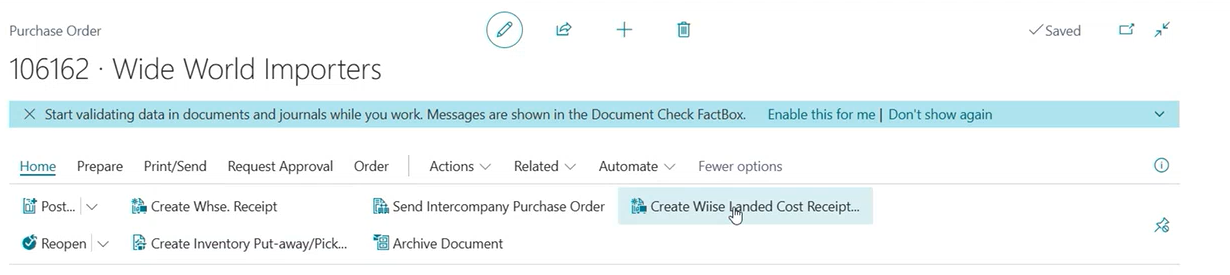
- Release the purchase order.
- Then, select Home. Select Create Wiise Landed Cost Receipt.

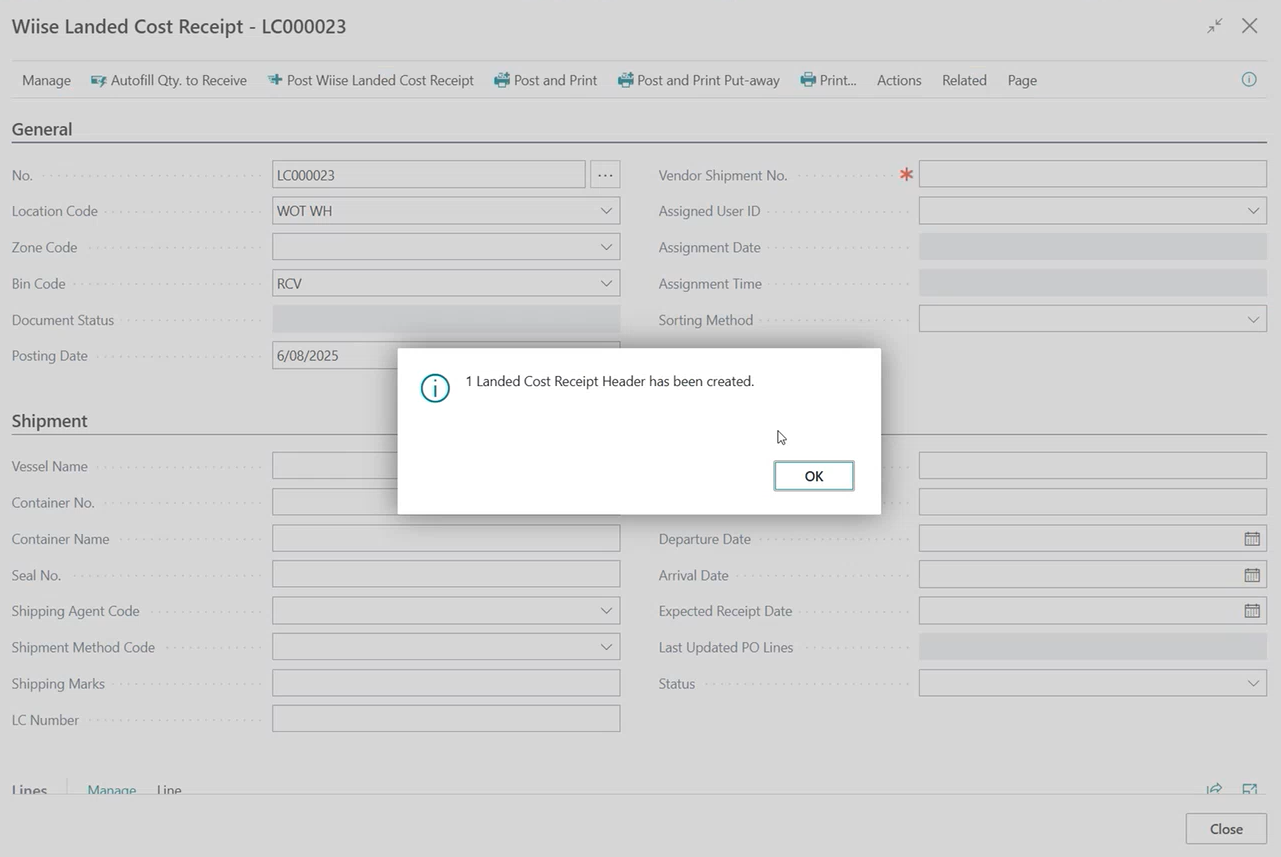
- A confirmation message displays that the landed cost receipt has been created.

- Select OK to acknowledge the landed cost receipt created.
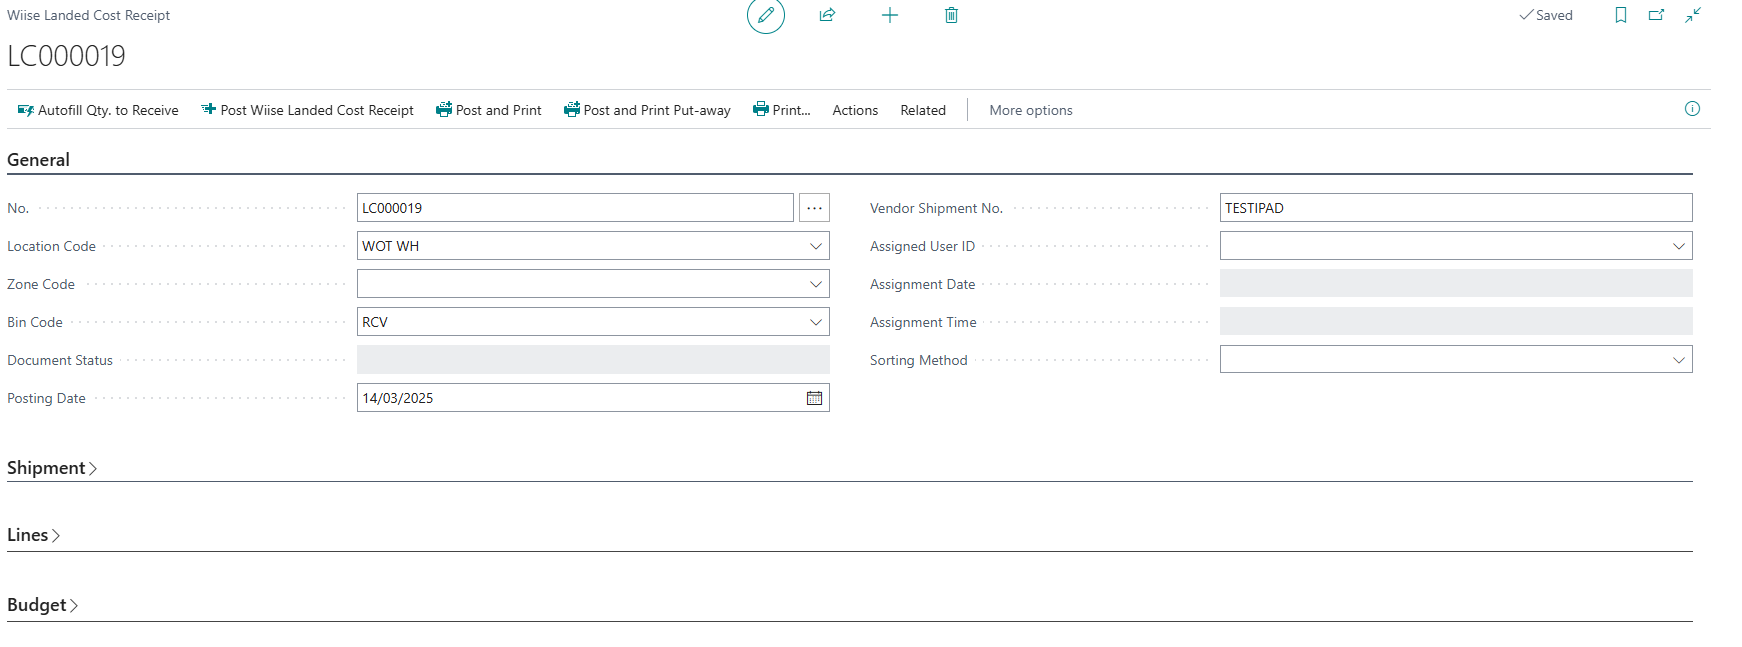
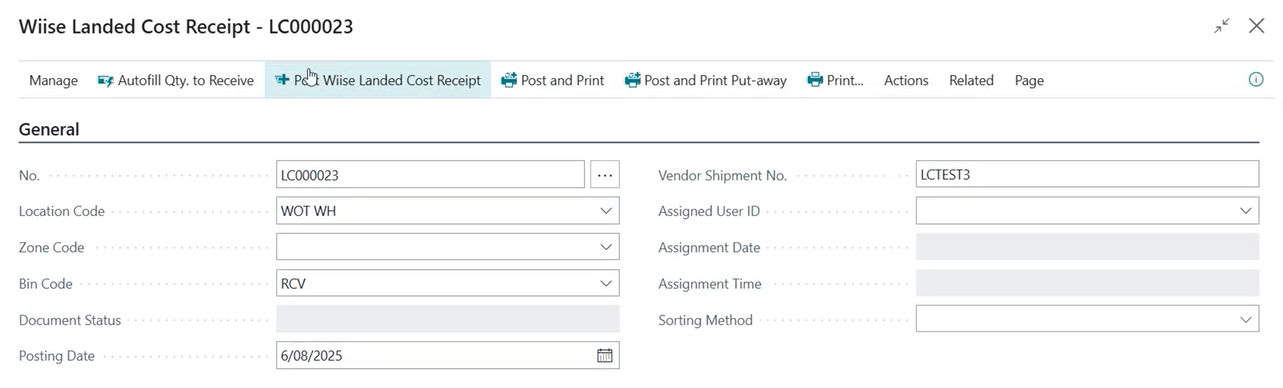
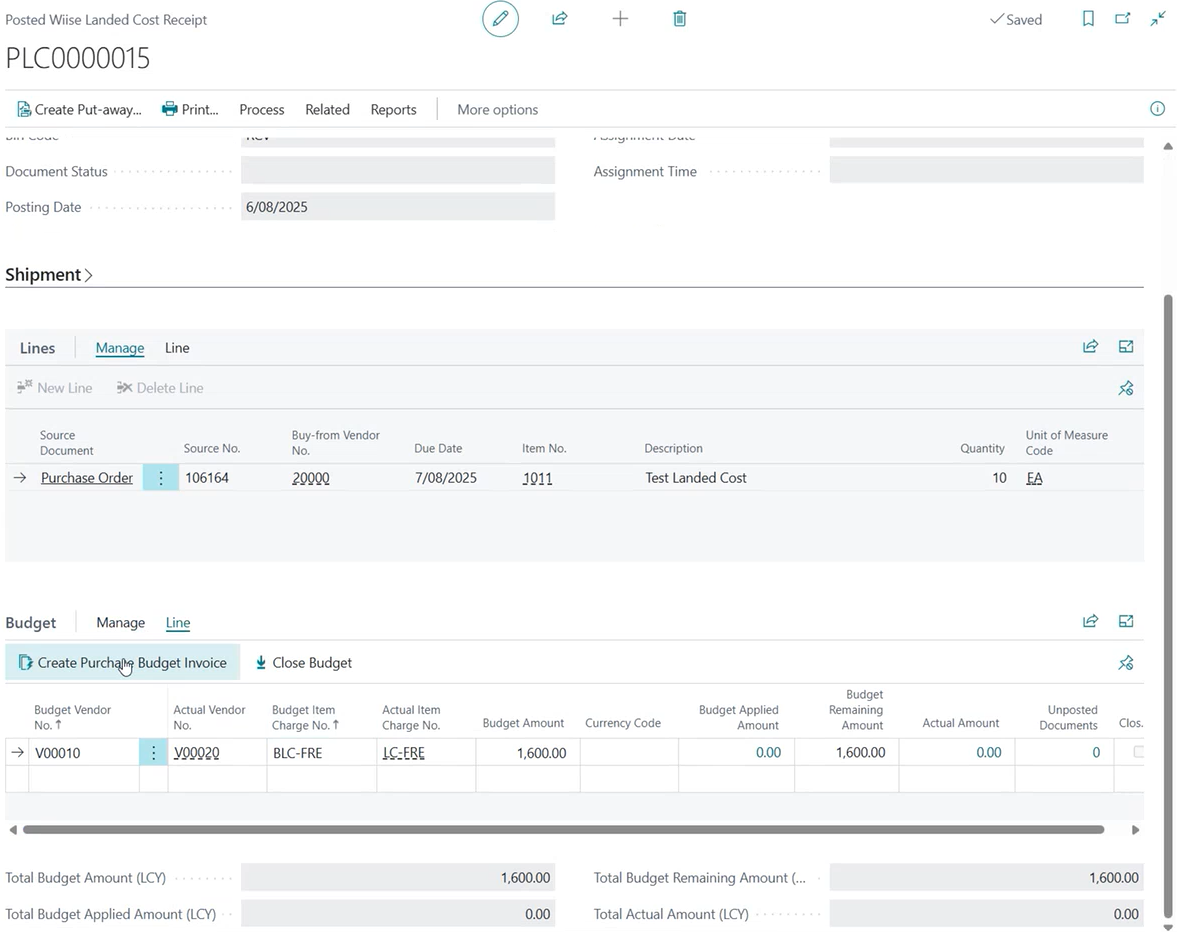
- The Wiise Landed Cost Receipt card consists of four sections. They are General, Shipment, Lines, and Budget.

- Update the following sections:
- General section:

- Vendor Shipment No: This is a mandatory field.
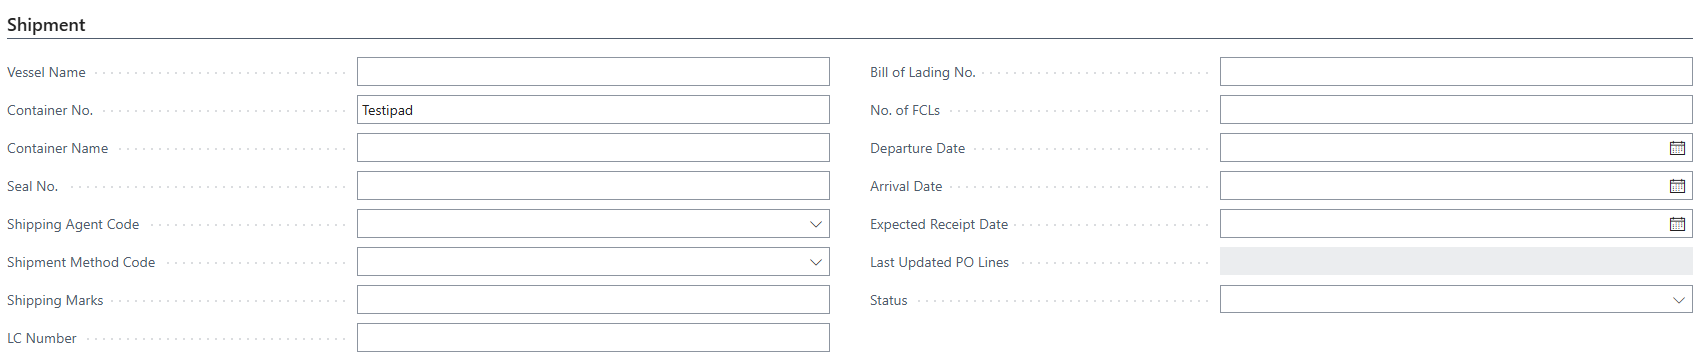
- Shipment section:

Note: These fields are used to capture shipping and receipt details. If you don’t update them now, you can update them later after the receipt is set up.- Vessel Name: The name of the ship transporting the goods.
- Container No.: The identified container carrying the goods
- Seal No.: The seal number used to secure the container during transit.
- Shipping Agent Code: The code of the shipping agent or freight forwarder handling the shipment.
- Shipping Method Code: The method of shipments such as sea, air or road
- Shipping Marks: Any marks or labels used to identify goods during shipping.
- LC Number: The Landed Cost number assigned to the shipped item in the receipt.
- Bill of Lading No: A legal document issued by the carrier with shipment and goods details.
- No of FCLs: Number of Full Container Loads in the shipment.
- Departure Date: The date the goods left the origin port.
- Arrival Date: The date the goods arrived at the destination port.
- Expected Receipt Date: The planned or estimated date the warehouse expects to receive the goods.
- Last Updated PO Lines: Timestamp or status indicating when the linked purchase order lines were last updated.
- Status: Overall status of the landed cost receipt process (Open, Released or Posted).
- Lines section: No adjustments are required.

- Budget section:

- Budget Vendor No: A placeholder vendor used to record estimated costs like freight or duty. Not used for actual payments.
- Budget Item Charge No: The type of cost you're estimating, like freight or handling.
- Budget amount: The estimated cost you expect to pay. Used to help calculate the total landed cost before getting the real invoice.
- General section:
- Then, select Post Wiise Landed Cost Receipt.

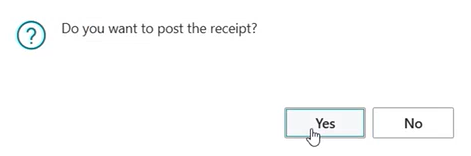
- A confirmation message displays confirming if you want to post the receipt.

- Select Yes to continue or No to stay on the page.
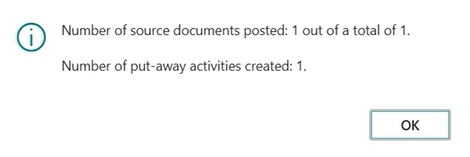
- A message displays confirming that a put-away activity is created.

- Select OK to close the process.
- You’ve set up and posted the Wiise Landed Cost Receipt.


Step 2: Set up a Purchase Budget Invoice
- Search for Posted Wiise Landed Cost Receipt List on the top right-hand corner of the page. Select the related link and list displays.

- Select the relevant Posted Wiise Landed Cost Receipt to update.

- On the Budget section, select Line. Then, select Create Purchase Budget Invoice.
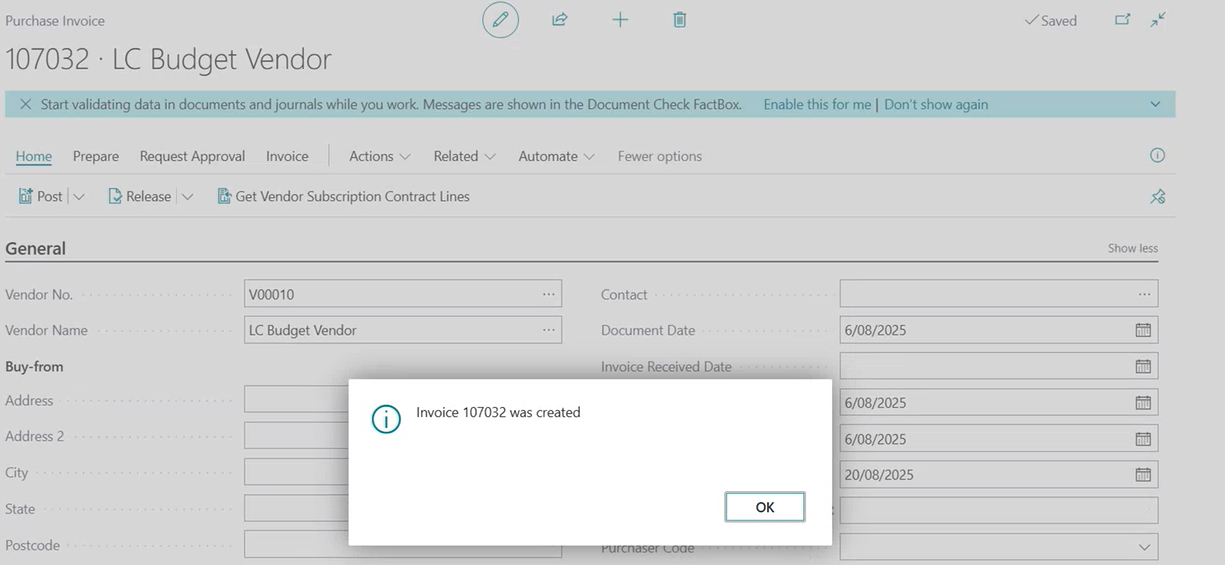
- A message displays confirming that the invoice is created.

- Select OK to acknowledge the message.
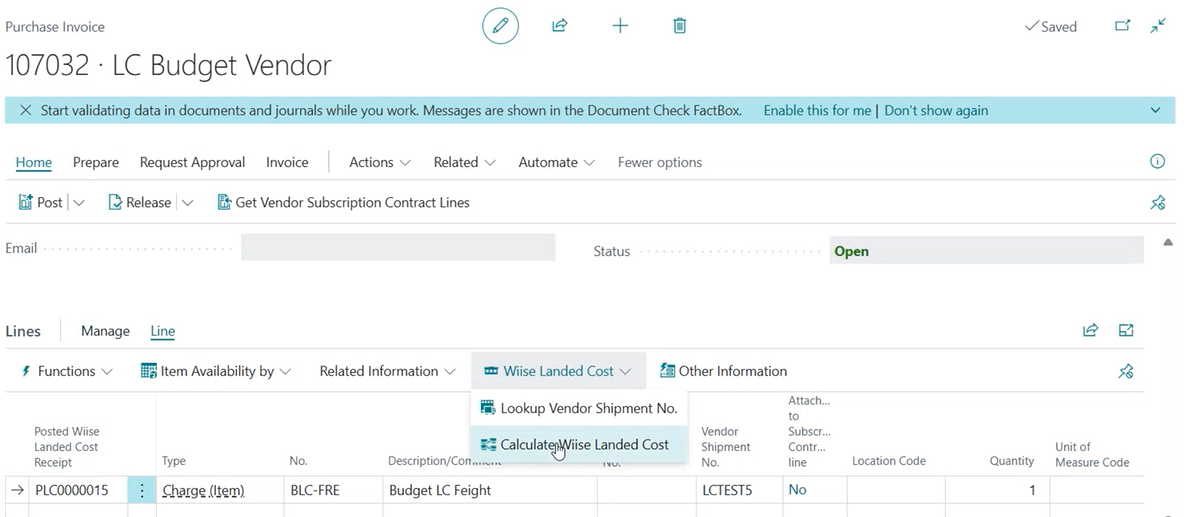
- You’re directed to the purchase budget invoice. It is prefilled.
Note: You’ll need to update the mandatory fields on the General and Lines section. - Then, select Line on the Lines section.
- Select Wiise Landed Cost.
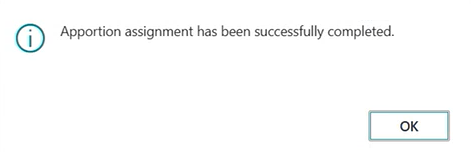
- From the drop-down menu, select Calculate Wiise Landed Cost.

- A confirmation message displays to confirm that the apportion method is assigned.

- Select OK to close the process.
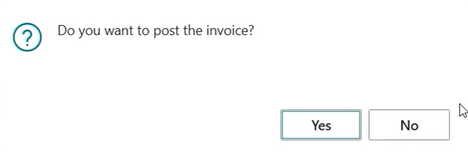
- Release the purchase invoice. Then, Post the invoice.
- A message displays to confirm if you want to post the invoice.

- Select Yes to continue.

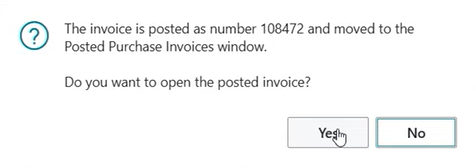
- A confirmation displays that the invoice is posted.
- You’ve set up a budgeted purchase invoice.
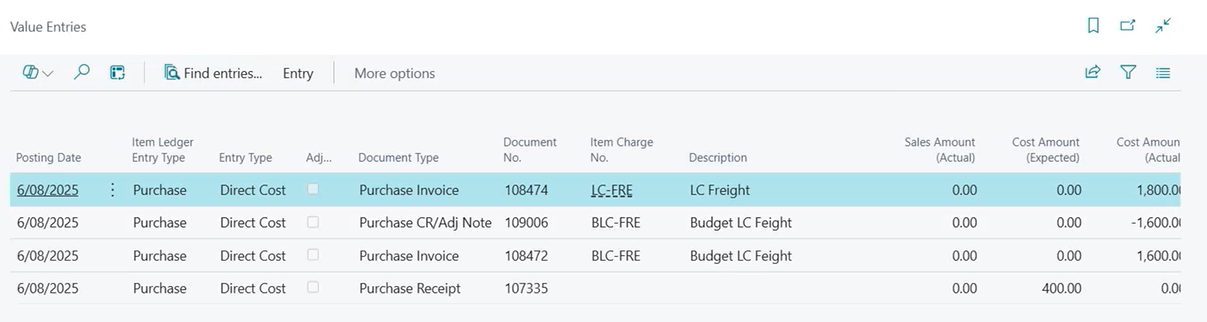
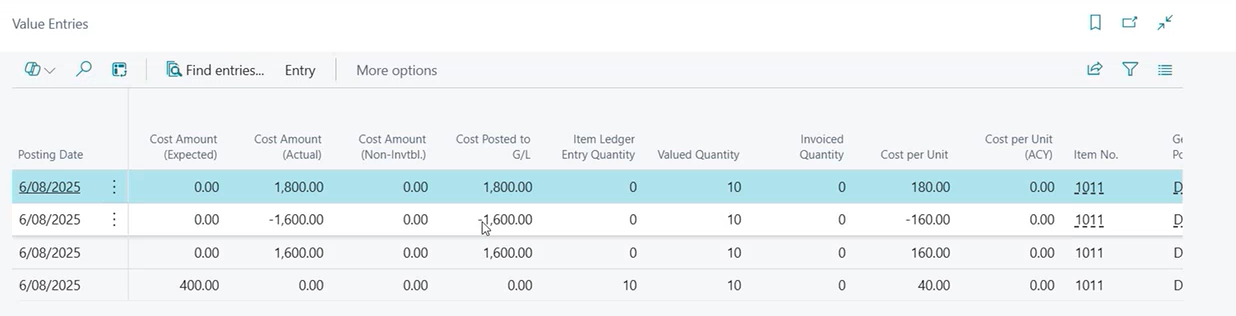
Note: You can view the Value Entries from the Item Ledger Entries on your Item Card. The receipt and budget cost receipts entries display.

Step 3: Post Actual Wiise Landed Cost Invoice
In this scenario, you have received your actual landed costs receipts. You’ll need to go back to your existing purchase order.
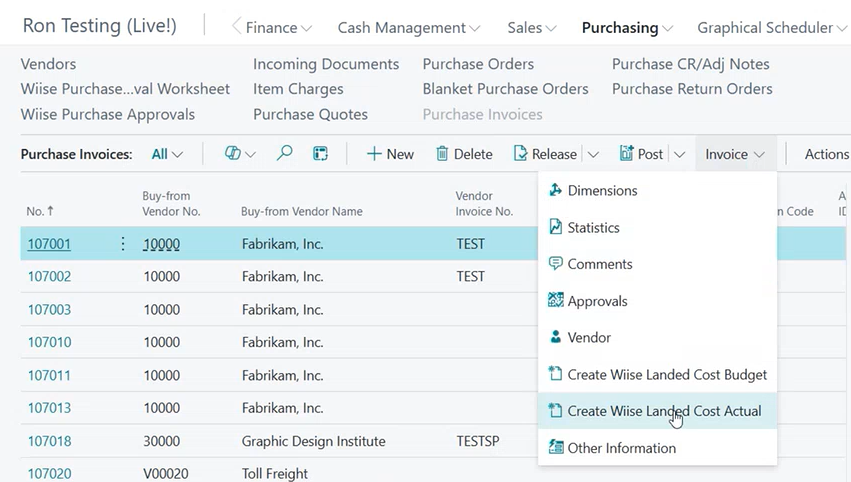
- Go to the Purchase Invoices list page. Select the Invoice menu. From the drop-down menu, select Create Wiise Landed Cost Actual.

- A new Purchase Invoice opens. Set up the purchase invoice.
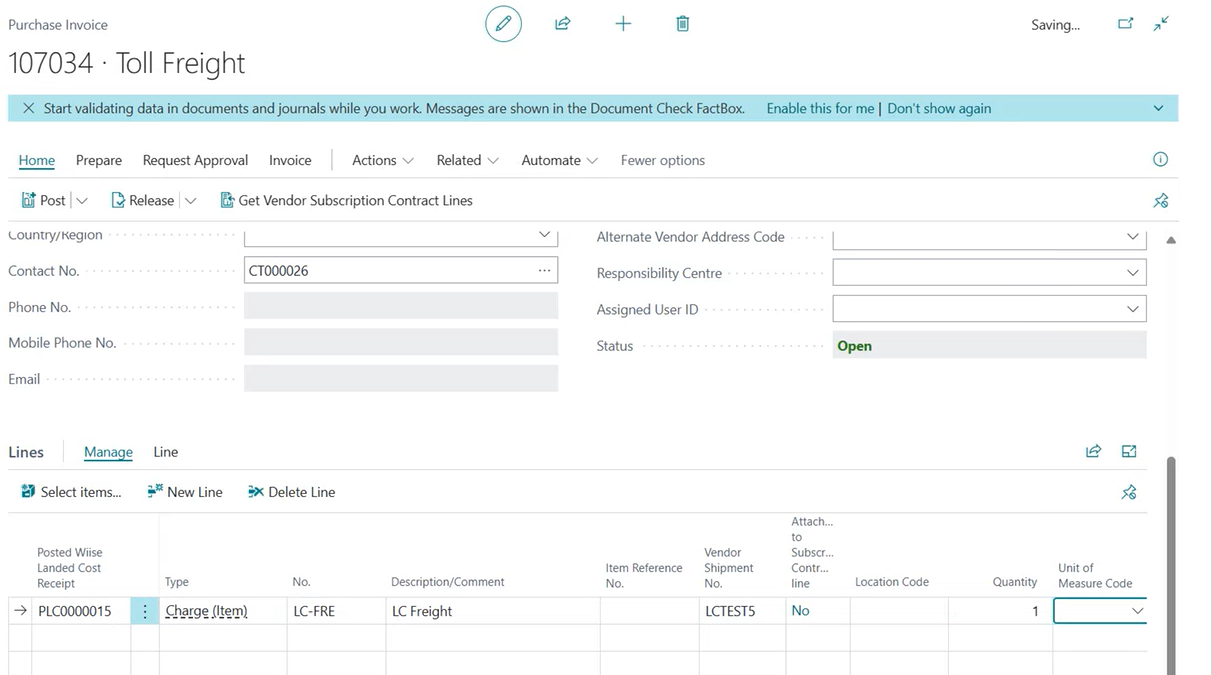
- On the Lines section, find the Posted Wiise Landed Cost Receipt that you created before and update the line row details.

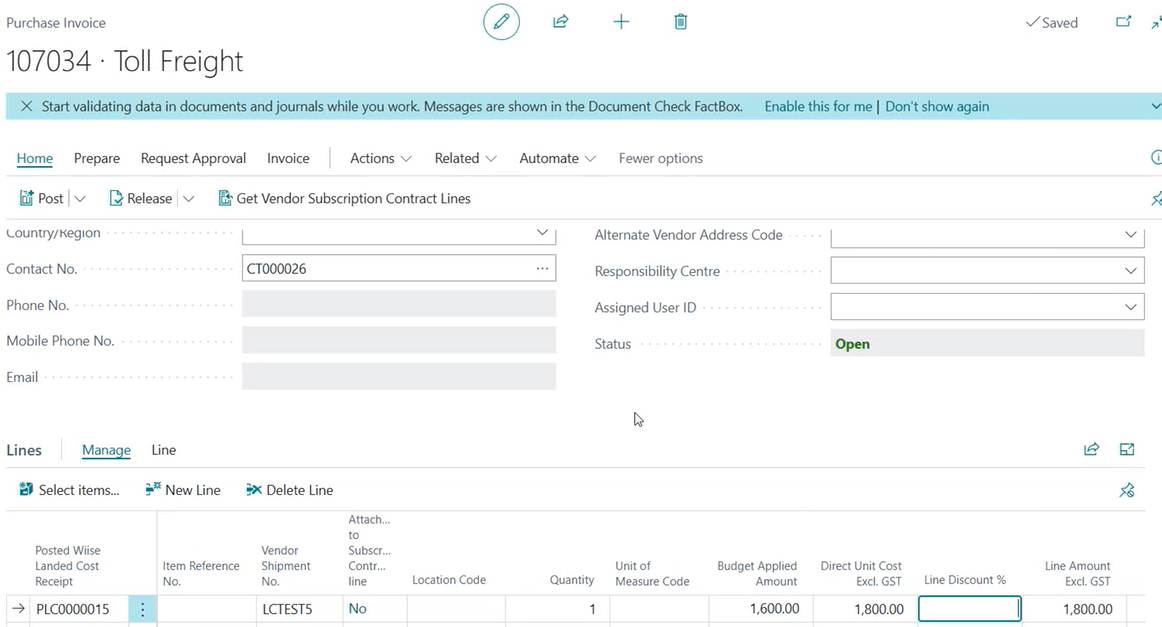
- You'll notice the Budget Applied Amount display.
- You’ll need to update the Direct Unit Cost field.

- Then, select Line in the Lines section.
- Select Wiise Landed Cost.
- Then, select Calculate Wiise Landed Cost to apply the apportion method.
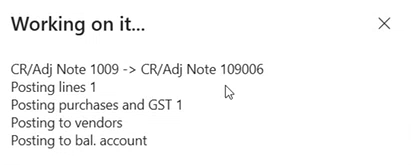
- Then, Release the purchase invoice and proceed to Post.
- A purchase credit note is generated to reverse the budgeted amount.

Note: You can now go back to the Item Value Entries to look at the last receipted Value Entries. You can see four lines which is the budgeted, actual costs and reversed budgeted amount.

- You’ve posted the actual Wiise landed cost invoice.
Step 4: Close the Budget
You can finalise the posted Wiise landed cost receipt by closing the Wiise Landed Cost Budget.
- Open the Posted Wiise Landed Cost Receipt after you have posted the actual Wiise landed cost invoice.
- Go to the Budget section.

- Select Line, then select Close Budget.
- A message displays if you’re sure that you want to close the selected landed cost budget lines. This action is irreversible.

- Select Yes to continue.
Note: The action confirms the budget is closed. You can see the actions greyed out and the Closed field ticked in the Budget section.
- This confirms that the credit note has been generated, and the budgeted value has been reversed.
- You have completed the Wiise landed cost end-to-end process.


Need more help?
No problem, that's what we're here for. Reach out to support@wiise.com anytime you can't find what you're looking for.