Overview:
- Learn to create and manage fixed asset cards
Why set up new fixed assets?
Fixed assets are essential, long-term resources that gradually depreciate over time. The fixed asset's function can help you record all assets correctly while helping you depreciate these assets and record the correct entries in your general ledger.
How to set up new fixed assets?
To record a fixed asset, you’ll need to create a fixed asset card. Remember to set up the fixed assets first before you create the purchase orders. Here are the steps:
- Select Finance from the navigation menu. Then, select Fixed Assets.

Note: If you can’t see the Fixed Asset menu on your Wiise landing page, you can use the Search function to search for Fixed Assets. - You’ll be taken to the Fixed Assets list page where you can see a list of existing fixed assets.

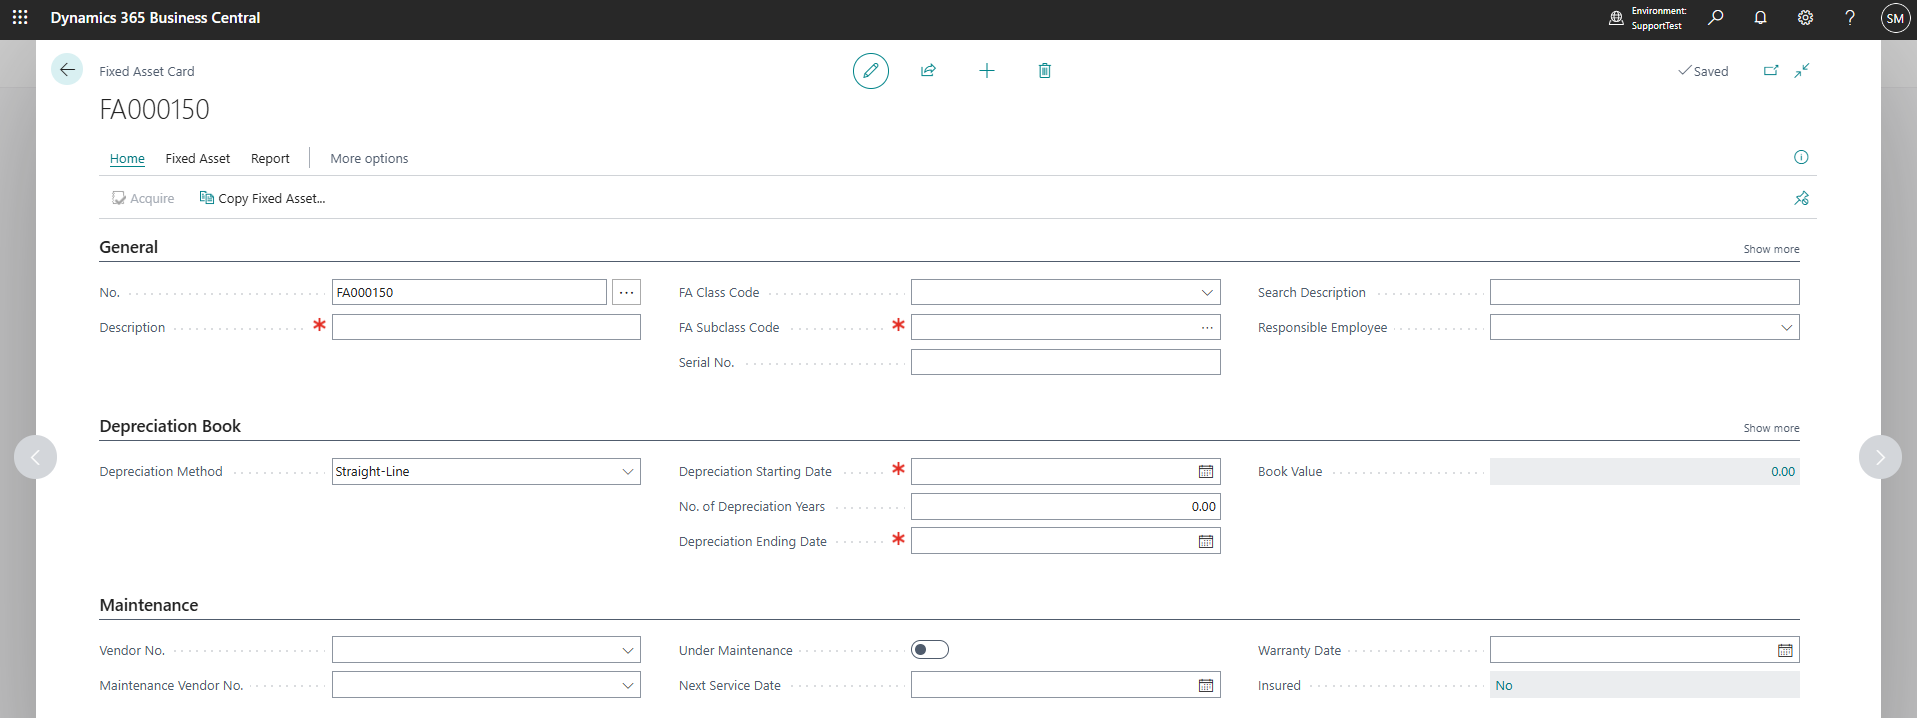
- Select +New Sto create a new fixed asset card.
- A blank fixed asset card is created. There are three sections which are General, Depreciation Book and Maintenance.
Note: In each of the sections, select Show More on the top right corner of each available section to see additional fields.
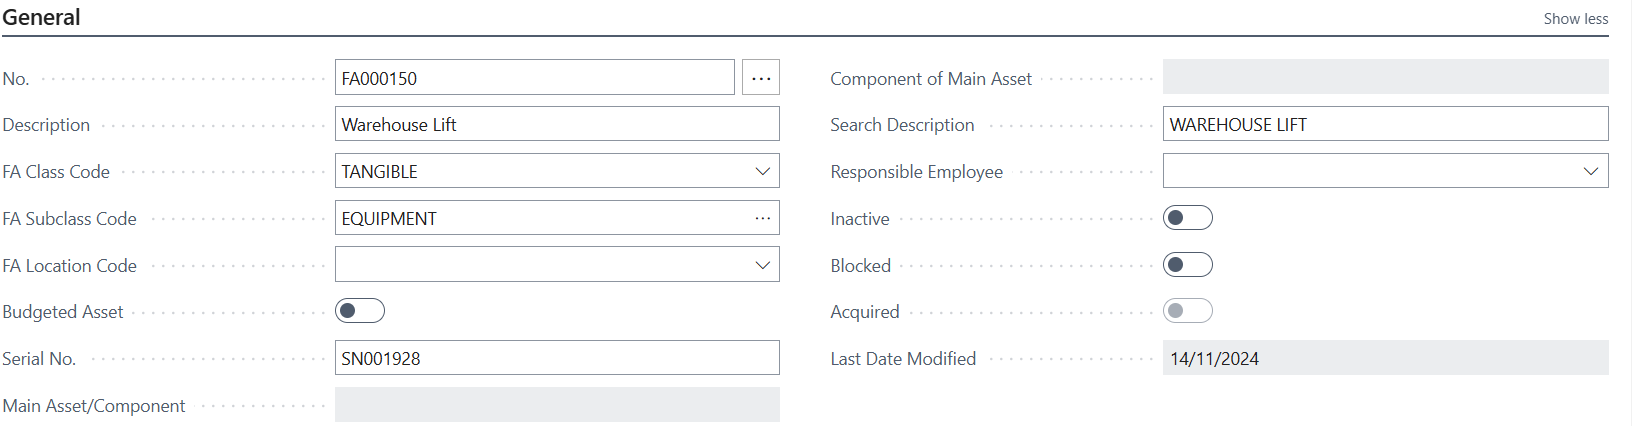
- In the General section, fill in the following fields:

- No.: Enter a unique code for the asset. It’s best to have this code set up to be numerically auto generated.
- Description: Provide a name or description of the asset
- FA Class Code: Categorise the asset. This can either be Financial, Tangible or Intangible depending on the way you’ve set up your categories.
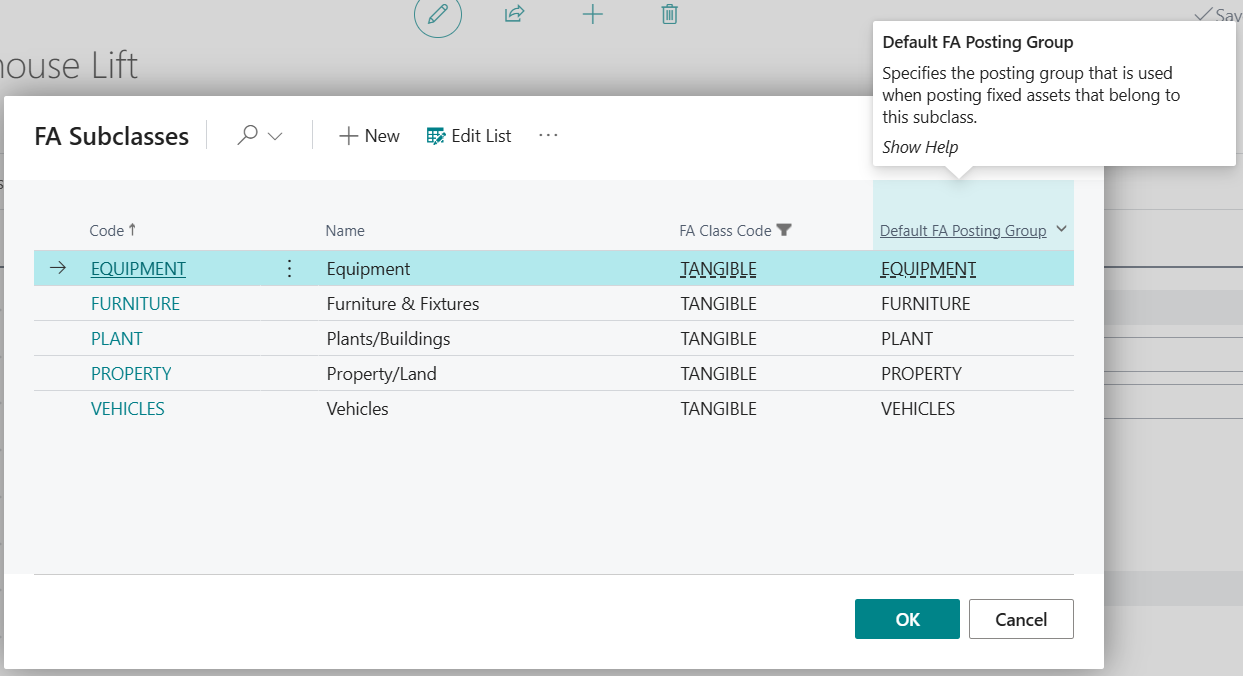
- FA Subclass Code: Identify a specific category to group your fixed asset.

Note: The FA Subclass Code may link to a default posting group within your depreciation book which is used to manage depreciation calculations and financial postings. - Serial Number: Enter the serial number of the fixed asset. This is optional.
- Search Description: Use this to easily find the asset. It’s usually the same as the description.
Note: Enable the Inactive toggle button when the fixed asset is no longer active which can be retired or sold. The depreciation calculations stop and can still be tracked for historical or reporting purposes.
Note: An enabled Blocked toggle button safeguards the asset by restricting any changes or transactions, ensuring it remains unchanged until you decide to unblock it.
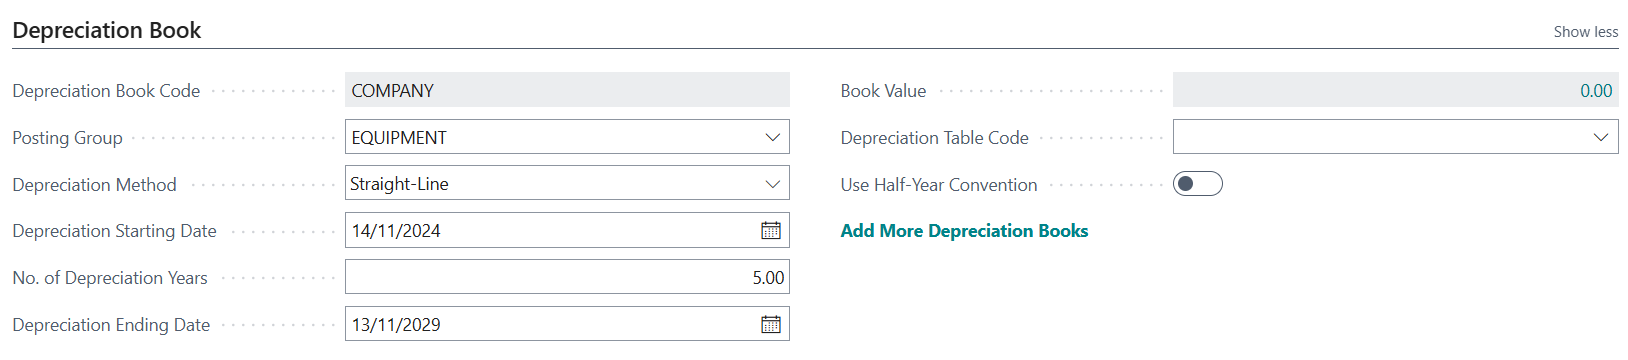
- In the Depreciation Book section, fill in the following fields to calculate depreciations:

- Depreciation Book Code: Assign the depreciation book for the fixed asset.
- Posting Group: This is the FA Subclass Code you’ve selected in the General section, to post your fixed asset transactions. This group sets your accounts for buying, depreciating, maintaining and selling the asset.
- Depreciation Method: Select from the drop-down menu how you will calculate depreciation.
Note: In Wiise, you can assign the following depreciation methods to a fixed asset: Straight-line, Declining balance 1, Declining balance 2, (declining balance 1/straight line) DB1/SL, (declining balance 2/straight line) DB2/SL, User defined or Manual. - Starting Depreciation Date: Enter when depreciation starts.
- No. of Depreciation Years/Months: Input the duration for depreciation.
- Ending Depreciation Date: This field automatically updates based on the depreciation duration.
- Book Value: This field automatically displays the asset’s current value after you’ve recorded the purchase.
- Add More Depreciation Books: Select this option to assign and manage multiple depreciation books to one fixed asset.

- Depreciation Book Code: Select a related depreciation book for the fixed asset card.
Note: You can select the option to Add More Depreciation Books to manage your fixed assets. You can add more than one depreciation method per fixed asset which means you can assign multiple depreciation books. If the depreciation book does not exist yet, you can create a depreciation book card in the Depreciation Books section on the Fixed Asset Card.
Note: Typically, only one depreciation book is integrated with the general ledger. Other associated depreciation books will not post entries to the general ledger. - FA Posting Group: Use a posting group when you’ve selected a general ledger integration for transactions to be posted. Otherwise leave it blank.
- Maintenance section: Use this section to record asset maintenance details. The following fields are available:

- Vendor No.: Enter or select the vendor who sold the asset.
- Maintenance Vendor No.: Enter or select the vendor responsible for the asset's maintenance.
- Under Maintenance: Select this box if the asset is currently being serviced.
- Next Service Date: Enter the scheduled date for the next service.
- Warranty Date: Enter the asset's warranty expiration date.
- Insured: Indicates if the asset is covered by insurance. This field is automatically populated.
- In the General section, fill in the following fields:
- You’ve updated the fixed asset card and you’re ready to acquire the fixed asset.


Note: Use the Copy Fixed Asset function to quickly create multiple fixed assets similar to an existing one. This saves time and minimises errors when adding similar assets.

What’s next?
Find out how to purchase a fixed asset.
If you have any questions, please reach out to support@wiise.com