Overview:
- Learn how to track vendor payments using vendor ledger entries in Wiise.
Why review vendor ledger entries?
Reviewing vendor ledger entries helps you monitor transactions such as invoices, credit memos, and payments. This ensures accurate accounts payable records, highlights outstanding balances, and supports better cash flow management
How to review vendor ledger entries?
- Select Vendors from your Wiise landing page.

Note: If you don’t see the Vendor tile on your landing page, search for Vendors using the search bar in the top right corner. Then select the related link to open the vendor list. - On the vendor card, go to the Vendor action menu and select Ledger Entries.

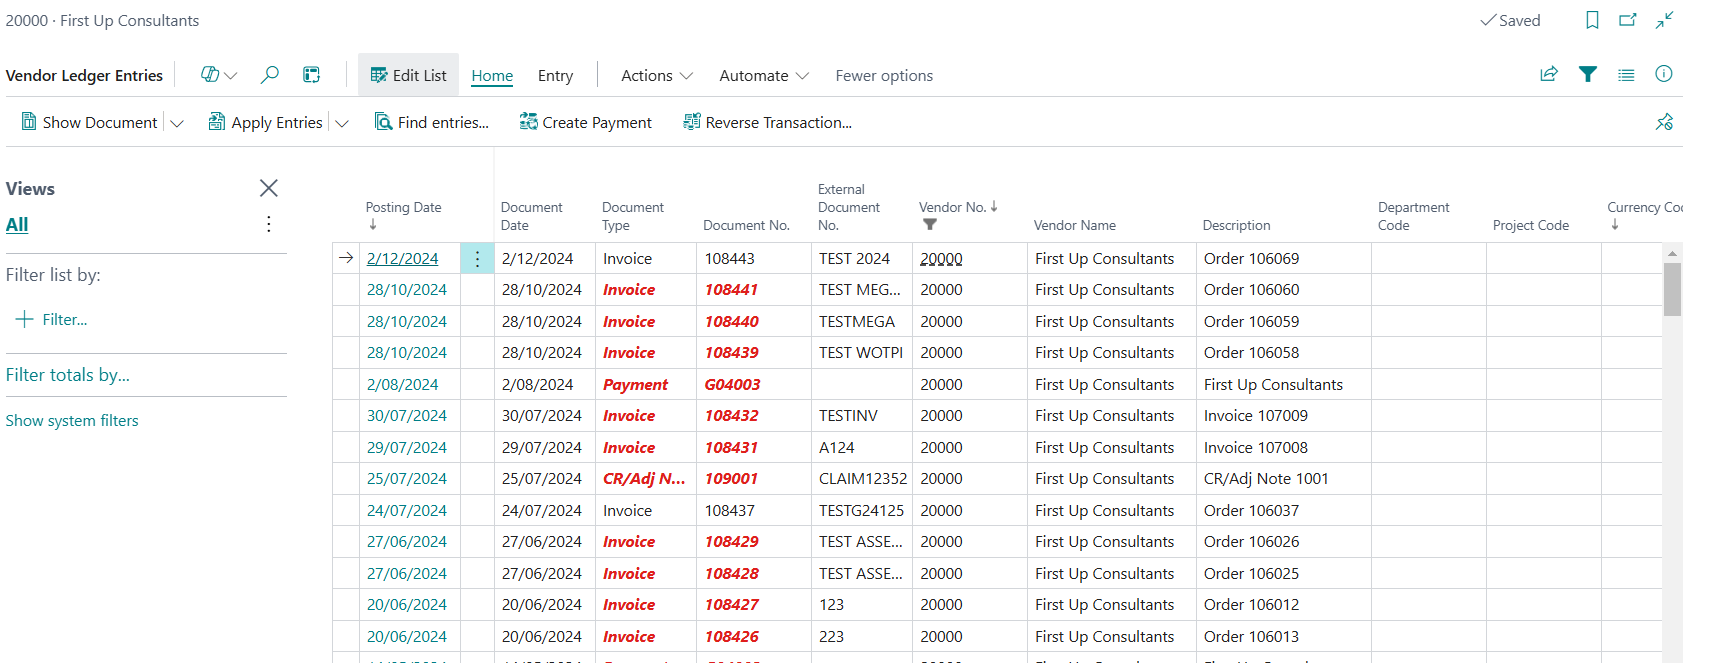
- The Vendor Ledger Entries list for the vendor displays all transactions related to the selected vendor.
Note: You can view outstanding transactions by filtering for open transactions or by selecting the balance field on the vendor card. - Review the vendor ledger entries. Here’s what each field means and how to use them:

- Posting Date: The date the transaction was recorded.
- Document Type: The type of transaction, such as Invoice, Credit Memo, or Payment.
- Document No.: A unique ID for the transaction.
- Due Date: The payment deadline.
- Remaining Amount: The outstanding balance.
- Amount: The total value of the transaction.
- Description: Additional details about the entry.
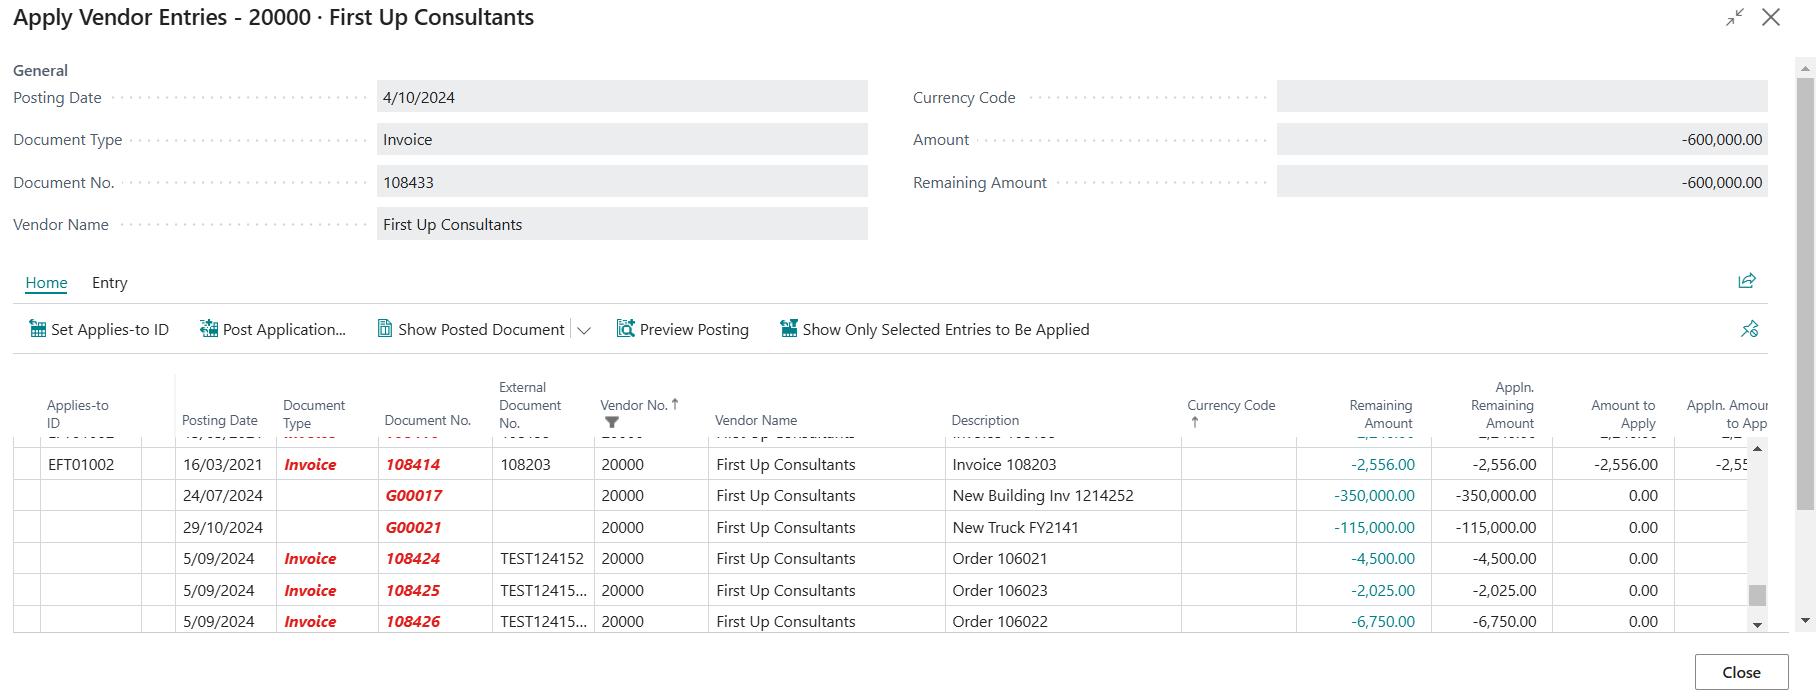
- Note: The Applies-to ID field appears when you Apply Entries to your vendor ledger entries. This indicates if the entry is linked to another.
- The filter options allow you to sort entries for easier analysis.
- Use the filter to sort entries to refine the list. You can filter by Document Type, Remaining Amount or other fields.
- Select a specific entry to view detailed information.
Note: You can drill down for details or apply and unapply ledger entries.
- Select Home. Then, select Apply Entries to view the applied vendor entries, which consist of linked transactions such as invoices and payments for the selected vendor ledger entry row.

- Select Close to close the process.
- If required, you can export the ledger entries to Excel for your review.

- You’ve reviewed the vendor ledger entries for your business.


Note: You can view the details of document types such as invoices and credit memos by selecting the show document button.
What’s next?
Find out how to create recurring purchase orders.
If you have any questions, please reach out to support@wiise.com