Overview:
- Submit bulk payment request
- Receive a remittance advice and post a cash receipts journal
Why submit a bulk payment request and process NDIS Remittance Advice?
A bulk payment request allows you to verify invoices that are ready to be submitted to NDIA for payment. This process removes the manual task of e-mailing invoices but uploads invoices to the NDIA. Similarly, you can receive payments from NDIA which automatically creates cash receipts journal in Wiise. These automations create accuracy in your submissions and notify you when a payment has been processed.
How to submit invoices using the bulk payment request?
Before you process the NDIS Remittance Advice, you’ll need to submit the posted sales invoices for payment using the NDIS Bulk Payment Request tool.
Here are the steps to process a NDIS Remittance Advice.
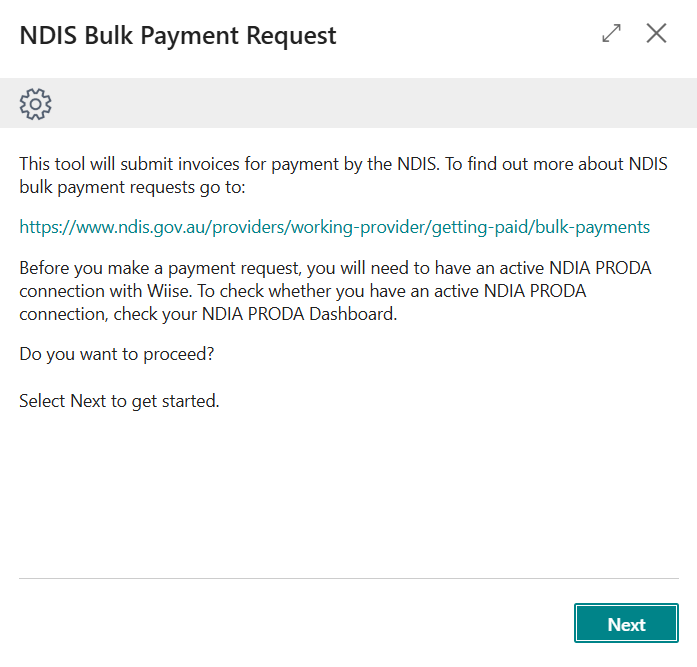
Submit a bulk payment request
- Select Wiise for NDIS navigation menu on your Wiise landing page.

- Then, select NDIS Bulk Payment Request.
- The NDIS Bulk Payment Request wizard tool displays.

- Select Next to get started.
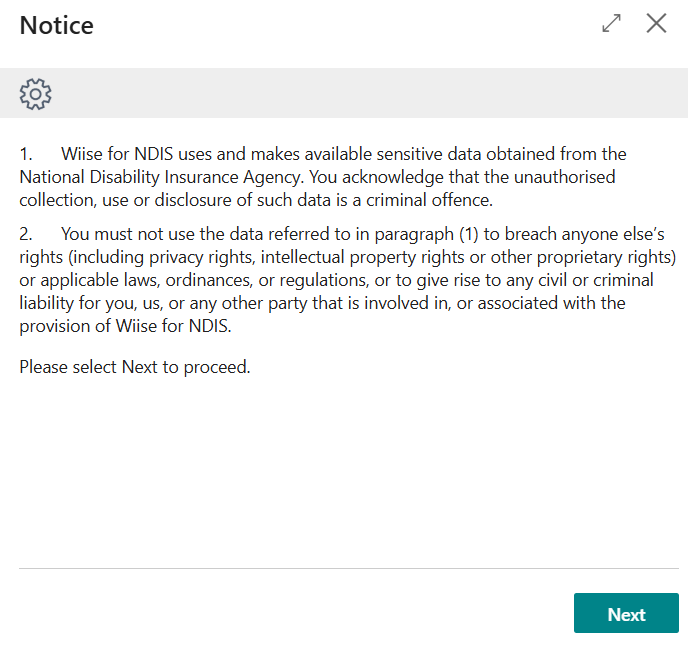
- The Notice page displays.

- Read the Notice.
- Select Next to continue.
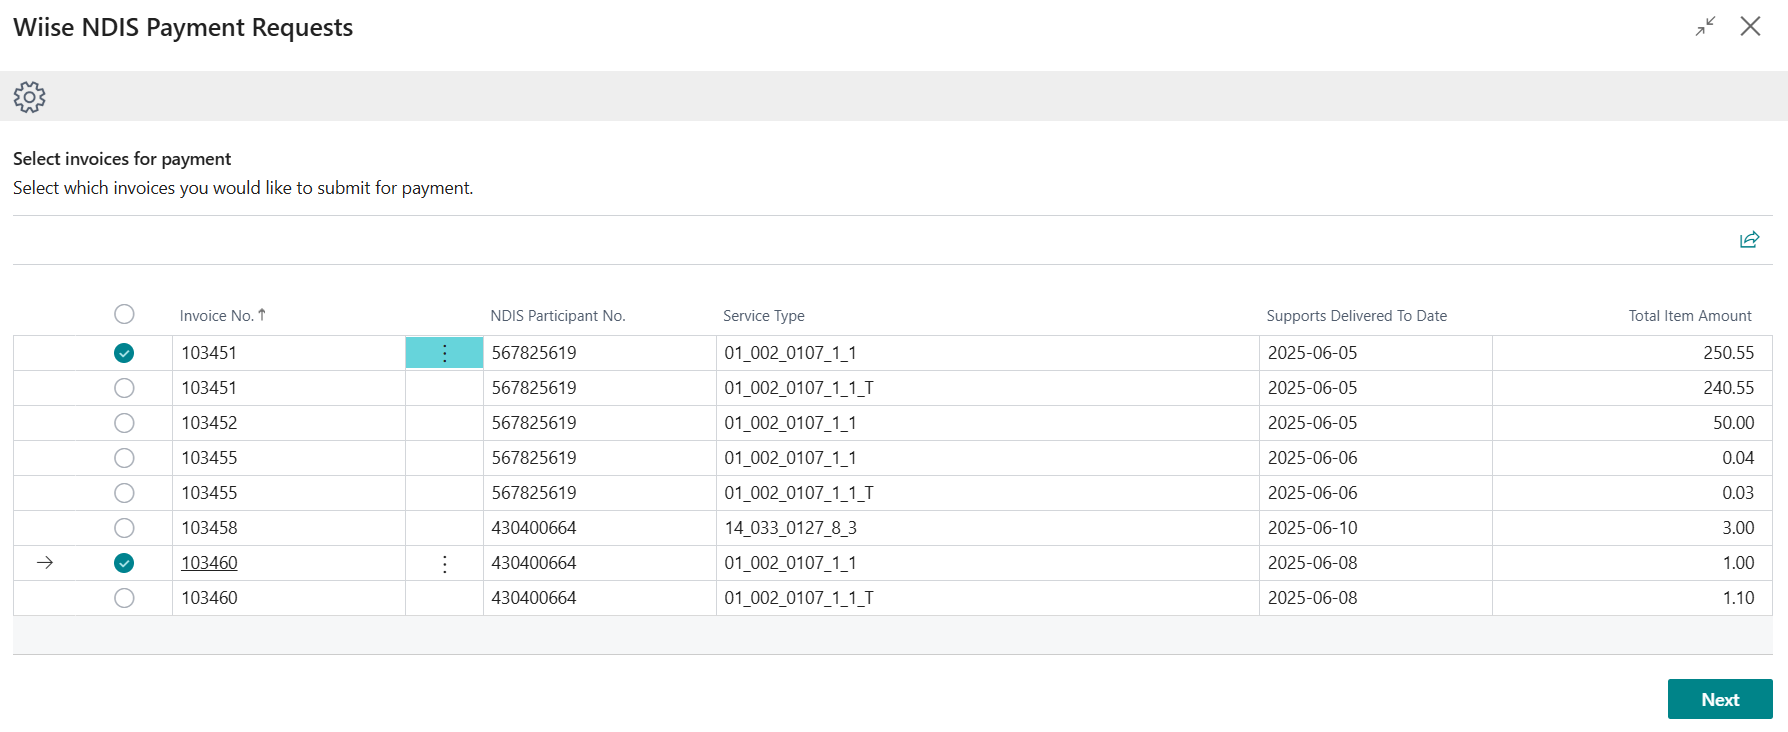
- The Wiise NDIS Payment Requests list displays. These contain all the posted sales invoices that you’ve requested for submission.

- Select the three vertical dots next to the Invoice No., column on a row. Then, select Select More rows. You can select all the rows or make your selection of specific rows.
- Select Next to continue.
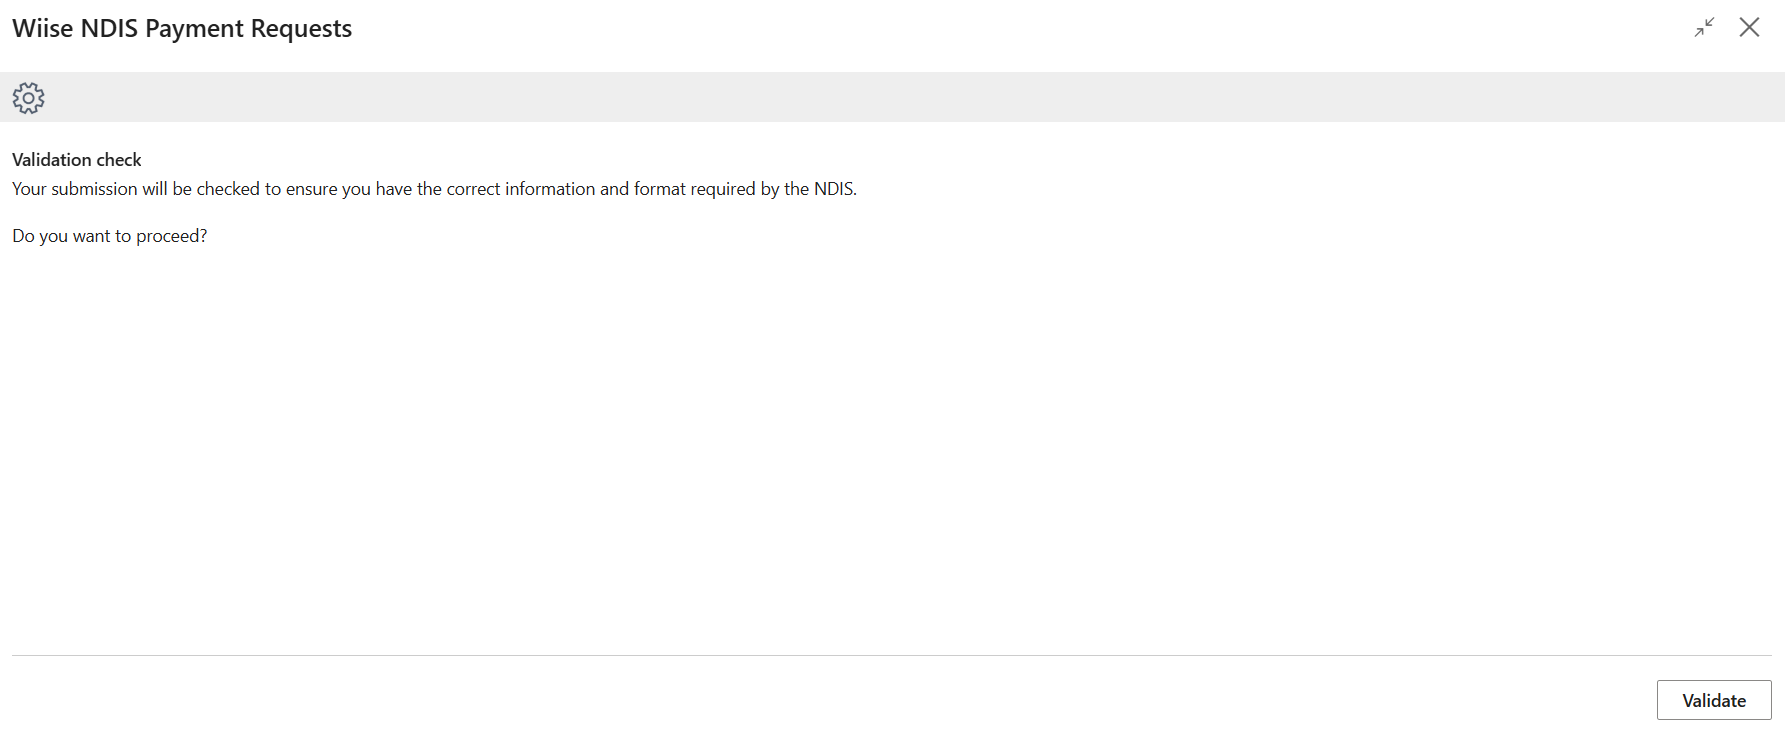
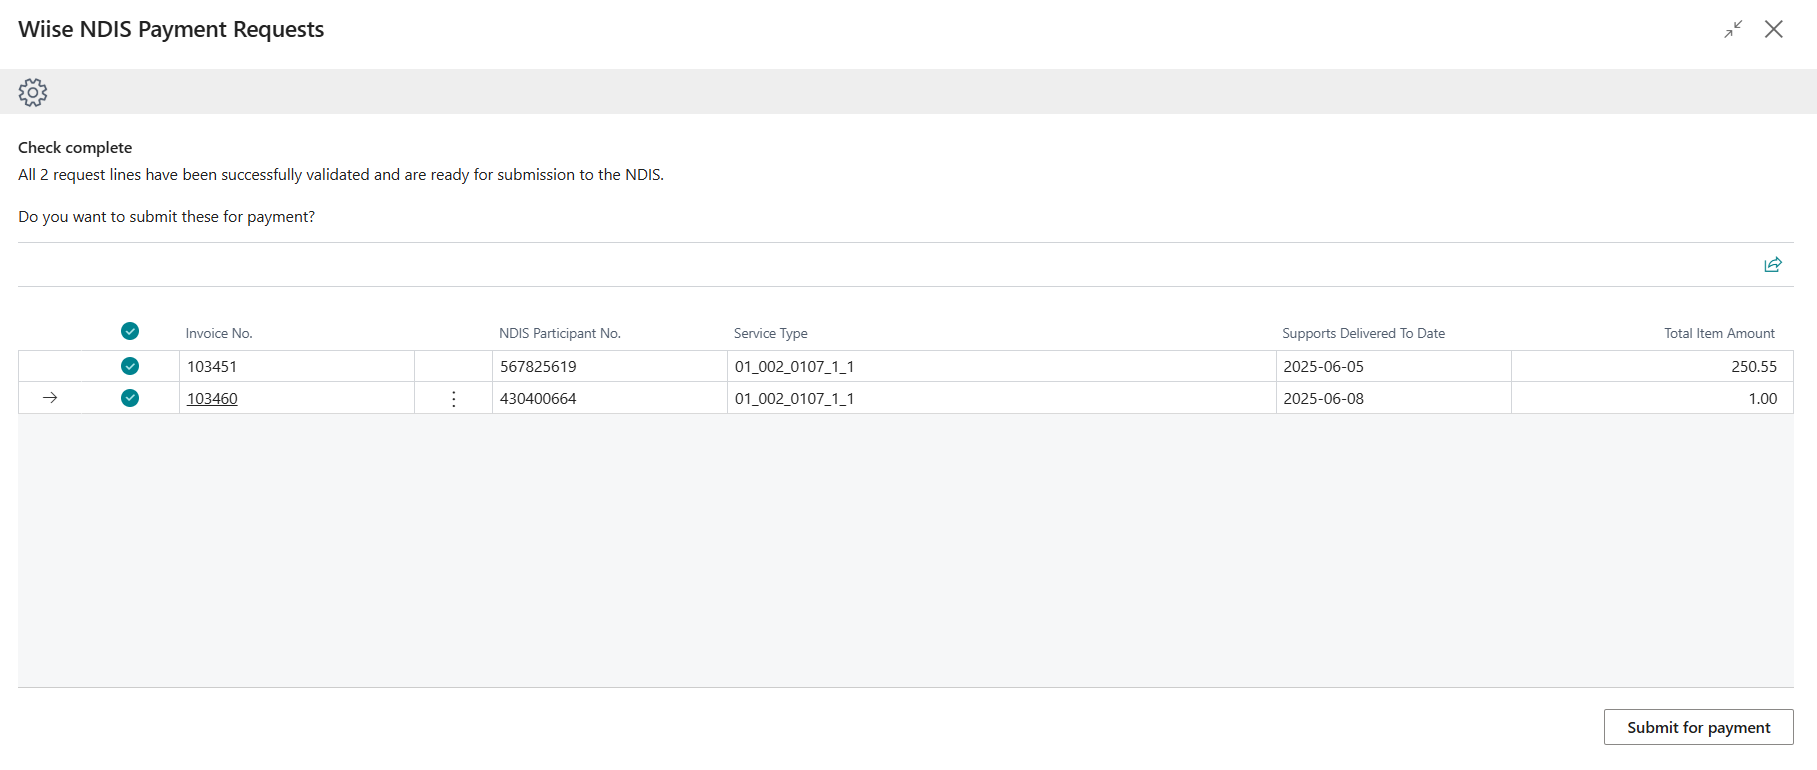
- The Wiise NDIS Payment Requests Validation Check page displays.

- Select Validate.
- The Wiise NDIS Payment Requests Check Complete page displays.

Note: The fields that need to be validated are the NDIS Participant No., Service Type and Support Delivered to Date. The fields can’t be empty. - You can see your selection of posted sales invoices ready to be submitted for payment to NDIS.
- Select Submit for payment.
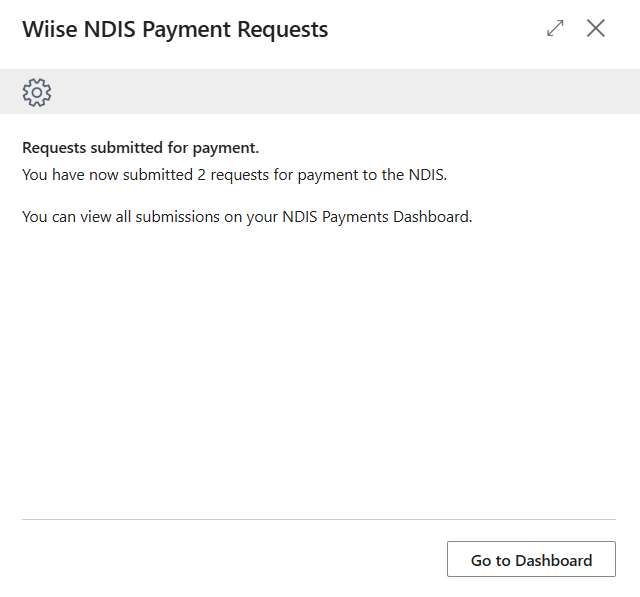
- Your requests have been submitted for payment.

- You can view all submissions on your NDIS Payments Dashboard.
- Select Go to Dashboard.
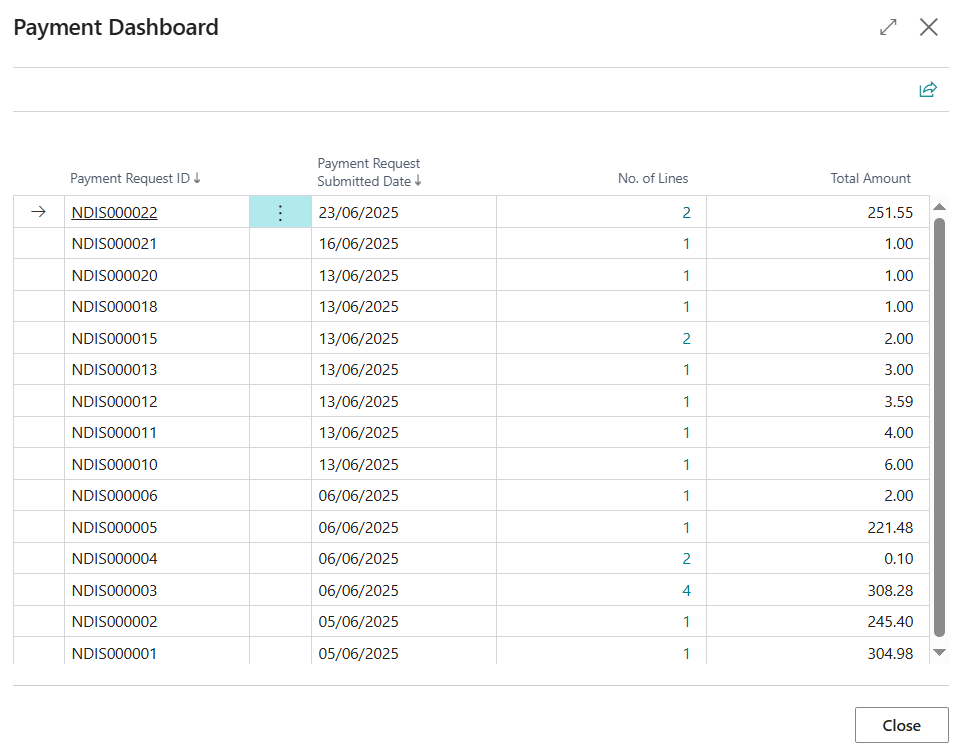
- The Payment Dashboard displays.

Note: You can view all the payments submitted to NDIS.
Note: You can also search for Payment Dashboard on the top right-hand corner of the page. Select the related link and the page displays. - Select the hyperlinked row on the No.of Lines column to view the NDIS submitted payments details.

Note: View the status of your submitted NDIS payment request. You should see a Pending Payment status, which indicates that the request is currently under review by the NDIA.
Note: You'll need to set up two job queue entries to receive automated notifications on the Status of your NDIS submitted payment request details.
Note: You can view the updated payment status on your provider portal or in Wiise. The NDIS Payment Request statuses are as follows:
- Empty: The payment is newly submitted. Select NDIS Payments. Then, select Update Batch to see the updated status.
- Incomplete: Details may be missing. Update the missing information and update the batch to display a new status.
- Rejected: If a claim is rejected, the provider portal will display the reason for rejection. Common reasons include exceeding budgets, incorrect details, or administrative errors.
Note: When your payment request is rejected, you’ll need to process a sales credit memo and then resubmit the claim to NDIA. - Awaiting Approval: The claim is waiting for NDIA approval
- Pending Payment: This status indicates the payment request is currently under review by the NDIA.
- Paid: This status indicates the payment has been approved and processed.
- Cancelled: If needed, providers can cancel a payment request within the portal.
- You've submitted a bulk payment request.


Post a cash receipt journal for a NDIS remittance
- When a payment is received, you’ll receive a notification on your Wiise landing page.

- Select Reconcile.
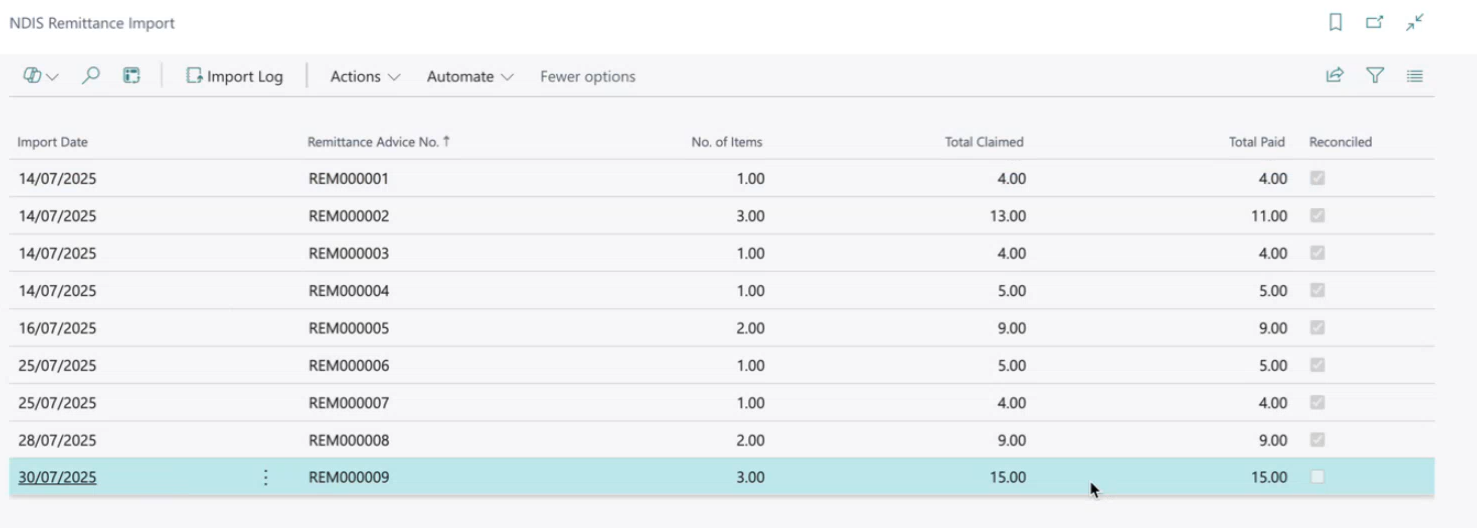
- The NDIS Remittance Import page displays.

Note: This is the NDIS Remittance Advice Import tool, accessible via the Wiise for NDIS navigation menu on your Wiise landing page. The line entries are not reconciled yet. - Select Actions. Then, select View Remittance Entries.

- The NDIS Remittance Entries displays.

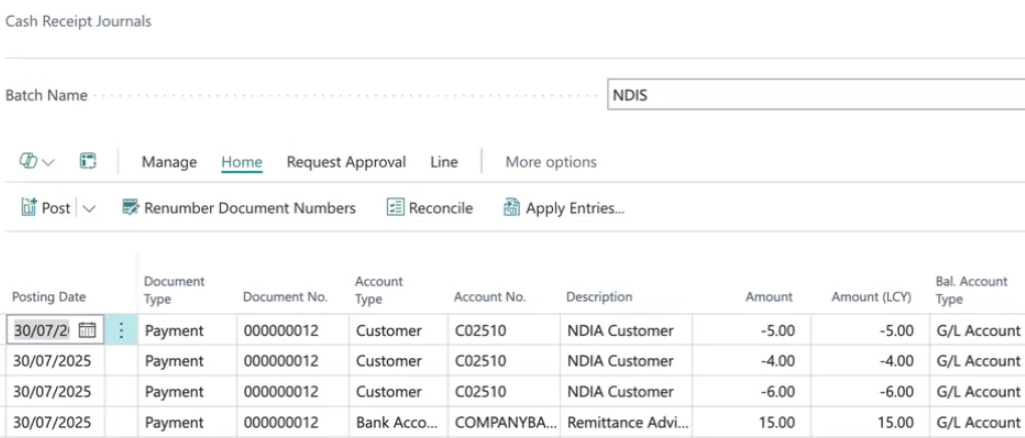
- Select Actions. Then, select Open Journal Lines. The Cash Receipts Journal page displays.

Note: The journal lines are automatically created in the Cash Receipts Journal against your NDIS batch. The balance line entry for the remittance advice appears as a single line in the journal. - Review for accuracy and then post the journal lines. Select Post/Print from the menu and then select Post or Post and Print when you need a printed confirmation.
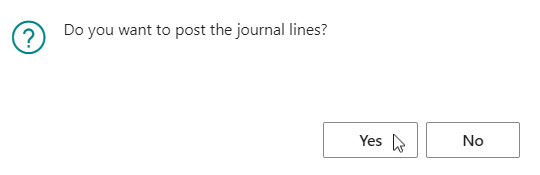
- A message displays to confirm the posting action.

- Select Yes to continue or select No to stay on the page.
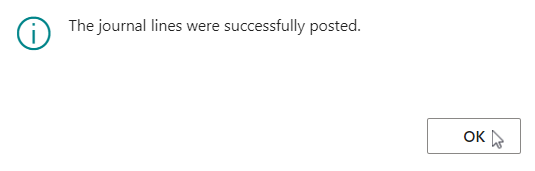
- A message confirms that the journal lines were successfully posted.

- Select OK to continue.
- You've posted the cash receipts journal.


Note: Upon posting, the Reconciled field status on the NDIS Remittance Import page is ticked.
What’s next?
Find out how to raise a sales credit memo.
Need more help?
No problem, that's what we're here for. Reach out to support@wiise.com anytime you can't find what you're looking for.