Why use Wiise Warehouse OnTime to receive Purchase Orders?
The process of receiving a purchase order involves more than just taking receipt of the goods. This crucial process serves as the initial step in ensuring accurate inventory management and timely fulfilment of customer orders. By receiving a purchase order effectively, we establish a clear record of incoming goods, enabling us to track inventory levels, manage stock replenishment, and maintain optimal supply chain operations.
Key activities that should be completed during this process include verifying the accuracy of the received items against the purchase order, inspecting goods for quality and recording damages, and documenting any discrepancies to reconcile with suppliers promptly.
How to enable the Receive feature
Receive can be enabled at locations that handle inbound inventory with an Inventory Put away document and do not require a Warehouse Receipt or Landed Cost Receipt.
Check the location configuration:
1. Open the Wiise Business Central desktop app and select the Search icon
2. Type 'Locations' and select the Locations page from the search results
3. Select the location name from the list and scroll to the Warehouse fast tab
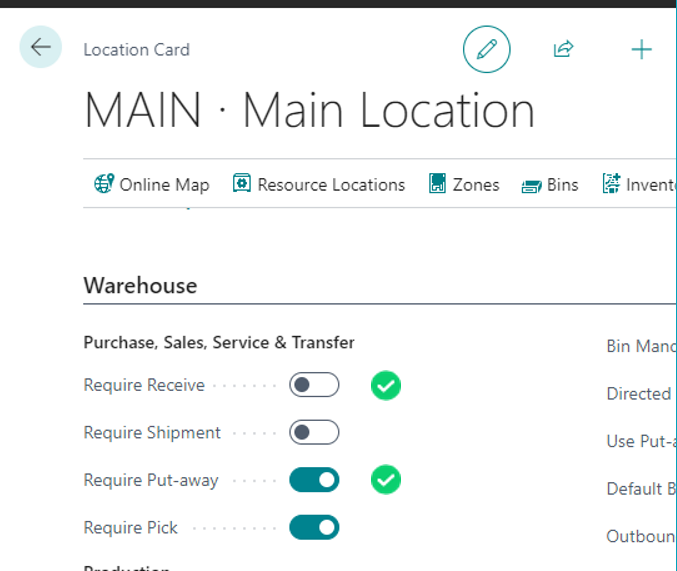
Talk to your partner before making any changes to the Location Card
Configure the Receive function:
1. Open the Wiise Business Central desktop app and select the Search icon
2. Type 'Wiise Warehouse OnTime' and select the Wiise Warehouse OnTime page from the search results
3. Select the Mobile Setup menu and select Configure Functions
4. Select Receive from the Functions List
5. Select the pencil icon to allow changes to be made to the page
6. Type a date calculation in the Priority Status Calculation field
7. Congratulations! Receive is now ready to use at this location.
How to receive a Purchase Order and create a put away using Wiise Warehouse OnTime
Once Receive is configured for a location, all Purchase Orders that are in Released status and have not yet had a Put away created can be received using OnTime.
1. Open the Wiise Warehouse OnTime mobile app and login with your Microsoft 365 credentials, if required
2. From the To do section of the Home screen, select Receive
If you can't see the Receive icon check that there are released Purchase Orders for the selected location and that a put away hasn't already been created.
3. Scroll down the list of Purchase Orders to find the order to receive. You can also find the Purchase Order by using the Search or Filter options.
4. Select the Purchase Order to open the Purchase Order Receive screen
5. Enter the Vendor shipping number, if available
6. Enter the Vendor invoice number. This is a required field and must be unique for this vendor
7. To attach images to the Purchase Order, select the Take photo button to open the camera on the device. You can add up to 10 images
8. To add notes to the Purchase Order, select the Add note button. Type the note with the device keyboard and select the Add button
9. Select Confirm delivery to receive the Purchase Order and create a put away
10. When the Delivery confirmed message is displayed select Open to complete the put away straight away or Dismiss if this will be completed at a later time
11. Congratulations! The Purchase Order has been received and the put away is ready to be completed